
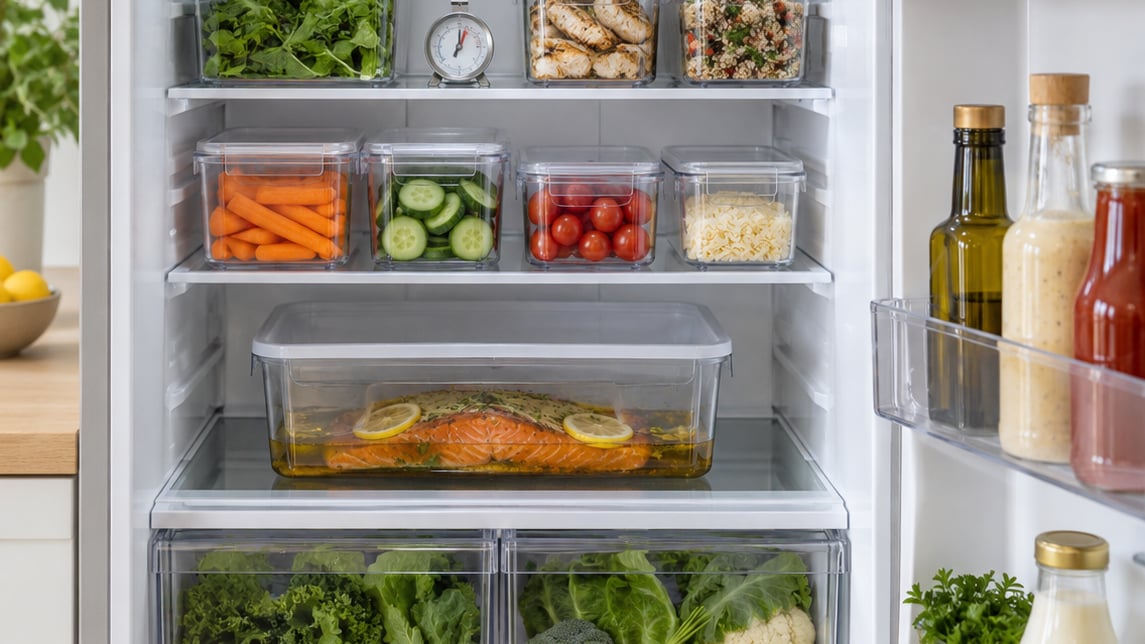
To organize a refrigerator, empty it completely, wipe every shelf, then sort the food by temperature zone: ready-to-eat items on the top shelf, raw meat sealed on the lowest shelf, produce in the crisper drawers, condiments and drinks in the door. The basic reset takes 20 to 30 minutes once the food is out, and it only holds together if you add a short weekly reset after that.
Most messy fridges are not messy because people are careless. They are messy because nobody ever defined a system, so every item lands wherever there was a gap. Once you assign each category a fixed home, the same job takes five minutes a week instead of a Saturday morning you keep postponing.
What You Need Before You Organize a Refrigerator
You need very little. Most of the good ideas on this list cost nothing, and the whole point is a system that works in your kitchen, not a matching set of organizers.
- Removable shelf liners or repurposed sheet pans. Metal sheet pans pull out like drawers and slide under anything that leaks. Clean them in the dishwasher like any other pan.
- Three or four clear bins in similar sizes. Pick a width that fits the shelf so one bin cannot slide behind another.
- Clear, right-sized airtight containers. Wide, shallow boxes beat tall deep ones because you can see the contents from above.
- Labels or a marker. Masking tape and a Sharpie do the whole job. Date stickers are optional.
- A measuring tape. You are sizing bins to shelves, not the other way around.
- Mild dish soap and a food-safe surface cleaner. Skip anything with a heavy fragrance, because the smell soaks into plastic and shelves.
- A small appliance thermometer. A ten-dollar thermometer beats guessing at the dial setting.
- A notebook or your phone. Write down what is going in the freezer and what is going out. It stops impulse rebuys.
Measuring the shelves first is the step people skip and regret. A bin that is two inches too deep becomes a black hole in the back of the shelf, and black holes are where food goes to be forgotten.
How to Organize a Refrigerator, Step by Step
The sequence matters more than the containers. Clean before you restock, measure before you buy bins, and assign zones before you decide where anything goes. Do the steps in this order and the job takes about half an hour plus cleaning.
Decide What to Keep and What to Discard
Sorting happens on the counter, and the counter is where the real decisions get made. Work in four piles: refrigerator, freezer, use this week, and out. Be honest about the fourth pile, because the space you free is the whole benefit.
A printed date is a rough signal, not a universal law. Use the package directions first, then your nose, then the date as a tiebreaker. A yogurt three days past its date with a clean smell and intact seal is usually fine. A jar that fizzes when opened is not, no matter what the label says.
For realistic refrigerated storage times, keep to these ranges as a working guide:
- Cooked leftovers and cooked meat: 3 to 4 days in a covered container at or below 40°F.
- Raw poultry, ground beef and pork: 1 to 2 days, or freeze on the day you buy if you are not cooking it that week.
- Raw steaks, chops and roasts: 3 to 5 days.
- Fresh fish and shellfish: use within 1 to 2 days, or freeze it.
- Deli meat and opened hot dogs: about 3 to 5 days once sliced.
- Hard cooked eggs: about a week in the shell.
- Opened deli cheese: roughly 3 to 4 weeks, cut side down so the surface does not dry out.
- Opened condiments such as ketchup, mustard and salad dressing: follow the label, and toss anything that smells off, fizzes or has separated badly.
- Fresh leafy greens: wash only what you will cook, and dry it thoroughly. Store unwashed in a breathable bag or a towel-lined bin.
Some foods are better off outside the fridge. Bread, whole potatoes, onions, garlic, unripe bananas, apples, pears and tomatoes all lose texture or flavor in the cold, and onions stored in a closed container can make the whole fridge smell. Flour, sugar, dry beans, nut butter, maple syrup, soy sauce, hot sauce and unopened shelf-stable milk do not need refrigeration either. This is a list worth printing, because it is the one almost nobody has on hand.
If a printed date makes you nervous, the USDA guidance and the package directions come first. The date on a jar tells you about quality as much as safety, and the two are not the same thing.
Clean Every Shelf and Drawer
Take everything out, including the drawers, and wipe down the walls, shelves, door bins and the rubber door seal. A layer of grime is how a small leak becomes an invisible one, and how a forgotten container becomes unrecognizable.
Clean spills immediately, before they reach the seams. Use warm water with a little mild dish soap for the everyday wipe-down and a food-safe surface cleaner for the sticky shelves and drawer runners. Dry everything before you load it back in, because trapped moisture and a warm interior are the two things mold likes most.
Give the inside of the door a wipe too, since that is where crumbs and sticky drips collect behind the butter. Wipe the thermometer before you put it back and note the reading while you are at it.
Create Zones: How to Organize a Refrigerator by Temperature
Refrigerators are not the same temperature everywhere. The back and the bottom run coldest, and the door swings up several degrees every time you open it. Putting food according to that gradient is what turns a tidy fridge into a safe one.
| Zone | What belongs here | Why |
|---|---|---|
| Top shelf | Ready-to-eat leftovers, drinks you use daily, breakfast food, deli cheese, opened jars | Consistently cold and closest to eye level, so the food most likely to be eaten gets seen first |
| Middle shelf | Dairy, eggs, cheeses, opened condiments you use daily | Steady mid-range cold, no more than a few degrees off the back-wall temperature |
| Lowest shelf | Raw meat, poultry, fish and seafood, in a leak-proof container or sheet pan | Any drip stays contained, so it cannot reach food that is already cooked or ready to eat |
| Crisper drawers | Vegetables in the high-humidity drawer, fruit in the low-humidity drawer | Matching humidity to the produce slows wilting in greens and moisture rot in fruit |
| Door shelves | Ketchup, mustard, salsa, jams, butter, condiments, and drinks you tolerate losing | The door is the warmest spot, so it is the right home for the most stable items |
That last row is the rule most households break. Milk and eggs go on an interior shelf, not in the door, because the door cannot hold a steady cold temperature. Condiments and drinks belong there instead, which is exactly the trade a door shelf should be making.
Keep raw meat on the lowest shelf in a container deep enough to catch a leak. That single move is the difference between safe refrigeration and cross-contamination, where bacteria from raw meat move onto food that gets eaten without further cooking.
For produce, use the humidity controls on the crisper drawers. High humidity keeps leafy greens, broccoli and herbs from wilting. Low humidity keeps fruit from going moldy, and it is also where ethylene-producing fruit belongs, since ethylene is a ripening gas that makes nearby produce spoil faster. Apples, pears, peaches and ripe bananas emit it. Leafy greens, berries, broccoli and carrots are sensitive to it and wilt faster next to a pear.
Group what goes together by use rather than by type alone. That habit of keeping a shared station for whatever a meal needs comes straight out of commercial kitchens, and you can read how a restaurant line handles a burger service in how restaurant kitchens organize a burger line. The idea is simple: the things you reach for together should not be in three different corners of the refrigerator.
Leave air space around the food. Refrigerators move cold air by convection, and a tightly packed shelf makes the whole interior run warmer, which pushes the real temperature up even when the dial looks right.
Use Containers That Make Food Visible
Clear containers are the single highest-value change. When you can see the leftovers from the doorway, you eat them. When they are stacked in an opaque tub in the back, you buy the same food again next week, and then the fridge gets worse.
Match the container to the food instead of forcing everything into one box. A shallow container for a cut of cheese, a tall one for celery stalks, a small lidded cup for a few spoonfuls of sauce. Anything smaller than a third full is usually better frozen or in the trash, because the same portion in a smaller box takes up less cold space.
Here is a typical before and after. Before: six foil-covered plates, two mystery tubs and a deli container of rice, all stacked on the middle shelf, one of them from last month. After: one shallow labeled container of rice, one of roasted vegetables, one of sliced chicken, all in a single bin marked Leftovers, and the oldest tub thrown out before restocking.
The rest of the fridge follows the same pattern. A bin at eye level for breakfast, a bin beside it for snacks that the kids open without asking, and a smaller bin for condiments that get used up. Buy three or four bins, not twenty. A fridge packed with organizers has the same air problem as a fridge packed with food.
And keep your empty containers somewhere else entirely, a high cabinet or a shelf over the stove. Containers stored inside the refrigerator block the airflow they are supposed to help.
Small refrigerators follow the same rules with no exceptions. The door shelves may be all the space you have, so put the condiments there and keep the raw meat at the bottom in a container on the one interior shelf you own. Fewer items, same zones.
Label and Maintain the System
Label each bin by category, and add a date only when the date changes something. Leftovers get a date. A bin of condiments does not need one, because condiments do not spoil on a schedule you need to watch.
Labels do more work in a shared fridge than in a solo one, because they tell everyone else where an item is supposed to go. The single biggest reason an organized fridge gets undone is that someone moves a container to make room and never puts it back. A label gives that person a rule instead of a puzzle.
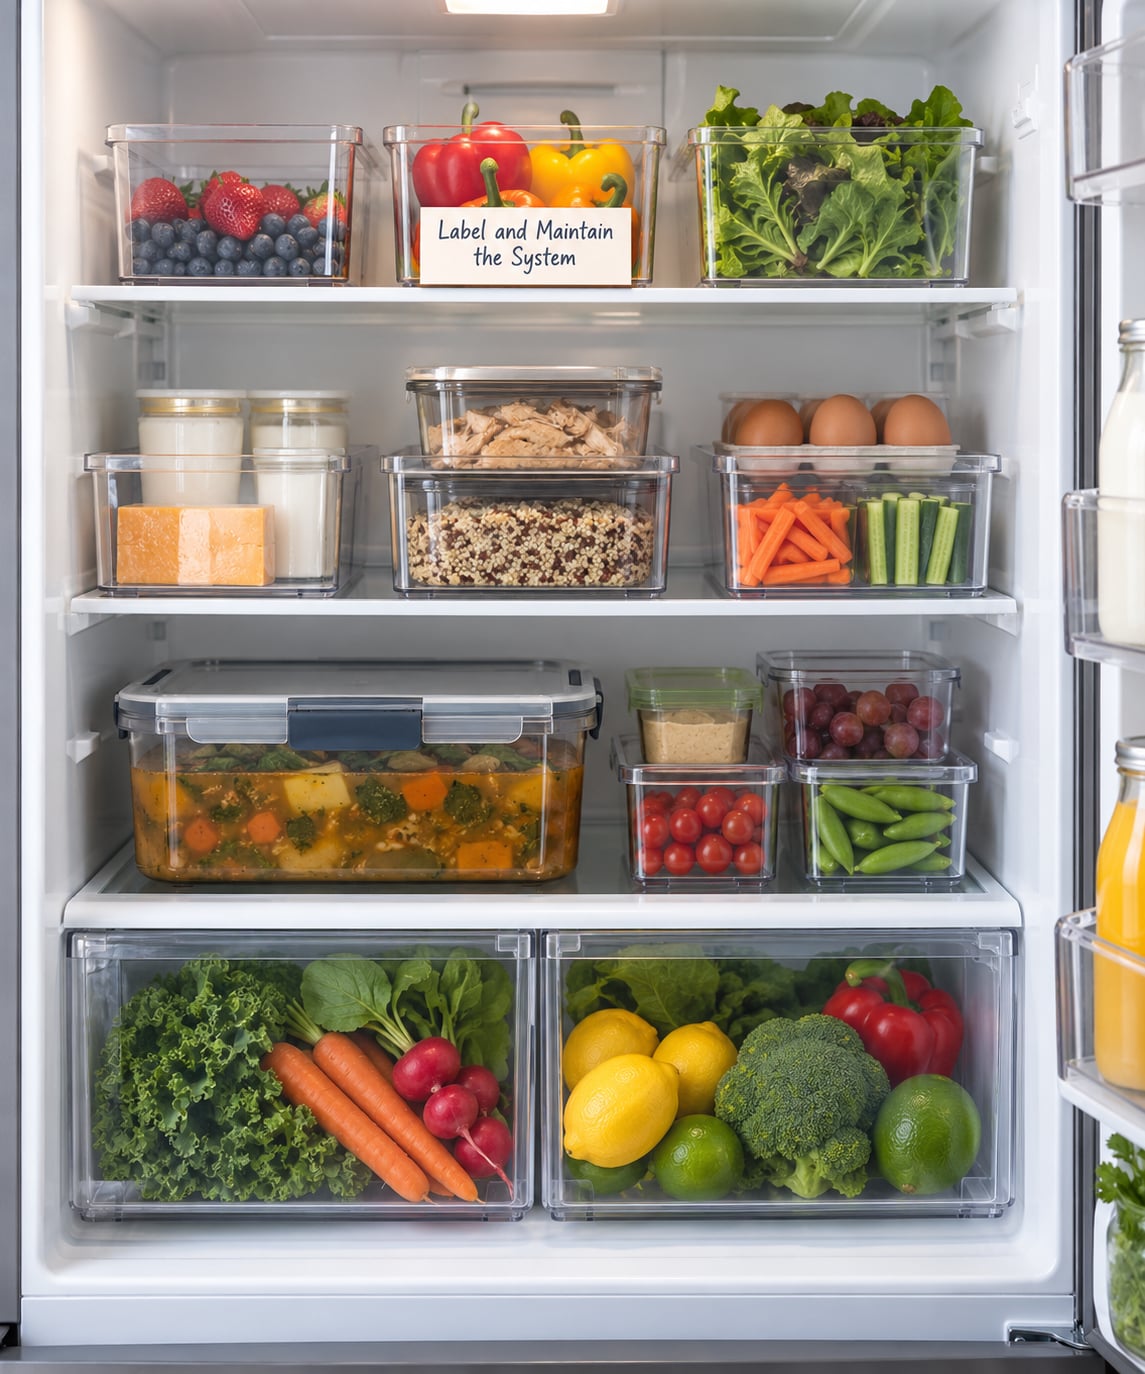
Then set the rhythm that keeps it. Five minutes on the same day each week, before or after the grocery run:
- Check the temperature and note it.
- Eat the bin in front first, oldest container out.
- Wipe any spill before it sets.
- Move the raw meat tray to the front if it has not been used in three days, or freeze it.
- Pull anything that looks, smells or feels wrong. No second chances.
Keep a short list on the door of what to buy next week based on what you already have. A running list stops the duplicate bagels problem, and it makes the weekly shop faster because you are not browsing.
Common Mistakes That Break the System
Almost every failed fridge reset comes down to one of the same handful of mistakes. Each one has a simple fix.
1. Raw meat on a high shelf. Any drip runs down onto food below it. Fix: lowest shelf, inside a container with a rim or a sheet pan underneath.
2. Overfilling the shelves. Cold air needs room to move, and a packed fridge runs warmer than the dial says. Fix: keep two or three inches of clearance, and if you cannot, reduce the number of items instead.
3. Milk and eggs in the door. The door is the warmest part of the refrigerator and the least stable. Fix: interior shelf, toward the back where it is coldest.
4. Strong smells next to delicate food. Onions, seafood and some cheeses will flavor everything near them. Fix: keep them sealed and separated, and stop storing raw onions in a closed container at all.
5. Opaque containers. If you cannot see it, you forget it. Fix: clear boxes, shallow, one category each.
6. Trusting the date label alone. Dates describe quality more than safety, and smell tells you more than either. Fix: package directions first, then your nose, then the date.
7. A refrigerator that is too warm. A dial set to the coldest position is not the same as 37 to 40°F. Fix: put a thermometer on the middle shelf, check it, and adjust the dial or the sealing on the door until it reads in range. Keep the temperature at 40°F or below, and remember that the freezer wants 0°F for food kept frozen.
8. Cleaning but not checking. A clean fridge spoils food just as fast as a dirty one. Fix: the five-minute weekly reset, on a day you will actually keep.
When you cook, safe minimum internal temperatures do the last part of the job: 165°F for poultry, 160°F for ground meat, and 145°F for whole cuts of meat and fish. Storage keeps food safe long enough to cook it properly.
Frequently Asked Questions
Where should raw meat be stored in a refrigerator?
Store raw meat, poultry, fish and seafood on the lowest shelf, inside a leak-proof container or a rimmed sheet pan. If any juices escape, they land on the pan instead of on food that is already cooked or ready to eat. That is the basic defense against cross-contamination. Put the container toward the back of the shelf, and keep it lower than every cooked and ready-to-eat item in the refrigerator.
Should refrigerator shelves be lined with liners or mats?
They help, but only if you can remove and wash them. Lining a shelf with a washable liner or a repurposed metal sheet pan makes leaks visible and lets you lift a mess out instead of scrubbing it in place. Skip anything that traps crumbs or cannot get to the dishwasher, and never line the bottom shelf so tightly that it blocks the air moving through the refrigerator.
How long does food last after reorganizing a refrigerator?
Reorganizing does not extend shelf life by itself, but a colder and better-ventilated refrigerator slows spoilage, and a system that makes food visible gets it eaten before it turns. Cooked leftovers still keep for 3 to 4 days at or below 40°F, raw poultry and ground meat 1 to 2 days, raw steaks and chops 3 to 5 days. Check the thermometer first, because temperature matters more than tidiness.
How can I keep my refrigerator organized after the initial cleanup?
A five-minute weekly reset does more than a deep clean. Wipe spills, eat the oldest container in the front bin, check the temperature, and pull anything that looks or smells off without a second chance. Label every bin so the rule survives other people in the kitchen. Keep a running shopping list on the door so you stop buying food you already own.
What temperature should a refrigerator be set to for food safety?
Keep the refrigerator at 40°F or below, and aim for 37 to 40°F, which is the range food safety guidance recommends. Put an appliance thermometer on the middle shelf rather than trusting the dial, and check it after a few hours. If it reads warm, check the door seal and whether the vents inside are blocked by food before you adjust anything. The freezer should hold 0°F.
Start with the raw meat tray and the door. Those two changes take five minutes and do more for safety than any bin you can buy. After that, label the containers, put a thermometer on the middle shelf, and decide which night each week the five-minute reset happens.