
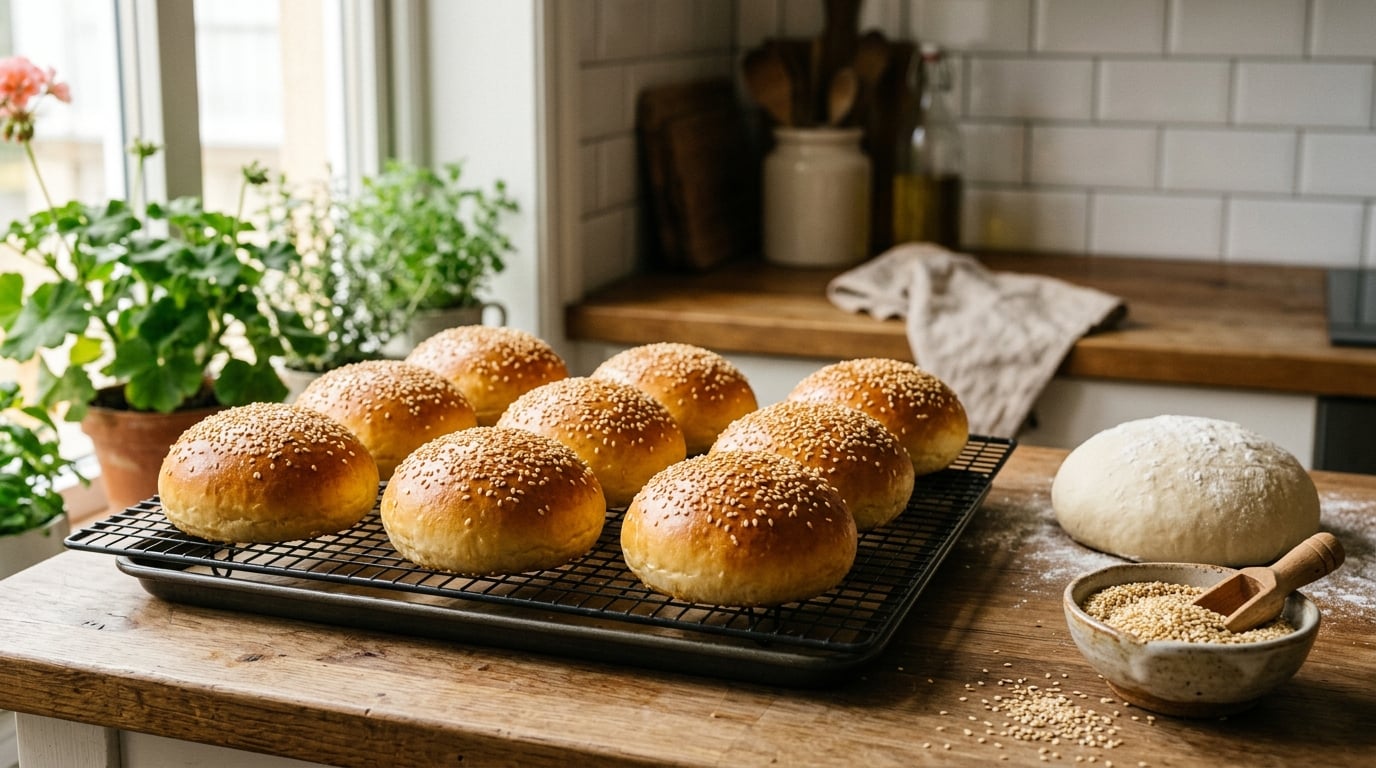
To make burger buns from scratch you need little more than flour, yeast, warm liquid, a little fat and an egg wash, and about two and a half hours including both rises. The dough comes together in one bowl, gets a short knead, rises twice, then bakes at 350 F until deeply golden. No mixer is required, though one makes the knead faster.
The payoff is a bun that holds a thick, sloppy burger without going soggy or tearing in half. Store-bought buns are built to travel well in a bag, which usually means they are a little soft, a little sweet and never that fresh. Breadcrumbed patties, melted cheese, a smear of mayo and a pile of pickles deserve better.
Are homemade burger buns worth it? For a family of four eating burgers twice a week, one batch of eight buns costs a few cups of flour and a couple of tablespoons of butter, and the whole batch takes about two and a half hours of mostly unattended time. Bake on a Saturday morning, cool, and freeze half. You have fresh buns for weeks.
What You Need
This recipe makes eight buns. Weigh your flour if you own a scale, because volume measures are the usual reason a dough comes out sticky one day and dry the next.
Ingredients
- 300 g bread flour or all-purpose flour (about 2 1/2 cups, spooned and leveled)
- 2 teaspoons instant yeast (7 g), or 2 3/4 teaspoons active dry yeast (9 g)
- 1/2 cup warm water (150 ml, around 110 F / 43 C)
- 2 tablespoons granulated sugar
- 1 teaspoon salt
- 2 tablespoons unsalted butter, melted and cooled slightly
- 1 large egg, plus a little extra for the wash
- Sesame seeds or flaky salt, optional
Instant yeast goes straight into the flour, so you can skip the activation step entirely. Active dry yeast needs the warm water and sugar to wake up first, and the water needs to be warm enough to activate but cool enough not to kill the yeast.
Equipment
- One large mixing bowl
- A wooden spoon, or a stand mixer with a dough hook
- A baking sheet lined with parchment paper
- A wire cooling rack
- Plastic wrap or a clean kitchen towel
- Instant-read thermometer, useful but not required
Before You Start
Preheat the oven to 350 F (175 C) and put the baking sheet inside so it heats with the oven. A hot sheet gives the buns a head start on oven spring, which is the burst of rise they get in the first few minutes of baking and part of why a bun has a domed top rather than a flat one.
Warm spot: an oven with only the light on, a warm cupboard, or the inside of a microwave with the door left slightly open. You want somewhere between 75 and 80 F, which is warmer than most kitchens and cooler than a running oven.
Step-by-Step: How to Make Burger Buns from Scratch
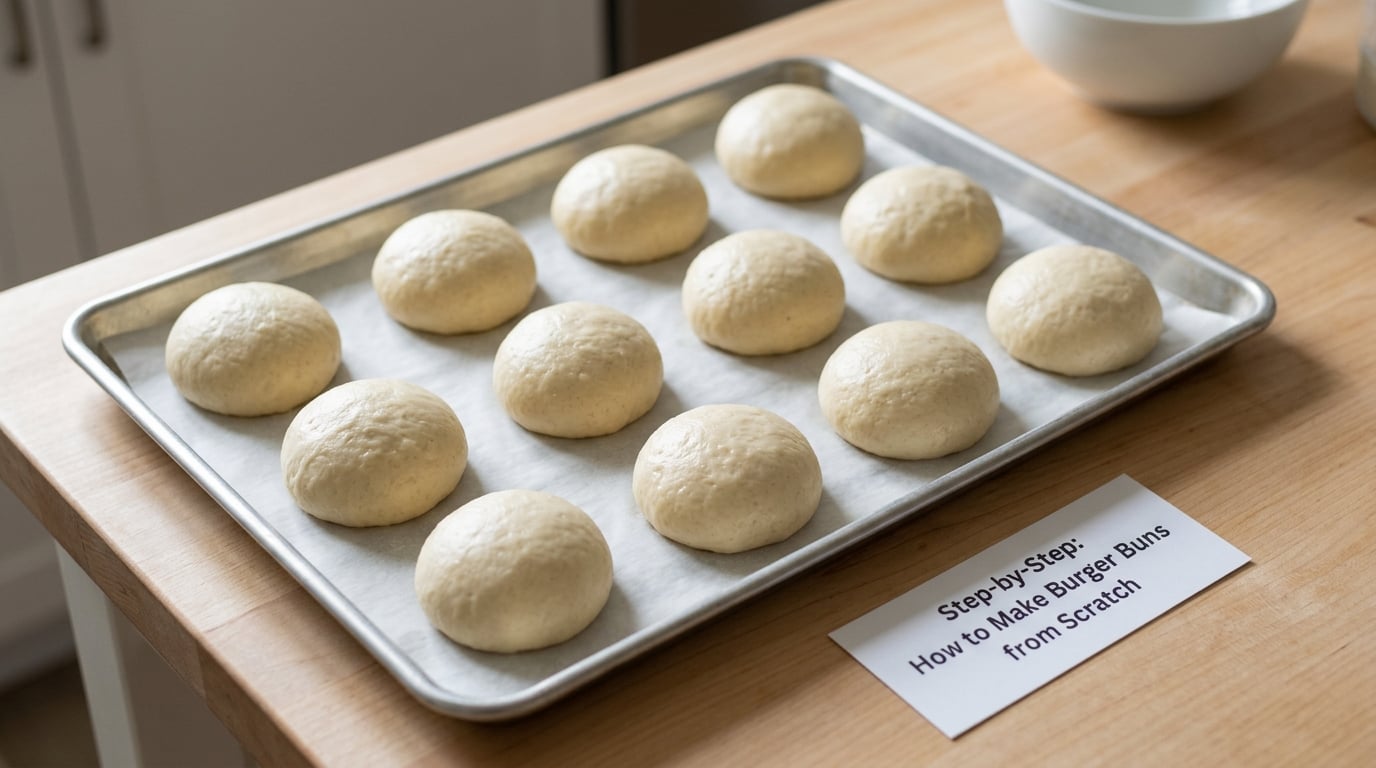
Here is the whole method in order: activate the yeast, mix the dough, knead it smooth, let it rise once, divide and shape, proof again, egg wash, bake, then cool before slicing. Total time is roughly 2 hours 45 minutes, with 2 to 2 1/2 hours of it rising.
Step 1: Activate the Yeast and Mix the Dough
Stir the sugar into the warm water, add the active dry yeast if that is what you have, and wait five to ten minutes. The surface should foam and smell sweet, which tells you the yeast is alive. Skim any foam off and pour the liquid into a bowl with the flour, salt, melted butter and egg.
Mix with a spoon until the flour is fully absorbed, then scrape the sides and mix for another minute. There should be no dry patches of flour left in the bottom of the bowl.
If you are using instant yeast, skip the activation and stir it straight into the flour with the salt, then add the wet ingredients.
Step 2: Knead Until the Dough Is Smooth
By hand, knead on a lightly floured surface for 8 to 10 minutes. In a stand mixer with a dough hook, use low speed for 6 to 8 minutes. You are looking for dough that feels soft, slightly tacky and elastic, and that springs back when you press a thumb into it.
A rough patch that is tearing instead of stretching means the gluten needs more development, so keep going. A sticky dough is normal for an enriched recipe. Rather than adding more flour, which makes the crumb tighter and heavier, use the reserve-flour trick: keep a small pile of flour on the board and dip your hands into it between kneads.
Step 3: Let the Dough Rise Until Puffy
Put the dough in a lightly oiled bowl, cover it with plastic wrap or a damp towel, and leave it in your warm spot for 60 to 90 minutes. It is ready when it has roughly doubled in size and looks domed and pillowy with bubbles around the edges.
The poke test beats the clock. Push a floured finger about half an inch into the dough. A slow springback with a slight dent means it is ready to shape. If the dent fills in instantly, the dough was not given enough time. If the whole thing deflates and collapses, it has overproofed, and the fastest fix is to shape it immediately and get it in the oven, even if the buns will be a little flatter.
If the rise is slow, the kitchen is probably too cool. Move the bowl somewhere warmer, or add a few minutes and check again rather than rushing the second rise later.
Step 4: Shape the Burger Buns
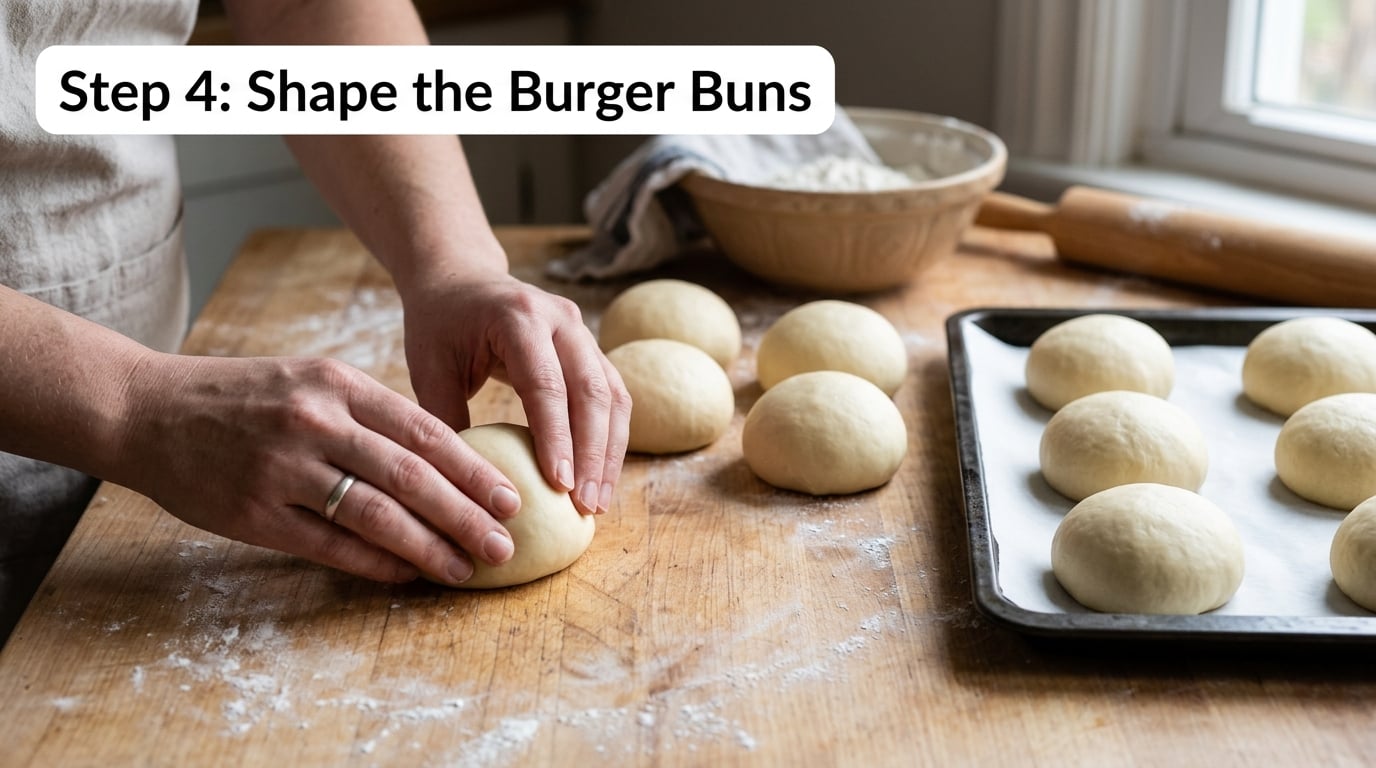
Turn the dough out onto a floured surface and press it into a flat disc to deflate the big bubbles. Divide it into eight equal pieces. A kitchen scale is the easiest way to keep them the same size, and even pieces matter because a small one bakes through before a large one gets its color.
Tuck the edges of each piece under themselves and roll it into a taut round, sealing the seam on the bottom. The surface should look like a smooth ball with no torn spots, which is what gives a bun an even, glossy top. If you want a flat-topped burger bun, press each round down gently with your fingertips after rolling.
Place the rounds on the parchment-lined baking sheet about 1 to 1 1/2 inches apart so they can expand and nearly touch. Overcrowding the tray makes the buns bake into one wide sheet, and a bun with no space for oven spring comes out squat.
Step 5: Proof, Egg Wash, and Bake
Cover the tray loosely with plastic wrap or a towel and let the shaped buns proof for 30 to 45 minutes. They are ready when they look puffy and have grown noticeably, and a gentle press leaves a dent that fills back in slowly. They do not need to double at this stage, just get airy and inflated.
Beat one egg with a tablespoon of water, then brush it over the tops. If you are using sesame seeds, scatter them on while the wash is still wet, or they will roll off in the oven. The egg wash is what gives the top its deep golden, slightly glossy bakery finish, and it also helps the buns hold moisture in.
Bake on the hot sheet at 350 F for 12 to 15 minutes, until the tops are deeply golden brown and the bottoms sound hollow when you tap the bottom of one with your knuckle. With a thermometer, the center should read 190 F (88 C). Baking an extra two minutes past that gives you a deeper color and a crisper crust, which is useful for buns that sit under a hot broiler.
Take the tray out of the oven and immediately brush the hot tops with a little melted butter if you want extra-soft buns with a slightly sweet, glossy finish.
Step 6: Cool and Slice the Buns
Move the buns to a wire rack and let them cool completely, 45 to 60 minutes, before cutting. Cutting a warm bun compresses the crumb and tears the structure, and the crumb is still setting as it cools, so patience here is what separates a light interior from a gummy one.
Slice with a serrated knife, sawing gently rather than pressing down. To get two clean halves instead of a torn top, lay the bun flat, hold it steady, and cut straight down with the blade kept vertical. Many people cut a small slot from the side and pull it open, which works well for brioche-style buns.
Common Mistakes
Almost every disappointing batch traces back to one of a handful of things. Here is what goes wrong, why it happens, and what to change next time.
Dense, heavy buns that do not rise. Almost always one of three things: the yeast was dead, the dough was not kneaded enough, or it was kneaded too long and the gluten tightened up. Check the yeast by adding it to warm water and sugar and waiting ten minutes for foam. If there is no foam, buy new yeast, which loses potency after a few months once opened. Weigh your pieces evenly and do not add extra flour to a sticky dough.
Buns that spread flat and collapsed in the oven. That is overproofing, either from a rise that ran long or from a second proof in a kitchen that was too hot. Shape the buns a little flatter than you want them to end up, since they spread as they bake, and shorten the second rise by ten minutes if your kitchen runs warm.
Lopsided or lumpy buns. Uneven dividing, or rolling with tension at the top instead of tucking the seams underneath. Weigh each piece, tuck the underside to seal the seam, and use the same motion for every piece. A bench scraper set at a fixed height for every piece is another quick way to keep them level.
Tops that burn before the center cooks through. The tray was too close to the element, or the buns were sitting too close together and the tops were catching the heat first. Move the rack to the middle of the oven, and check them at 11 minutes rather than waiting the full 15.
Buns that taste stale the next day. Bread goes stale because the starch firms back up as it cools, and it speeds up in warmth. Store the buns in a bag or a container at room temperature and never in the fridge, which pulls moisture out of the crumb quickly. Refresh them in a 350 F oven for five minutes and they come back close to fresh.
Tearing or soaking through under a juicy burger. Two fixes. Cut a shallow slit in the bottom of each bun so the juices go somewhere other than straight into the crumb, and make sure the second rise was long enough that the crumb has structure. Cutting the bun with a serrated knife rather than a straight blade also leaves a rougher surface that holds moisture instead of releasing it.
Two habits fix most of the above. Weigh the flour and the dough pieces, and trust the dough rather than the clock, because a kitchen at 68 F in February and one at 78 F in July will not rise on the same schedule.
Frequently Asked Questions
Can I make burger buns without yeast?
You can, and the result is a quick skillet or baked hamburger bun rather than a soft bakery roll. Baking powder and milk provide the lift, so the dough rests for 15 to 20 minutes rather than an hour, and the texture comes out more like a biscuit or scone: tender and crumbly, not chewy. For a no-yeast version, combine 2 cups flour, 2 teaspoons baking powder, 1 teaspoon sugar, 1/2 teaspoon salt, 3/4 cup milk, 1 egg and 2 tablespoons melted butter, then shape and bake immediately.
How long does it take burger bun dough to rise?
Expect 60 to 90 minutes for the first rise and 30 to 45 minutes for the second, though temperature drives the schedule more than the clock does. Look for the dough to roughly double in size and go from dull to domed, then use the poke test: an indentation that springs back slowly means it is ready. In a kitchen below 70 F, the first rise can stretch past two hours.
Why are my homemade burger buns dense?
Three causes account for nearly every dense batch. The yeast was dead or too old, so check it in warm water with sugar and look for foam within ten minutes. The dough was under-kneaded, so give it a full 8 to 10 minutes by hand until it feels elastic and springs back. Or the dough was over-floured while shaping, which tightens the crumb, so use the reserve-flour method and keep handling to a minimum.
Should I egg wash burger buns before baking?
Yes. A beaten egg mixed with a tablespoon of water gives you the deep golden, glossy top that makes homemade buns look like they came from a bakery, and the fat in the wash helps the crust stay tender. Brush it on after the second rise and before the seeds, so the sesame or flaky salt sticks. It is not essential, but it is the single easiest upgrade to the look of the finished buns.
Can I freeze burger buns after baking?
Baked buns freeze better than raw dough. Let them cool completely, wrap the whole batch in foil or place them in a freezer bag, and freeze for up to three months. To reheat, wrap a bun in foil and warm it in a 350 F oven for 8 to 10 minutes, or let it thaw at room temperature and refresh for five minutes. Freezing unbaked shaped buns also works, but plan on proofing them from frozen, which takes longer.
How do I keep burger buns soft overnight?
Keep them at room temperature in a bag, a bread box or a container with the lid slightly ajar, never in the refrigerator. Cold dry air is what turns a soft bun into a stale one within hours, and wrapping buns tightly while warm traps steam and softens the crust. A slice of bread added to the bag helps a leftover bun stay soft for a day or two, and brushing a day-old bun with a little butter and reheating it restores most of the texture.
The Short Version
Mix, knead for 8 to 10 minutes, rise until doubled, shape eight equal pieces, proof 30 to 45 minutes, egg wash, and bake at 350 F for 12 to 15 minutes. That is how to make burger buns from scratch, and the cooling rack step is the one people skip and then wonder why the inside is gummy.
If you only try one improvement, weigh the dough pieces. Even portions are the difference between a tray of identical buns and a tray where the little ones are dry and the big ones are still pale in the middle.