
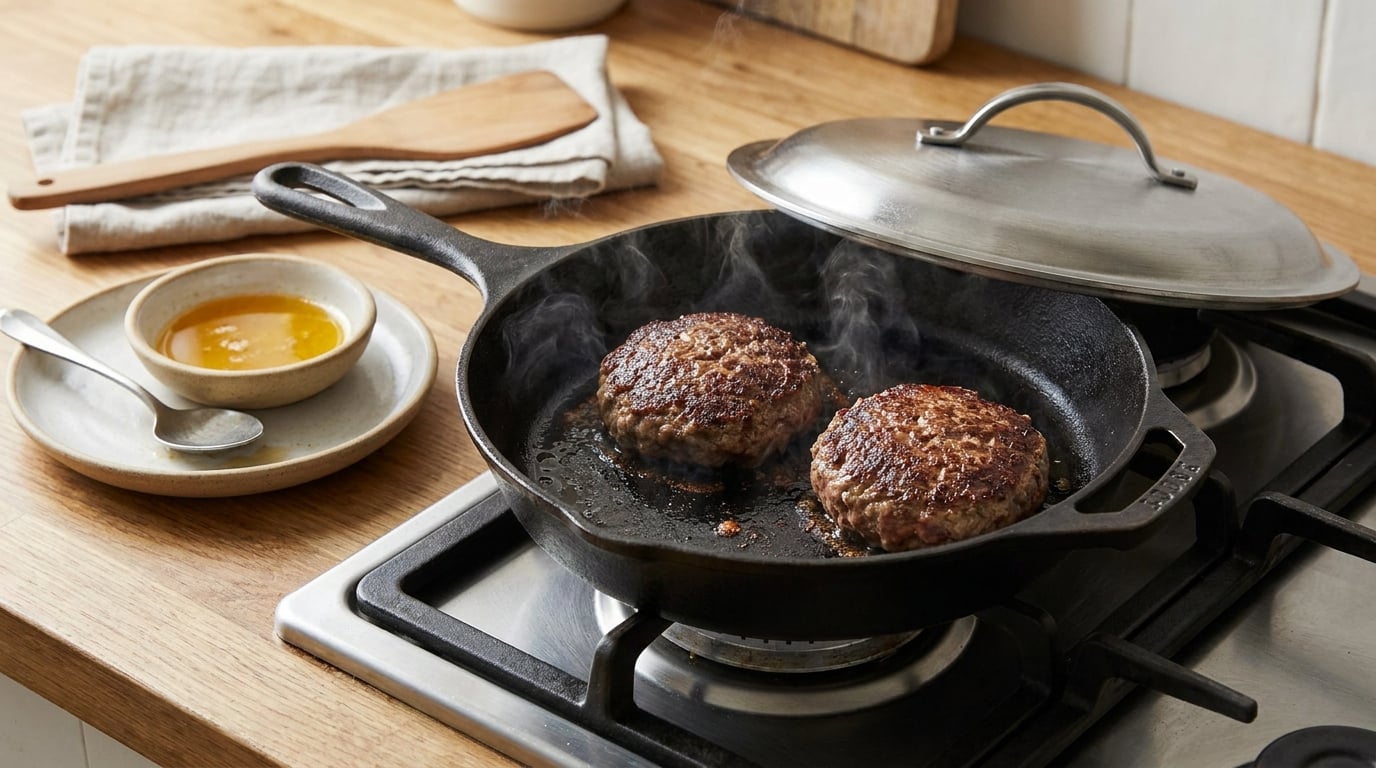
Burgers smoke indoors for four reasons: excess fat drips onto a hot burner, the pan is overheated, the patties are wet, or the oil you used burns. Control those four things and a stovetop burger sears like a grill burger, with the kitchen staying clear. Total time is about 25 minutes for four burgers, and the only real technique is heat control.
Smoke is not a separate problem from cooking well. When a pan is too hot, the rendered fat vaporises before the patty has formed a crust, so you get haze instead of browning. Fix the temperature and the smoke goes with it.
Table of Contents
- What You Need
- How to Make Burgers on the Stove Without Smoke, Step by Step
- Step 1 – Choose the Right Pan and Set Up Ventilation to Cook Burgers on the Stove Without Smoke
- Step 2 – Form Loose, Even Patties
- Step 3 – Heat the Skillet Until It Is Very Hot, Not Smoking
- Step 4 – Sear Without Crowding
- Step 5 – Flip, Cover, and Cook Through
- Step 6 – Check Doneness and Melt the Cheese
- Step 7 – Rest and Assemble the Burgers
- Common Mistakes
- Frequently Asked Questions
- Why are my burgers smoking when I cook them on the stove?
- Can I cook burgers on a stove without a lid?
- Should I cover the skillet when cooking hamburgers on the stove?
- How do I stop rendered fat from smoking while the burgers cook?
- How long should I cook a burger on each side on the stove?
- How can I tell if a burger is cooked without cutting it open?
- Conclusion
What You Need
A heavy skillet, one lid, an instant-read thermometer and a neutral oil cover almost everything. Here is what each item does for you.
- A heavy skillet or flat griddle. Cast iron, carbon steel or a heavy nonstick pan holds heat, so the patty sears instead of slowly stewing in its own juice. Match the pan to the burner: if the flame ring is much larger than the patty, the exposed metal burns the fat that drips off the edge.
- A lid that fits the skillet. A metal lid, propped about a centimetre off the rim, traps the airborne grease that would otherwise hit your backsplash, while the gap lets steam and smoke vent upward to the hood.
- An instant-read thermometer. Time alone produces dry burgers and wobbly ones. A thermometer gets you to the safe 160F (71C) mark every time without guesswork.
- A high smoke point oil. Avocado, canola, grapeseed or refined sunflower oil. Olive oil, butter and coconut oil break down at searing temperatures and turn into the acrid haze you are trying to avoid.
- Coarse salt and black pepper. Season on the meat, not the pan, so the crust forms without the seasoning burning first.
- Optional cheese and a second weight. A slice of cheese added after the burger is safely cooked melts without extra smoke. A second heavy pan on top of the lid presses the patty flat for even thickness, closer to smash-burger results.
How to Make Burgers on the Stove Without Smoke, Step by Step
The method below runs seven steps and takes roughly 25 minutes. Set up ventilation before the pan ever heats, keep the patties loose and evenly shaped, and give them room in the pan. That is the whole difference between a smoky kitchen and a clean one.
Step 1 – Choose the Right Pan and Set Up Ventilation to Cook Burgers on the Stove Without Smoke
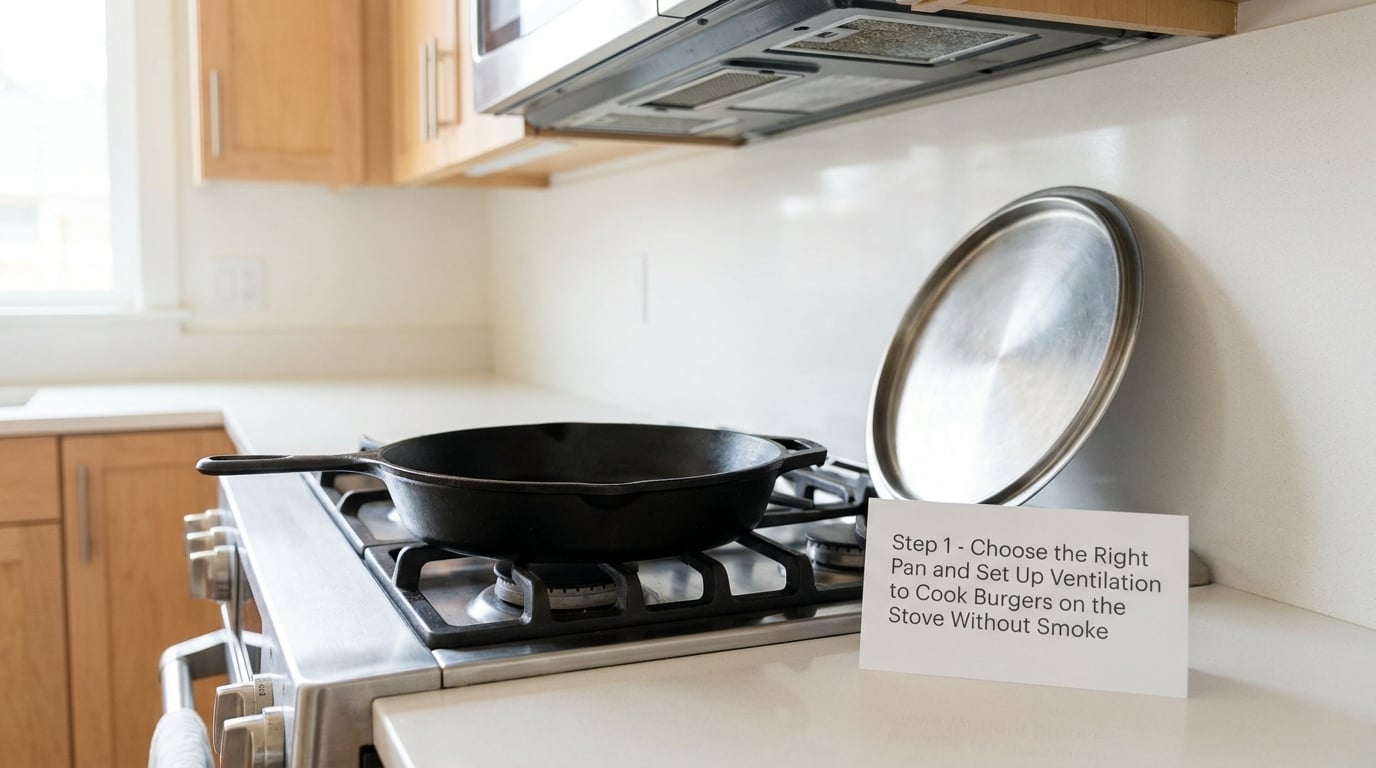
Turn the exhaust fan to its highest setting before you light the burner, and open a window or door to create cross-ventilation. Run the fan first and the grease vapour leaves the kitchen instead of hanging in it for hours.
Use a heavy pan sized close to the diameter of your patties, ideally about 12 inches for four standard burgers. A pan far larger than the burner concentrates the flame’s heat in the middle while the patty overhangs, and the raw fat hanging over cooler metal drips straight down onto the flame.
If your kitchen has no working hood, a bathroom fan near the door or a fan set in the window makes a measurable difference. It is worth the ten seconds it takes to move it into position.
Step 2 – Form Loose, Even Patties
Handle ground beef as little as possible. Loosely ball about 150 to 180 grams of 80/20 beef for each burger, then pat it into a patty roughly 2 cm thick without packing or kneading it.
Dense patties squeeze out fat as they cook, and all of that fat has to go somewhere. Loose patties render more slowly and drip less. Keep the edges ragged rather than pinching them smooth, and press a shallow thumb indentation into the centre so the burger stays flat instead of doming.
Refrigerate formed patties for 10 to 15 minutes while you get everything else ready. Cold, firm patties hit the pan harder, which means a faster sear and less sticking.
Step 3 – Heat the Skillet Until It Is Very Hot, Not Smoking
Preheat the empty pan on medium-high for about four to five minutes. Add a thin film of high smoke point oil, let it shimmer and flow freely, then wait a few seconds more.
Light wisps of smoke coming off the oil mean it is ready. A cloud of smoke means you have gone too far, and so have your chances of a clean kitchen. Cooking guides that say heat the pan until smoking usually mean exactly that thin shimmer from the oil itself.
Never put a cold or damp patty straight from the fridge into the pan. The temperature crash in the pan is what makes the oil smoke, and a wet surface turns into steam and spatter. Pat the meat dry with a paper towel before it goes in.
Step 4 – Sear Without Crowding
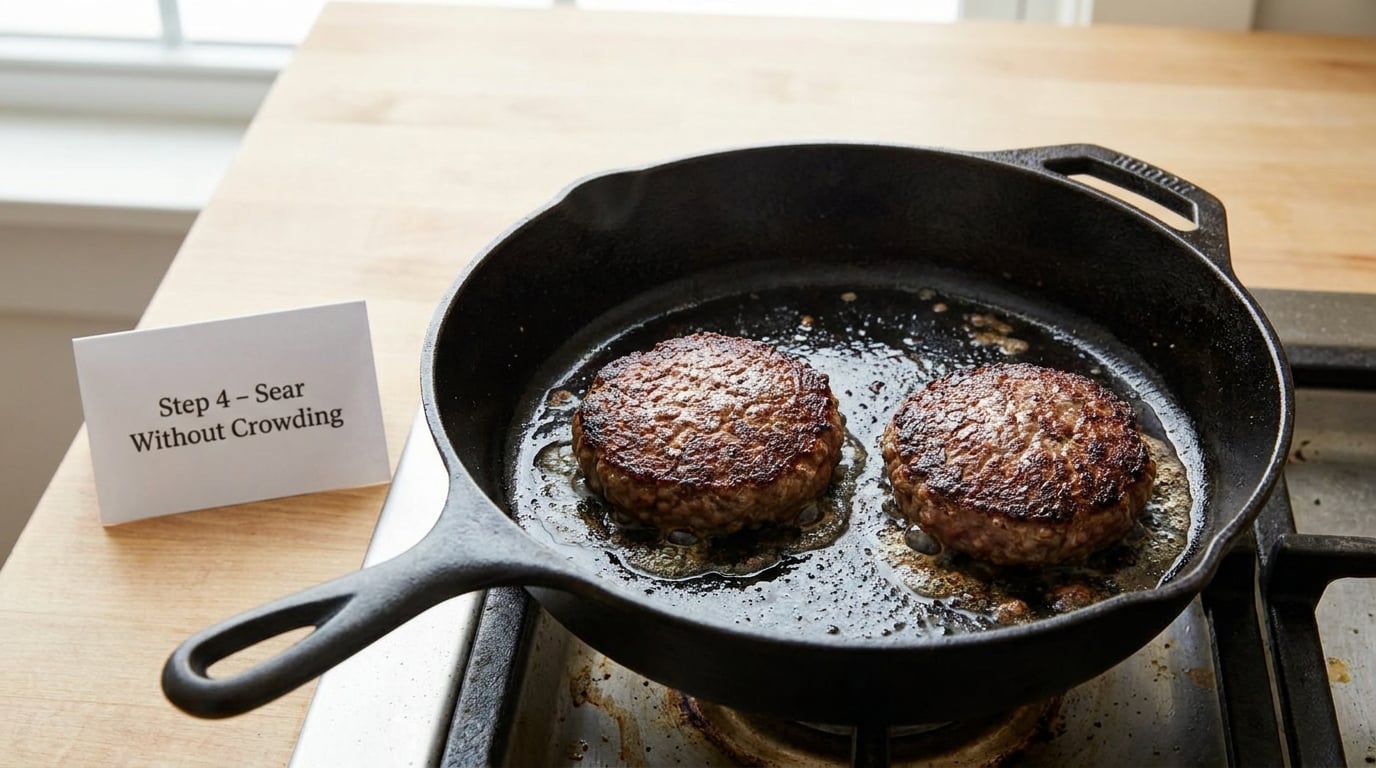
Space the patties so a finger-width sits between them. Touching patties steam each other instead of searing, and an overcrowded pan cools below browning temperature, so fat soaks in and later spits.
Lay each patty away from you and press it flat for a full ten seconds of contact. That full contact is what creates lacy, crisp edges. Leave the patties alone for three to four minutes and resist flipping early.
What you want to see before turning is a deep brown crust with the edges turned grey-brown and crisp, and liquid fat running around the outside of each patty rather than puddling thickly. If fat is pooling several millimetres deep around the burger, tip off the excess into a waiting dish instead of letting it scorch.
Step 5 – Flip, Cover, and Cook Through
Flip with a thin metal spatula or a fish slice, sliding it fully under the patty rather than sawing at one edge. Cook the second side for two to three minutes.
Now put the lid on, propped about a centimetre open. The lid slows the finish so the centre cooks evenly, and the gap vents the steam that would otherwise fog your kitchen and drip condensation back onto the crust.
A full seal is the mistake to avoid. A tight lid traps moisture against the crust, softens the sear and steams the patty. For a thinner smash-style patty, skip the lid entirely and finish in under three minutes a side; the thicker patty needs the covered finish to reach temperature in the middle.
Step 6 – Check Doneness and Melt the Cheese
Check doneness with a thermometer, not a cut. Push the tip into the side of the patty, away from the bone-free centre where you would normally cut, and read the temperature.
USDA guidance for ground beef is 160F (71C) internal temperature. For a more relaxed burger, 130F to 135F (54C to 57C) is medium-rare and 140F (60C) is medium, but whole patties carry surface bacteria from grinding, which is why the safe recommendation is 160F for anyone who is not choosing that risk knowingly.
Add cheese only after the patty is safely cooked. Slide a slice onto the top, put the lid back on for 20 to 30 seconds, and it melts from residual heat. Cheese added at the start burns, sticks and adds to the smoke.
Step 7 – Rest and Assemble the Burgers
Rest the patties on a rack or a warm plate for three to five minutes. The juice held by the meat settles back in, so the first bite is not dry.
Toast the buns cut-side down in the same pan for 30 to 60 seconds, using the residual heat and a wipe of the pan’s fat. Keep toppings simple: a pinch of salt, lettuce, tomato, and a sauce added at the table rather than cooked onto the patty.
Move the patties straight to a warm plate and assemble at the table. A patty that sits on a plate for ten minutes loses heat and dries out at the edges.
Common Mistakes
Most smoky stovetop burgers come down to six fixable problems. Here is what each one looks like in the pan and what corrects it.
- Too much fat in the blend. 80/20 renders a lot of liquid fat, and on a hot pan some of it drips off the edge and vaporises on direct flame. Choose 85/15 for indoor cooking, or pour off the fat that collects during the cook.
- A pan and burner mismatch. An oversized pan on a small burner leaves the patty overhanging the flame’s outer edge, where fat hits the burner directly. Use the pan that matches your burner, or cook on a flat griddle that covers two burners.
- Starting with a cold pan. A cold pan slowly heats, the meat slowly renders, and the fat sits in the pan long enough to scorch. Preheat fully, add oil, wait for the shimmer.
- Wet or packed patties. Moisture becomes steam, steam pushes fat outward, and outward fat pops. Dry the meat surface and handle it gently.
- Weak ventilation. No fan running and no window open means the haze has nowhere to go. This is the cheapest fix on the list and it takes five seconds.
- A sealed lid. Wrapping the pan in a tight lid traps steam, softens the crust and, on a pan running hot, steams grease into the air instead of letting it drain. Always leave a gap.
If your smoke alarm is sensitive, a fine-mesh splatter screen beats a lid for airflow while still stopping most flying grease, and a foil liner in a sheet pan underneath gives the drips somewhere to go instead of the burner ring.
Tips for Better Stovetop Burgers
For a thicker crust, sear on medium-high and finish the patty on medium-low with the lid cracked, rather than blasting both sides at full heat.
When cooking for a family, work in two batches of two rather than crowding four patties in. You keep the pan above browning temperature, and you get two pans going at once if you have the burners.
Lean 90/10 beef needs less fat in the pan and a shorter cook, since it dries out fast. Fattier blends tolerate a harder sear and reward you with more flavour. Match the cook time to the blend, not the other way round.
Press the patty once at the start for full contact and it finishes fast, which means less time sitting in its own rendered fat. Keep the spatula out of the pan while they cook so you are not tempted to press again.
On browning, dry the surface with a paper towel, salt it right before it hits the pan, and let the crust rest undisturbed. Movement is what stops a crust from forming.
After a smoky cook, wipe the burner grates while they are still warm, and degrease the range hood filter with hot soapy water once it has cooled. Boiling a small pan of water with a splash of vinegar afterwards pulls the last of the smell out of the room.
Frequently Asked Questions
Why are my burgers smoking when I cook them on the stove?
Smoke means fat is hitting heat faster than it can cook away. The usual causes are a pan set too high, more fat in the blend than you want indoors, patties sitting in a pool of their own rendered fat, and oil such as olive oil or butter breaking down at searing temperature. Lower the heat to medium-high, choose 85/15 beef, pour off pooled fat during cooking, and use avocado, canola or grapeseed oil.
Can I cook burgers on a stove without a lid?
Yes, and for thin patties a lid-free cook is the cleaner option. A lid slows the finish and traps steam, so if you sear thin patties for about two minutes a side with the heat already right, skip it. You lose the splash protection, so a fine-mesh splatter screen is a better substitute than a lid: it stops flying grease while steam and smoke still move freely toward your hood.
Should I cover the skillet when cooking hamburgers on the stove?
Cover the skillet, but never seal it. Prop the lid about a centimetre off the rim so steam and smoke can escape while the trapped heat finishes the centre of the patty. A tight lid holds condensation against the crust, softens your sear and steams the surface. Thick formed patties need this vented finish; thin smash-style patties cook through in under three minutes a side without any lid at all.
How do I stop rendered fat from smoking while the burgers cook?
Give the fat somewhere to go. Pat the meat dry before it hits the pan, space the patties so their fat cannot pool together, and pour off any liquid fat that collects more than a few millimetres deep. A 85/15 blend renders less than 80/20. Tipping fat into a dish mid-cook keeps it from sitting on hot metal, and if it starts to smoke, lower the burner one notch rather than trying to cook through it faster.
How long should I cook a burger on each side on the stove?
On a preheated medium-high skillet, a 2 cm thick patty needs about three to four minutes on the first side and two to three minutes on the second. A thin smash-style patty takes roughly 90 seconds to two minutes per side. Those times assume correct pan temperature and a decent crust before you turn. Always confirm with a thermometer rather than the clock, because patty thickness, blend fat content and your burner all move the real finish time.
How can I tell if a burger is cooked without cutting it open?
Use an instant-read thermometer and push the tip into the side of the patty, where cutting a slit would release the most juice. USDA guidance puts ground beef at a safe 160F (71C). If you prefer rarer, 130F to 135F is medium-rare and 140F is medium, but remember that whole patties carry bacteria from the grinder across the surface, which is why the safe recommendation applies to every burger.
Conclusion
Four priorities do most of the work when you want to make burgers on the stove without smoke: a fully preheated heavy pan, patties spaced so nothing touches and nothing hangs over the burner, a lid propped ajar rather than sealed, and an instant-read thermometer in your hand before you flip.
Run the exhaust fan before the burner lights, use a high smoke point oil, and the rest is timing. Do those things and you get a browned crust, a 160F (71C) centre and a kitchen that still smells like nothing more than dinner.