
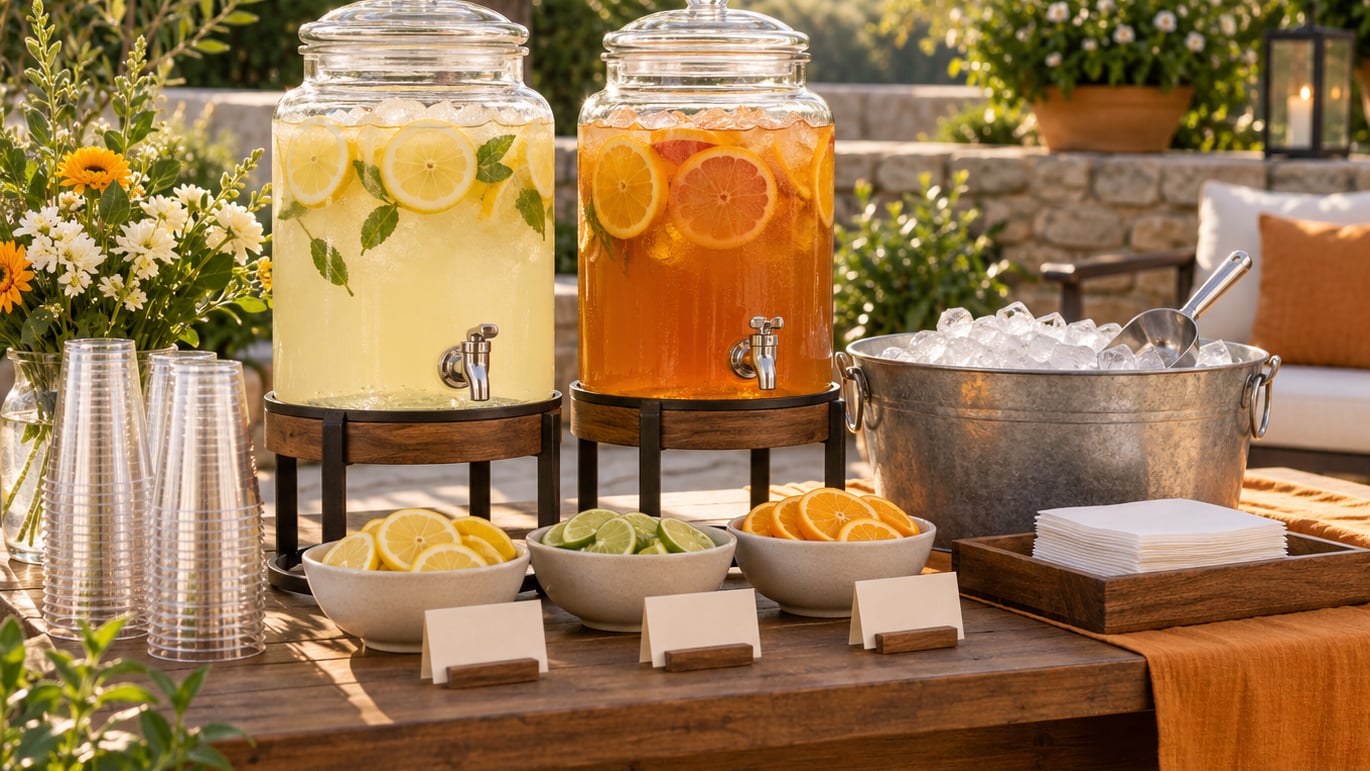
A self serve drink station is a table, cart, or counter loaded with cups, ice, mixers, garnishes, and a short list of drinks, arranged so guests can pour and build their own drinks without a bartender. Setting one up takes about an hour on the day plus thirty minutes the night before, and it comes down to three things: a short drink list, a table people can actually stand at, and enough ice that nobody drinks warm punch.
This guide walks through the whole setup, including how much to buy, how to keep things cold, and how to stop a line from forming. It works for a backyard cookout, a holiday open house, a brunch, or a wedding reception.
Table of Contents
- What You Need
- Step 1: Choose Drinks That Work for Your Group
- Step 2: Plan the Table and Traffic Flow
- Step 3: Chill and Prepare the Drinks
- Step 4: Set Up the Dispensers and Ice
- Step 5: Add Cups, Labels, and Self Serve Essentials
- Step 6: Test the Station and Refill It
- Common Mistakes
- Frequently Asked Questions
- Conclusion
What You Need
Split the list in two. The host kit is what you use to build and refill the station; the guest kit is what guests touch. Keeping them separate stops you from putting out things nobody needs and from running out of the one thing everybody needs.
Host kit: drink dispensers or urns with spigots (or plain pitchers if nobody pours for themselves), ice tubs or bins with a scoop, a cooler for reserve bottles and bags of ice, a cutting board and knife, labels or index cards plus a marker, a serving tray or rubber mat under each spigot, tongs or a jigger, and a trash or compost bin close enough to reach.
Guest kit: cups with a few spares, lids for anyone heading outside, straws, stirrers, napkins, coasters, and drink markers such as coloured straws or ribbon tied to different glasses.
How much of that you buy depends almost entirely on the guest count. This table assumes a three-hour party, with guests drinking about two drinks in the first hour and one per hour after that.
| Item | 10 guests | 25 guests | 50 guests | 75 guests |
|---|---|---|---|---|
| Total drinks | 40 | 100 | 200 | 300 |
| Ice, in pounds | 40 | 100 | 200 | 300 |
| Cups | 15 | 38 | 75 | 113 |
| Spirits, 750 ml bottles | 2 | 4 | 8 | 12 |
| Mixers, 2 litre bottles | 1 | 2 | 3 | 4 |
| Garnish portions | 40 | 100 | 200 | 300 |
| Napkins | 20 | 50 | 100 | 150 |
Ice is the number most hosts get wrong. Canned drinks, beer, and wine need none, so if half your menu is served cold and canned, cut the ice figure roughly in half. Add a spare ten percent to every row anyway, because someone always spills a cup.
Step 1: Choose Drinks That Work for Your Group
Pick three to five drinks, no more. A station with fifteen options is not generous, it is a project: guests read labels, guess wrong, mix something odd, and use up garnish. Every drink you put out should be buildable in three moves or fewer using only what is on the table.
Match the lineup to the occasion and the hour. A brunch leans toward sparkling wine, juice, and coffee. An evening party leans toward a batched punch, one spirit-forward drink, and a lighter option. A cookout works best with drinks that are cold and forgiving.
A lineup that covers most groups: a citrus drink (a spritz or a grapefruit soda spiked with sparkling wine), one spirit-forward option served from a dispenser, one big batched punch in a urn, and a zero-proof drink that is just as good as the alcoholic ones. Put something genuinely good in the non-alcoholic column. When the only mocktail is plain sparkling water with lime, the water glass empties faster than anything else on the table.
Make sure at least one drink needs no mixing at all. On a crowded patio, a canned drink or a bottle someone can crack open is often the one people actually want.
Step 2: Plan the Table and Traffic Flow
Size the table to the number of guests, not the number of drinks. A single serving spot handles about two guests at a time, so twenty-five guests want roughly six to eight feet of table. Past fifty, run two stations on opposite walls rather than one long one, and split the drink lineup between them so people spread out.
Place the station out of the path between the door, the kitchen, and the food. A drink line that shares space with a serving line turns both into a bottleneck. If you are indoors, put it near a sink or a spigot; if you are outside, put it in shade, because a table in full sun warms everything on it fast.
Then arrange the tabletop in the order people move through it: glasses first, ice next, base drinks, mixers, garnishes, and napkins at the very end with the trash bin beside them. Guests pour without backtracking, and the mess happens at one end of the table rather than across the whole surface.
Keep the depth shallow. Anything sitting three rows back is something guests will not find, and it will end up as the item you still have at midnight.
Step 3: Chill and Prepare the Drinks
Do the prep the night before. Batch your punch, wash the fruit, and put everything in the fridge so it is genuinely cold rather than room temperature with ice added at the last minute.
Dilute concentrates with water and follow the dilution ratio printed on the label rather than eyeballing it. If you want a stronger punch, add more of the base spirit to the finished batch, not more concentrate, since the concentrate is already balanced for the water you are about to add.
Chill the dispensers before you fill them. Pour cold water into an empty urn, swirl it around, and empty it ten minutes before the drink goes in. A room-temperature dispenser warms the first few servings no matter how much ice is in the ice bin.
For garnishes, keep cut fruit, dairy-free cream alternatives, and anything fresh in the fridge until the moment you set them out. Perishable garnishes should not sit unrefrigerated for more than two hours, or one hour if the day is hot enough that the food safety guidance says to shorten it. Bring them out in small batches and swap them as they get picked over.
Freezing juice into ice cubes is a small trick that pays off. It keeps the punch from getting watered down as the ice melts, and the cubes are edible if a guest drops one in a glass.
Step 4: Set Up the Dispensers and Ice
Fill each dispenser no more than two-thirds full. A full urn is heavy to lift, heavier to tip, and easier to slosh. The remaining third is your working space, and it means a half-empty urn still pours correctly.
Put a tray, a plastic sheet, or a rubber bar mat under every spigot. Set the spigot high enough that a tall glass clears it without the guest tilting their head, and low enough that the drink does not arrive as a flood. Have somebody fill one glass from each dispenser while you watch where it lands.
Use an ice bin with a scoop, never hands. It looks unhygienic and it really is faster for someone to grab a handful. Keep a second bin or an open cooler under the table loaded with unopened bags, so topping up the bin never means leaving the station.
How much ice does a self serve drink station need?
Plan on roughly one pound of ice per drink served over ice, which works out to about 15 to 20 drinks from a 20-pound bag. A hundred-drink party needs close to a hundred pounds, so five bags, plus a spare in the cooler. Ice sinks and compacts as it melts, so lift a full bag and judge by the weight rather than by how much space it appears to fill.
Place the ice bin close to the dispensers rather than at the end of the table. Anyone filling a glass with ice first and then walking for a drink will drip the whole way back.
Step 5: Add Cups, Labels, and Self Serve Essentials
Labels do more work than any other part of the setup. Name every item in the same format: drink name first, ingredients underneath. “Citrus Spritz: sparkling wine, grapefruit soda, ice, orange peel” tells a guest everything they need. A card that only says “spritz” tells them nothing and guarantees a question directed at you.
Use different markers for drinks that share glassware. A coloured straw or a loop of ribbon on a highball versus a lowball solves the problem of four identical-looking glasses with three different things in them.
On glassware counts, one glass per guest covers most parties if you have a dishwasher or a sink for rinsing. Two per guest is right if the drinks are strong enough that people want a fresh glass, or if the gathering runs long. Stack glasses with the opening facing the same direction and put a clean towel underneath so they do not slide.
Put napkins last in the line, right beside the trash bin. Putting them first means people pick up a napkin, set it down to pour, and knock something over. Lids belong near the cups if anyone will be walking around with a drink.
Step 6: Test the Station and Refill It
Test everything fifteen minutes before guests arrive. Run water through every spigot until the stream is steady, check that a glass fills in a few seconds, and confirm each label matches what is actually in the container. A mislabelled dispenser is the single thing guests complain about most.
Pour one glass of each drink and drink it. If the punch tastes flat, the concentrate was under-diluted; if it tastes thin, you can add more concentrate to the batch. Checking this cold, in daylight, with time to fix it, is far better than finding out an hour into the party.
Keep a reserve pitcher of each popular drink in the fridge and swap it in rather than topping up a container that is running low. Topping up is what turns a fresh batch into flat, lukewarm punch by the second hour, and swapping takes ten seconds.
Give yourself a refill trigger: when any container drops below a third, replace it. Check the ice bin at the same time. Ice melting out is the most common reason a self serve drink station gets abandoned partway through an evening, and it is entirely preventable with a cooler of reserve bags underneath.
Common Mistakes
Putting out too many drinks. Fifteen options reads as generous and behaves like a chore. Cut to three to five, and move the rest of your list into a follow-up round if anybody asks.
Setting up in a walkway. Any station that sits between the door and the food will gridlock both. Push it to a side wall and make it a destination.
Unstable dispensers. Fill them two-thirds, put them on level ground, and test the wobble before anyone arrives. An urn that tips takes out the tablecloth, the ice bin, and your afternoon.
Skipping labels. Write every label yourself, in the order guests will read the table. Handwritten index cards work as well as anything printed and cost nothing.
Overfilling the ice bin. A heaped bin is unstable and blocks the view of the drinks behind it. Fill it to about two-thirds and keep the rest in bags in the cooler.
Leaving perishable garnishes out. Cut fruit, fresh herbs, and cream-based toppings belong in the fridge until serving, then come out in small batches. Two hours unrefrigerated is the usual limit, one hour in hot weather.
Forgetting the spare supplies. Extra cups, extra napkins, and one spare of each drink go in the cooler before guests arrive. Running out of cups shuts the whole station down, not just one drink.
Putting napkins at the start. They end up on the counter, under a spill, or on the floor. Napkins and the trash bin close the line.
Skipping the test pour. Fifteen minutes of testing covers bad spigots, wrong labels, flat punch, and warm dispensers, all of which are invisible until the crowd arrives.
Two hosting habits carry most of the rest. Stay near the station rather than across the room, so refills happen before anyone asks. And decide in advance where the crash zone is, so dirty glasses, empty bottles, and wet towels have a place that is not your guest’s coat.
Frequently Asked Questions
How much ice do you need for 100 drinks?
About one pound of ice per drink, so roughly 100 pounds for 100 drinks, or five 20-pound bags. A 20-pound bag usually yields 15 to 20 servings depending on how much goes in the glass. Canned drinks, beer, and wine need no ice, so if half the menu is canned you can cut that figure substantially. Keep spare bags in a cooler under the table and refill the bin when it drops below two-thirds.
What is the 2:1:1 rule for cocktails?
The 2:1:1 rule is a home mixology shortcut meaning two parts spirit, one part sweet mixer, one part sour or citrus. It is a starting point for balanced classics, not a law, and it is not a legal or safety standard. If you are batching a cocktail for a station, mix by the parts and taste the batch cold before the guests arrive.
How do I set up a mocktail bar for a party?
Treat a mocktail bar exactly like the alcoholic one: the same dispensers, labels, ice, and cups, with at least one drink just as good as the boozy options. A citrus soda with fresh fruit, a ginger and lime cooler, and a batched fruit punch all work served over ice. Put the labels in the same format as the alcoholic drinks so nobody has to guess whether something is a mocktail.
How much alcohol should I plan per person per hour?
A common home-party starting point is one drink per person in the first hour and one per hour after that, so about four drinks across a three-hour gathering. That figure varies widely with the crowd, and so does drink strength, so it is a starting figure rather than a rule. Buy a ten percent margin on top, keep cold drinks available, and keep non-alcoholic options equally visible.
Is it legal for guests to pour their own drinks at an event?
Rules differ by state, country, and venue type, so check with your state alcohol authority or your venue before you assume. Some places permit self-pour at private events; others require a licensed server and a permit. Self-serve is not hands-off either way: someone responsible should stay nearby, check identification, and step in if a guest has clearly had too much.
How do I stop a line from forming at a drink station?
Two-sided stations, duplicate ice bins, and two people pouring at the same time do more than any trick. Keep cups and ice at the front so nobody waits behind a spigot to start, and put the drinks that pour fastest nearest the queue. Past about fifty guests, split the lineup across two stations on opposite walls rather than lengthening one table.
Conclusion
Start with the three decisions that carry the rest: pick three to five drinks, count your guests, and fill the dispensers and ice the night before. Everything after that is layout, labels, and a spare bag of ice in a cooler.
Once you know how to set up a self serve drink station this way, guests pour their own, the line stays short, and you spend the evening hosting instead of holding a pitcher.