
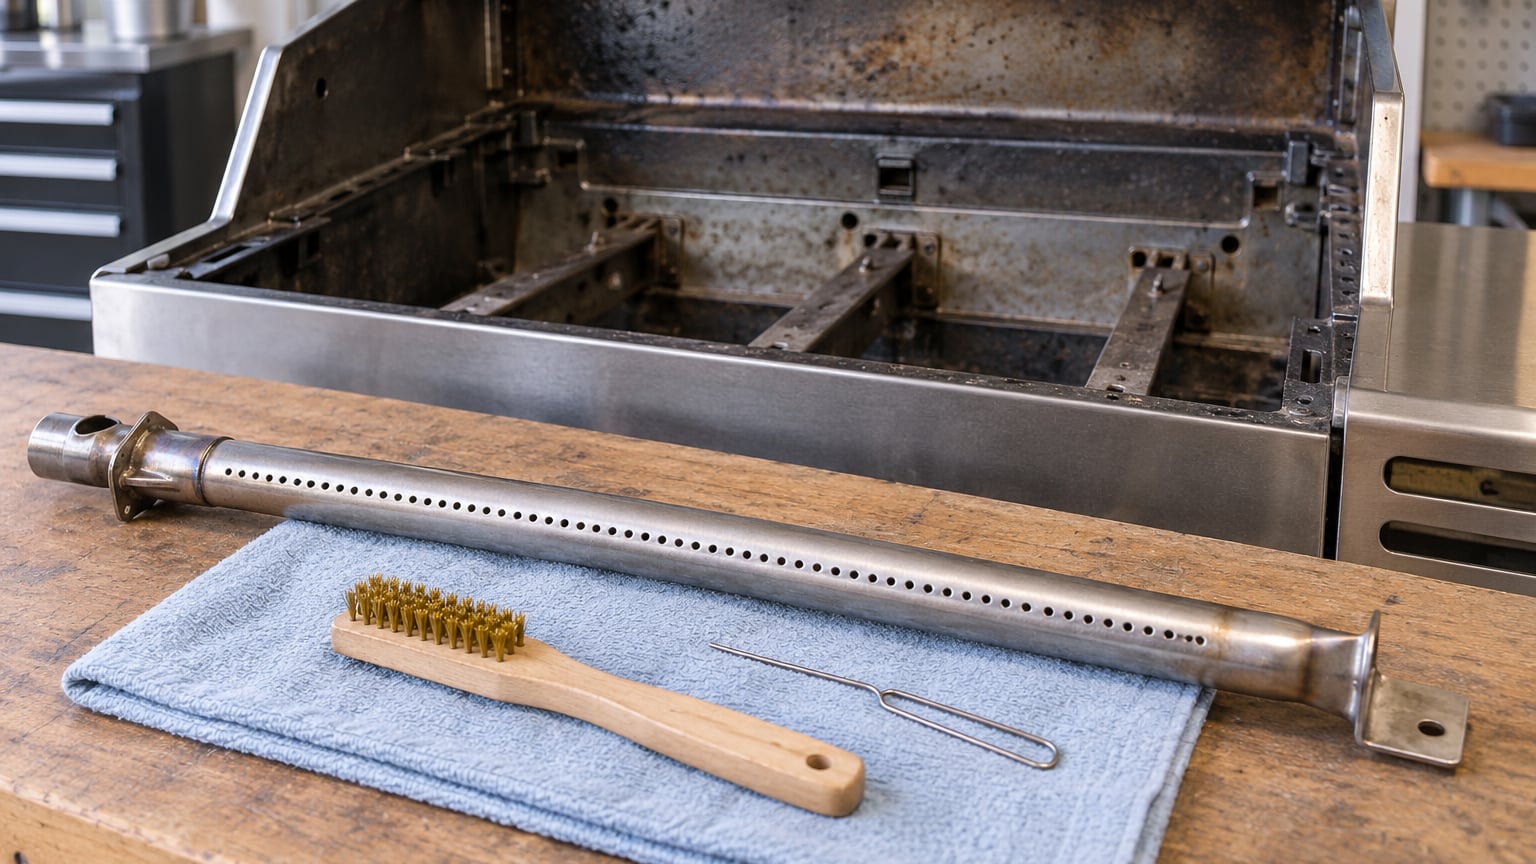
How to clean grill burners comes down to one job: opening the gas ports back up. A burner tube is a hollow stainless or cast metal pipe running under your grates, drilled with hundreds of tiny holes that mix gas and air into a flame. Grease, rust and carbon close those holes a little more every time you cook, until the flame goes uneven, the grill stops reaching temperature, and the cookbox fills with smoke. Cleaning them takes 30 to 60 minutes on a completely cool grill, and most of that time is brushing.
The short version, in the order that works:
- Turn off the fuel. Shut the burners off, close the tank valve, and let the grill cool completely.
- Remove the burners. Take off the grates, then the flavorizer bars or heat deflectors, then lift the burner tubes out.
- Brush the exterior. Work a brass or stainless wire brush across the surface of the tube, never lengthwise.
- Clear the port holes. Push an unfolded metal paperclip straight through each burner port, one at a time.
- Clean the inside. Run a venturi brush or a flexible bottle brush down the tube to pull out spider webs and rust flakes.
- Wipe the insect screens. Dampen a cloth and wipe each air shutter screen at the venturi.
- Reinstall and test. Seat the tubes back over the gas valves and run a five-minute test burn before cooking for real.
If your flames are already weak or yellow, start with the diagnostic table further down. It saves a lot of disassembly when the actual problem turns out to be a burner valve rather than a clogged port.
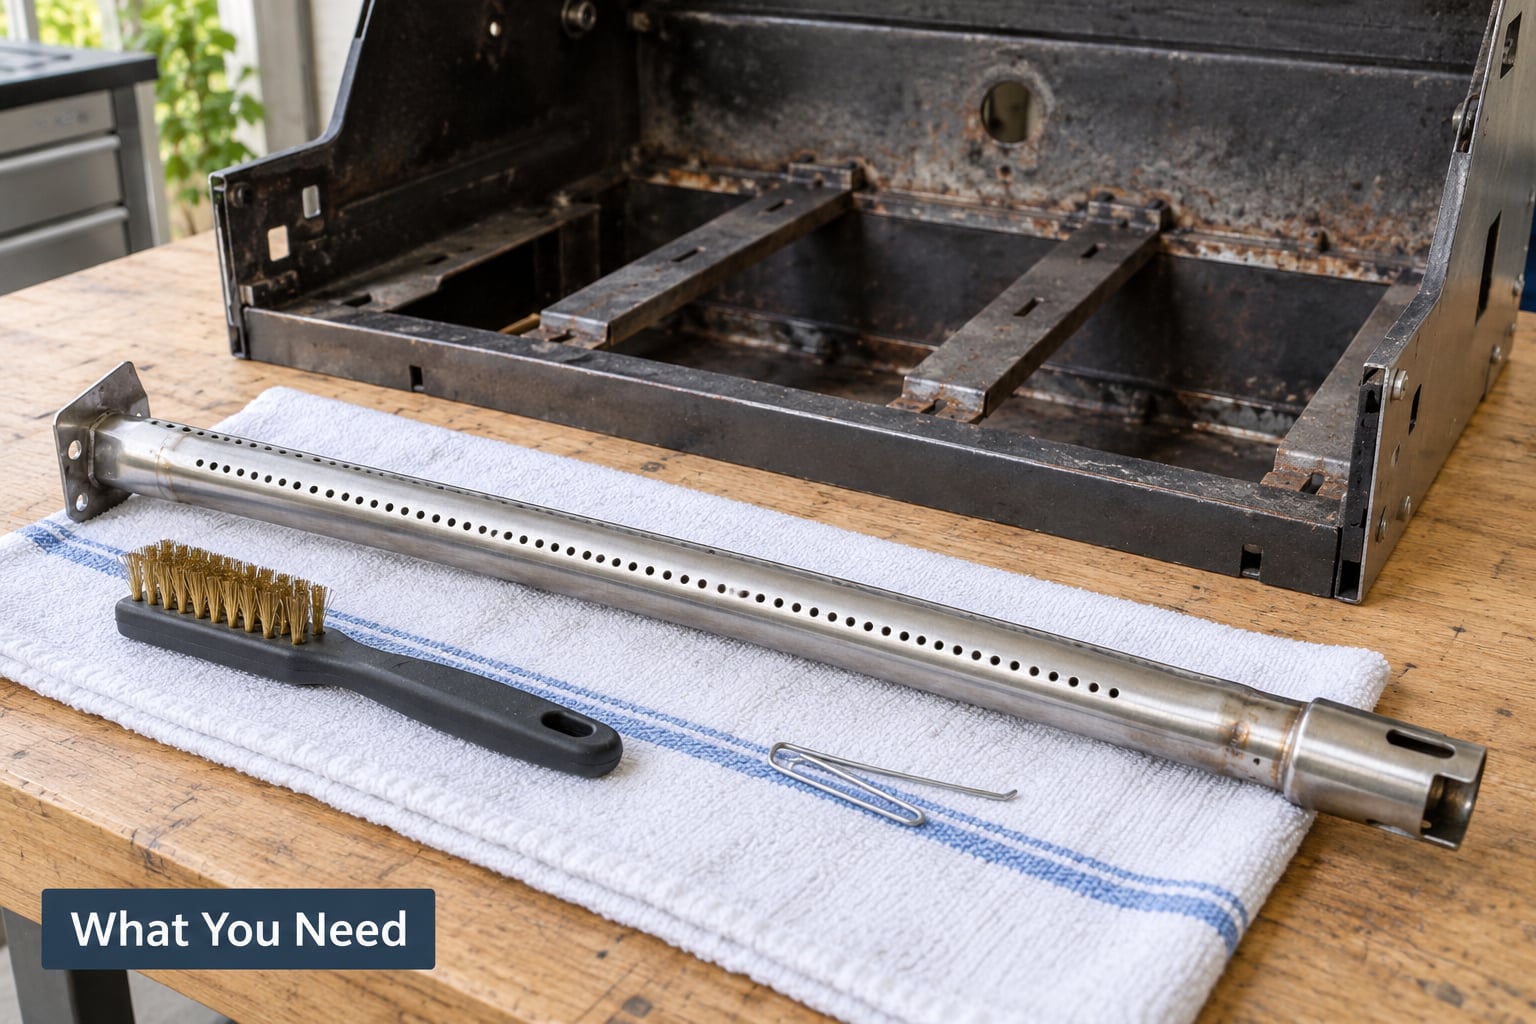
What You Need
A dedicated burner brush matters more than any other item on this list. Cook grate bristles are stiff enough to scar the inside of a burner tube, and a brush that has been sitting in bacon grease will happily move that grease straight back into the ports. Keep a second brush in the garage for burner work only.
| Tool | What it does | Household substitute |
|---|---|---|
| Brass or stainless wire burner brush, long handle | Loosens carbon from the tube surface and cookbox | None that works well. A household scrub pad will not shift hardened carbon. |
| Venturi brush or narrow flexible bottle brush | Clears webs and rust flakes inside the tube | A soft pipe cleaner, or a strip of rolled paper towel pushed with a pencil |
| Unfolded metal paperclip | Reopens individual gas ports | A wooden toothpick will snap and re-clog the hole. Skip it. |
| Damp cloth or paper towel | Wipes insect screens on the air shutter | Any lint-free rag |
| Manufacturer-approved degreaser | Loosens hardened grease on burner covers and trays | Hot soapy water and a nylon bristle brush |
| Nitrile gloves and safety glasses | Protect your hands and eyes from falling carbon | Work gloves and clear eyewear |
| Screwdriver, nut driver, pliers | Removes shields and cotter pins on some models | Standard household hand tools |
Two safety rules before anything else. First, the grill must be stone cold to the touch, not merely switched off, and on a gas grill you close the supply valve at the tank and disconnect the line rather than only turning the front knobs to off. On an electric grill, unplug it. Second, check your owner’s manual about soap: several manufacturers specifically say not to use dish soap on cast iron or porcelain-coated burner parts, because detergent residue near a flame hole leaves a film you will find again next season.
Step-by-Step: How to Clean Grill Burners
1. Turn Off the Fuel and Let the Grill Cool Completely
Close the burners, then close the valve on the propane tank or shut off the natural gas supply, then disconnect the line if your grill uses one. Turning the front knobs off stops the gas at the valve but leaves the tank valve open, and that is the difference between safe and not.
Give it 45 minutes to an hour. Touch the lid and the cookbox with the back of your hand before you reach for a tool. A burner that is warm to the touch is still hot enough to warp a burner tube or crack a quartz igniter.
Follow the manual for your specific model, because removal steps differ. Weber-style sealed burners lift straight out of the cookbox on a few models and are held in by a cotter pin or screw on others, and the igniter electrode often threads through the same opening the tube passes through.
2. Remove the Burners and Inspect the Port Pattern
Take off the cooking grates, then the flavorizer bars or heat deflectors. These lift out on most grills once the grates are gone, and they sit directly above the burners, which is why they take the heaviest carbon.
Pull the burner tube up and out gently. If an igniter electrode or a probe comes with it, do not force it. Look at where it sits and how the tube aligns with the gas valve spud underneath before you lift anything, and take a phone photo if the parts look unfamiliar.
Now check what you are looking at. Carbon is black and dry, surface corrosion is orange or brown scale on the outside of the tube, and rust flakes inside the tube mean water has been sitting in it. Loose hardware and cracked porcelain on the grate bars are separate problems, worth noting now.
Put the small parts into a bowl or a magnetic tray. Cotter pins and clips vanish into the cookbox grease and turn up two years later when you need them.
3. Brush Away Grease and Carbon Buildup
Brush across the burner tube, not lengthwise and not up and down the holes. Side-to-side strokes lift carbon off the surface without shoving it into the port holes. Lengthwise brushing drives debris down the tube and into the ports you already cleaned.
Use light pressure on cast iron and heavier strokes on stainless, because stainless tubing dents more easily than people expect. Work the same direction the metal was formed in, and pay attention to the crimped end sections where carbon packs in.
Brush the cookbox floor, the underside of the flavorizer bars and the burner cover while you are there. Work over a tray so the debris lands somewhere you can throw it away instead of onto the patio.
You will know it is working when the flame ports read as dark, open dots against clean metal and the tube surface shows bare metal rather than a matte black film.
4. Clear Burner Ports Without Enlarging Them
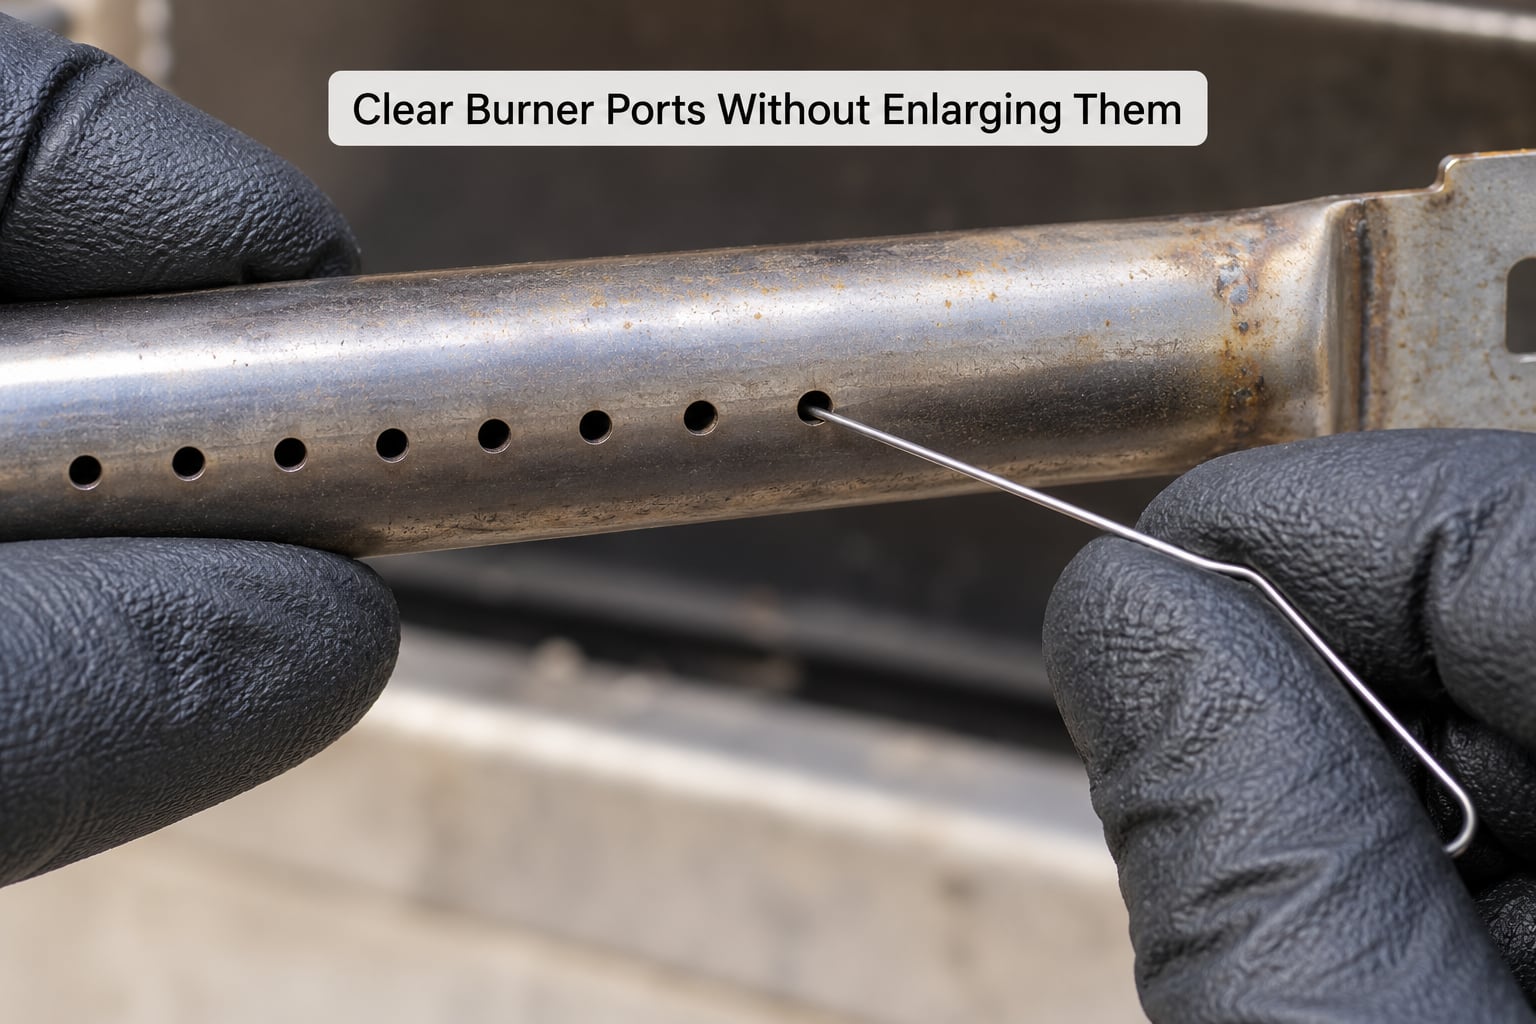
Some manufacturers ship a burner cleaning tool sized to the port. If yours came with one, that is the first choice. Otherwise, unfold a metal paperclip into a straight, stiff wire and push it through each hole from the inside toward you, straight along the axis of the port. Never twist or force it.
A hollow needle is the classic mistake. It can widen a port, and a widened port changes the gas-air mix at that hole, which shows up later as a lazy flame spot or a scorch mark on a new liner.
Do not blast the ports with compressed air. The pressure pushes carbon deeper into the tube where you cannot reach it with a brush. A gentle puff of air is fine for dust on the insect screens at the venturi, nothing more aggressive than that.
If a port stays blocked after two careful passes with the wire, leave it. Move on to the internal cleaning and re-check it after the tube dries. Forcing a stubborn port is how burners get damaged.
5. Clean the Burner Cover, Grease Tray, and Cookbox
Burner covers sit over the ports on many models, and once they are off they are usually the dirtiest thing in the grill. Degrease them with a manufacturer-approved cleaner and a nylon bristle brush, or hot soapy water if the manual allows it.
Scrape hardened grease out of the grease tray and check that the drain hole is open. A blocked tray drains grease into the firebox instead of the cup, which is a good part of the reason people see flare-ups even on a clean burner.
Wipe the cookbox interior with a damp cloth, keeping moisture well away from the igniter wires, electrode and any electrical housing. Never spray degreaser directly into a burner tube or soak a burner that is still plumbed to the gas line.
Cleaning the burner valve and the gas line is a separate job, and it is the first thing to try if a burner will not light even after cleaning. Some manuals describe running water through the valve and line to flush debris out; follow yours rather than guessing.
6. Reassemble and Test the Grill Safely
Reinstall the burner tubes so each one sits squarely over its gas valve spud, which is where the gas actually enters the tube. A burner hanging crooked is the most common cause of a burner that lights then dies. Retighten any cotter pin or screw, refit the flavorizer bars, then the grates.
Before lighting, look for anything you forgot: a dropped tool, a loose fitting, liquid pooled in the firebox, a bolt sitting where it does not belong. For gas models, run the leak check your manufacturer describes, and never use a flame to look for a leak.
Start the grill outdoors on a clear day and give it a five-minute burn with the lid closed. Watch every port as it lights. A healthy flame is mostly blue with lighter blue cones, it should run quietly, and it should be steady from the front of the burner to the back.
A strong smell of gas at any point means shut the burners and the tank valve immediately and let it air out outside before doing anything else. When in doubt about a gas connection, a licensed gas fitter or the manufacturer’s service line is the right call, not a forum post.
How Often Should You Clean Grill Burners?
Do a light brush-down monthly during grilling season and a full clean twice a year: once before the first cook of the season and once before you put the grill away for winter. A grill that sits outdoors under a cover for eight months will hold moisture in the burner tubes, so the pre-season job usually finds more rust than the last one did.
Clean sooner than the calendar says when the burners tell you to. Yellow or orange flames instead of blue, a grill that will not climb past 400 degrees when it used to reach 550, weak flames that die when you open the lid, hissing or popping sounds, visible hot spots on the grate, and heavy smoke on preheat are all signs of partial blockage.
Check the grease tray after any cook with fatty burgers, wings, bacon or ribs. Grease does not stop at the tray, it hardens on the burner cover and on the underside of the flavorizer bars, where it eventually drips onto a burner port and blocks it.
If flames stay uneven after two cleanings, suspect the valve rather than the ports, and see our guide to setting up two-zone heat on a grill to work out which end of the grill is giving you trouble. A grill that heats evenly on one side only is usually a burner problem. A grill that cooks evenly but cold in the middle is usually a heat deflector or placement problem.
Anyone who has just inherited or bought a used grill should do a full deep clean before the first cook, regardless of how clean it looks. Owners regularly open a burner tube on an old grill and find an insect nest inside, and that is a carbon hazard and a fire risk, not a surprise.
Common Mistakes When Cleaning Grill Burners
Almost every avoidable burner problem traces back to one of these.
- Working on a warm grill. Warm metal warps burner tubes and can crack an igniter. Wait until the cookbox is cool to the touch, not just to the elbow.
- Using wooden toothpicks in the ports. They snap inside the hole and leave a fresh blockage behind. Use an unfolded metal paperclip or the manufacturer’s cleaning tool.
- Brushing lengthwise or straight up and down. That pushes carbon into the ports and down the tube. Brush across the surface instead.
- Reusing a greasy grate brush. It deposits bacon grease into a burner you just cleaned. Keep a separate brush for burner work.
- Spraying WD-40 or any petroleum cleaner near the flame path. Grills are not lubricated with WD-40, and oil residue close to a port hole is exactly the kind of thing you do not want near a flame.
- Hosing down or soaking a burner that is still attached to the gas line. Water inside a burner tube corrodes it from within and can reach electrical parts. Remove the tube first, then soak it separately.
- Soaking burners in the sink overnight with the valve attached. Any residual gas in the line makes this a fire and a personal-injury risk.
- Forcing the tube past the igniter electrode. The electrode is porcelain and it cracks. Lift straight up, and read the removal step in your manual first.
- Losing the cotter pins. A small magnetic tray or a bowl keeps them. Without a pin, the burner tube is not secure.
- Leaving the grease tray full. A full tray drips grease onto burners and flare-ups follow. Empty it while the grill is still warm.
One more worth naming, because plenty of people do it: leaving loose bristles from a worn brush inside the cookbox. Replace brushes that are shedding, and clear any stray wire ends before you close the grill back up.
Stop and replace rather than clean when a burner tube is cracked, split, badly bent, rusted through, or so blocked that the ports do not open after two honest attempts. Many manufacturers warrant burners for around ten years, so check your grill’s coverage before buying a part. For a grill outside that window, a replacement tube and a matched orifice are usually cheaper than the time you spend on it.
If you are seeing flare-ups on a grill whose burners look clean, the problem is more often grease and drip management than blocked ports. Our flare-up control guide covers that side, and stopping burgers sticking to the grate covers what you can do about drips landing where they should not.
Frequently Asked Questions
Can I remove my grill burners myself?
Most models are designed for owner removal, and it takes an hour with basic tools. Lift the grates, remove the flavorizer bars, then lift or unclip the burner tubes according to your manual. The fiddly part is the igniter electrode, which often passes through the same opening as the tube, so read that removal step first. Work slowly and keep the hardware in a bowl.
Is vinegar or dish soap safe to use on grill burners?
Vinegar is fine on stainless burner tubes, and a diluted citric acid soak is a popular way to shift heavy internal carbon. Dish soap is different: many manufacturers prohibit it on cast iron or coated burner parts because residue collects near the flame path. Hot water and a nylon brush usually do the same job without the film.
Why are my grill flames yellow or orange?
Yellow flames almost always mean the burner ports are partly blocked, so the gas-air mix is off at those holes. Clear every port with an unfolded paperclip and brush the tube across the surface. If the flame stays yellow after a full clean, the next suspect is the burner valve or a failing igniter electrode, which is a repair job rather than a cleaning job.
How do I clear clogged burner ports?
Push an unfolded metal paperclip straight through each port along its axis, never twisting, and brush the tube across the surface so debris moves outward. Skip wooden toothpicks, needles and compressed air, which widen the hole or drive carbon deeper. Ports that stay blocked after two careful passes are usually better soaked in a degreaser than forced open.
What do I do if a burner will not ignite after cleaning?
Check the obvious first: the igniter electrode may have been knocked out of position, a cotter pin may be loose, or the tube may not be seated squarely over the gas valve. Confirm the gas supply is on and the burner control is set correctly, then follow the manufacturer leak-check procedure. If it still will not light, the valve is the usual culprit and needs service.
Conclusion
Start by turning the burners off, closing the tank valve and letting the grill cool all the way down. Everything after that is mechanical: lift the burner tubes out, brush them across the surface, clear each gas port with an unfolded metal paperclip, run a venturi brush through the inside, wipe the insect screens, and put it all back for a five-minute test burn.
Burn a clean blue flame and a grill that holds temperature, and that maintenance pays back every cook you make after it. Yellow flames that refuse to improve, a tube that is cracked or rusted through, or a gas smell you cannot trace are service problems, not cleaning problems, and those are worth handing to a professional.