
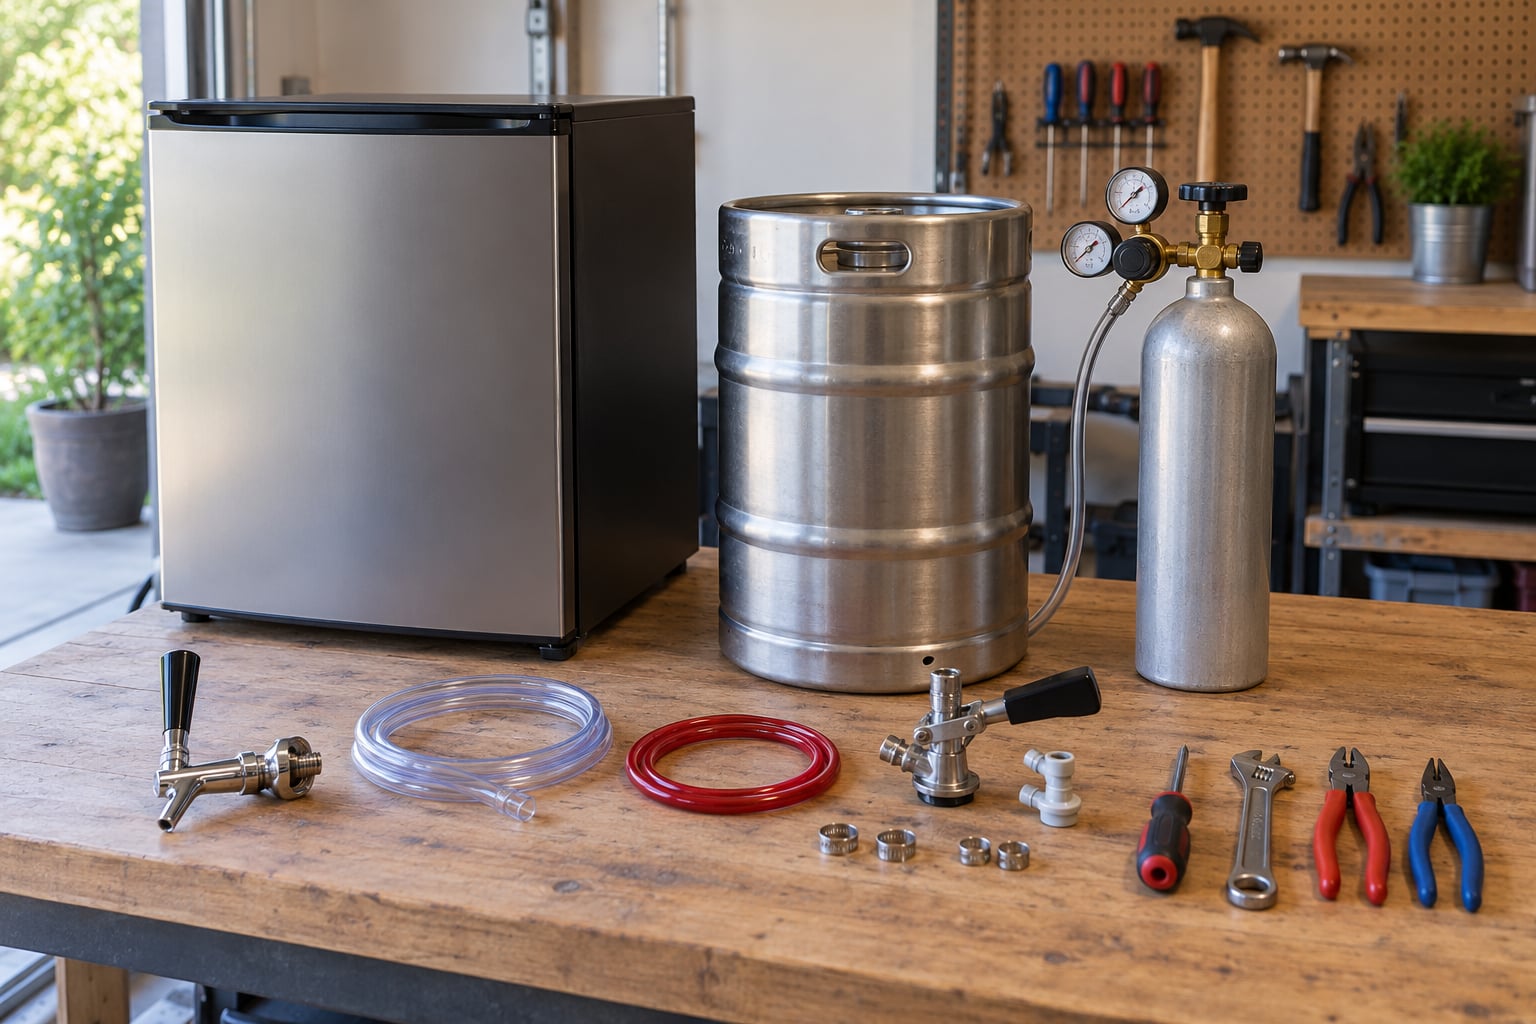
Building a kegerator is plumbing with a fridge attached: choose an appliance that holds serving temperature, mount a faucet through the door or a tower, run a low-pressure beer line up from the keg and a high-pressure gas line down from a regulated CO2 cylinder, and let pressure push the beer to the glass. A door-mount setup on a small refrigerator is an afternoon job. A chest freezer keezer with a wood collar takes a weekend and handles more beer.
Most first-time builders spend far longer picking the appliance than drilling anything. That is the right order, because the fridge you choose sets your keg capacity, your line length, and how much of the build you can safely do yourself.
This guide covers both routes — converting a refrigerator and building a keezer from a chest freezer — with an emphasis on not drilling into a sealed refrigeration system, not guessing at gas pressure, and leaving yourself a way to service the thing later. If a step involves wiring, gas, or anything structural beyond your skill level, hire a licensed trade and follow the appliance manual.
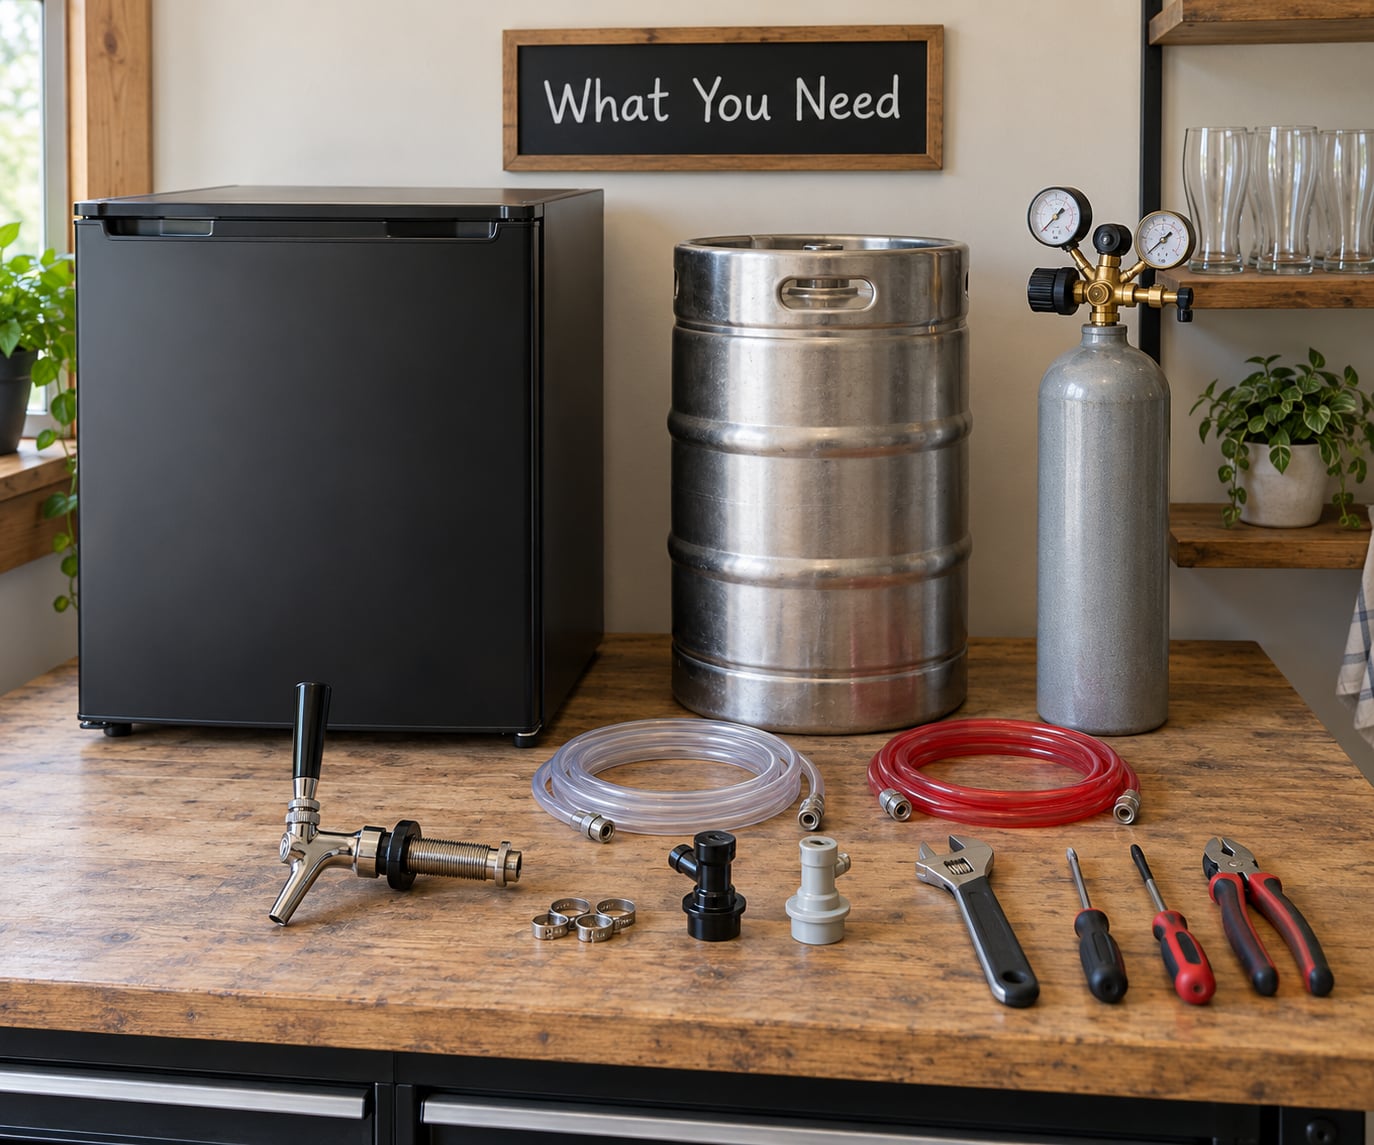
What You Need
Two build routes cover almost every home kegerator. A refrigerator conversion puts the keg inside an upright or mini fridge and mounts the faucet through the door, which keeps the beer line short and cold with no extra cooling hardware. A chest freezer keezer holds the keg in an insulated freezer under a hinged wood collar, with taps installed through the collar so the whole vessel stays cold.
Convert a refrigerator when you need one or two kegs in a small footprint and want the simplest possible plumbing. Build a keezer when you want two or more taps, better insulation, or a piece of furniture that looks deliberate in a garage or basement bar.
Core hardware for either route
- Appliance: a small refrigerator or a chest freezer, plus a temperature controller if the built-in thermostat cannot hold the range you need.
- Keg: a homebrew ball lock or pin lock keg, or a commercial Sankey keg if that is what you will be tapping. One half-barrel is roughly 15.5 gallons, and it is the standard starting size.
- Coupler: a coupler matched to your keg type, plus an adapter if you mix homebrew and commercial kegs on one system.
- CO2 cylinder and regulator: a cylinder with a threaded connection your regulator accepts, and a regulator with a gauge so you can read the pressure at the keg rather than guessing.
- High-pressure gas line: rated for cylinder pressure, connecting the regulator to a disconnect and then to the keg’s gas post. Red or orange tubing is the common color code.
- Low-pressure beer line: food-safe tubing running from the liquid post to the shank. Length matters more than most builders expect, because it sets pour speed.
- Faucet and hardware: a faucet, a shank, a tailpiece, a beer line connector, a wing nut, and a drip tray for a door mount. A tower kit replaces the shank with a manifold and multiple faucets.
- Tools and sealants: a screwdriver set, a tape measure, a bucket, towels, a level, a marker, and food-safe silicone or gaskets for anything that touches beer.
How a single-keg build differs from a multi-tap bar build
A single-keg system is one faucet, one gas line, one beer line, and one coupler. Everything fits inside a small refrigerator, and the faucet mounts in the door with no drilling into the cabinet.
A multi-keg build adds a gas tee, a tower with two or three shanks, one beer line per tap, and a cooling plan for the tower itself. Half-barrel kegs on two sides of a standard chest freezer usually fit without a second appliance; four taps in an upright fridge needs a much larger unit and careful shelf planning.
Keep the compressor, thermostat, and any refrigerant lines exactly where the manufacturer put them. Every part rated for pressure or for food contact should be installed to its own instructions rather than to a shortcut.
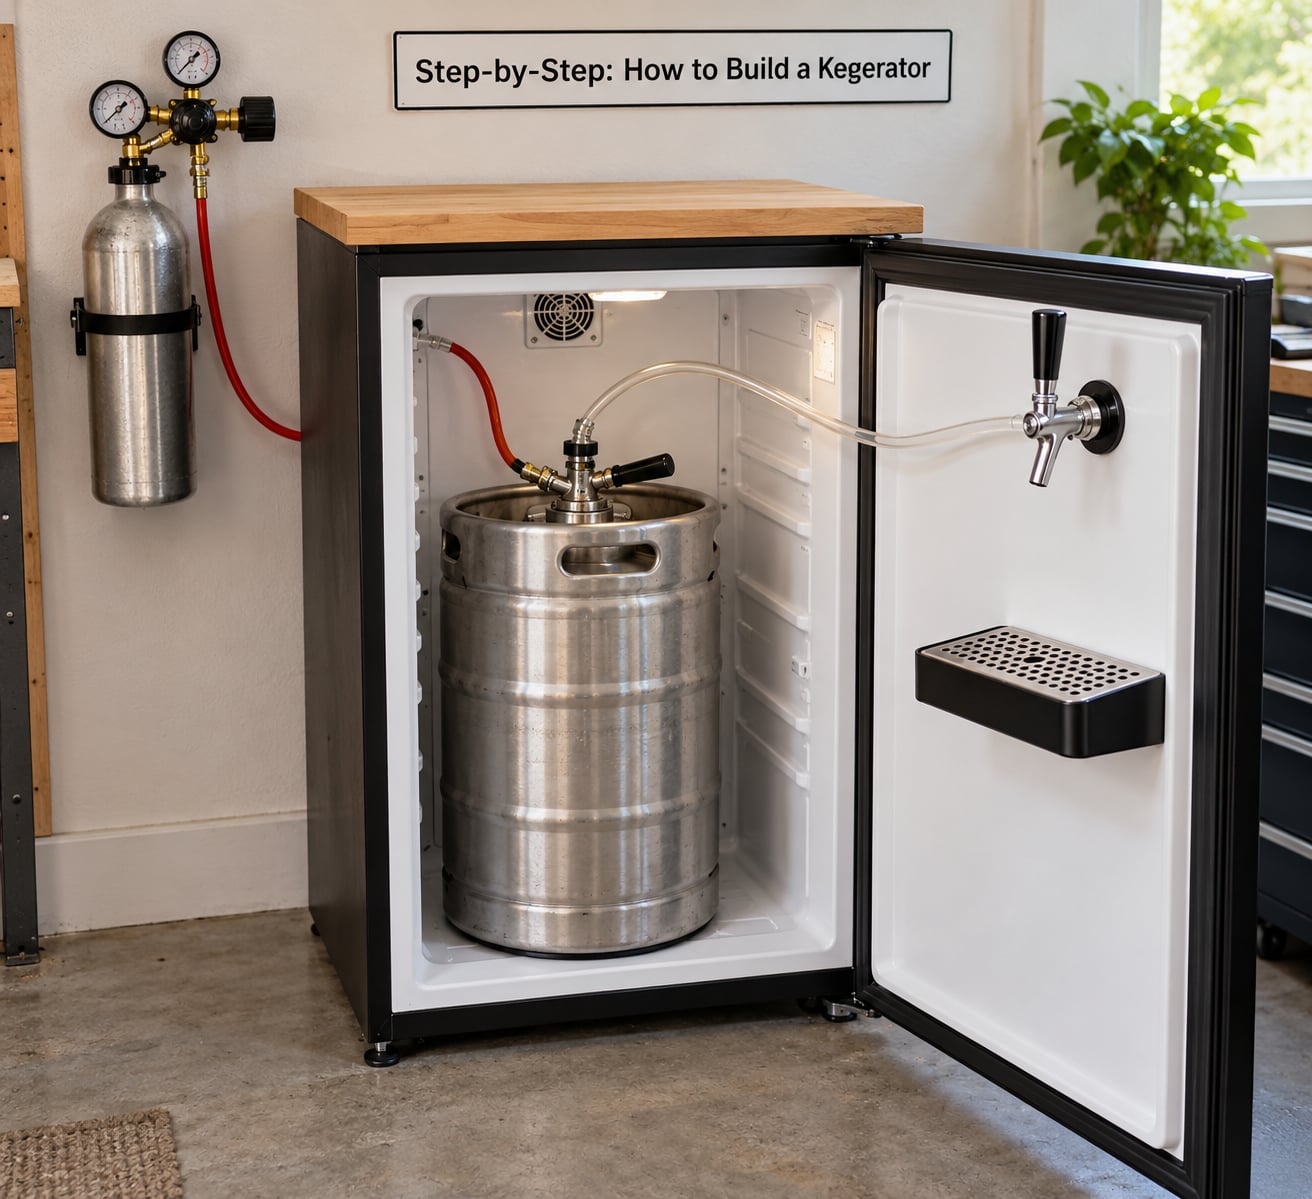
Step-by-Step: How to Build a Kegerator
Choose the Kegerator Format
Decide the format before you buy anything, because the appliance, the faucet mount, and the line layout all follow from that one choice.
A portable single-keg unit is the fastest route. It needs no tools, sits anywhere with a wall outlet, and gives you one tap. It is the right pick for a patio, a garage, or a first keg.
A refrigerator conversion is the most common DIY project. You drill the door, not the cabinet, mount a shank, and route tubing to a single keg inside. Add a second faucet and you have a two-tap system that still fits under a counter.
A built-in or multi-keg system is the serious version. It needs a chest freezer, a collar or a tower, a gas distribution setup, and usually a dedicated temperature controller. Plan the serving capacity first — number of guests, number of beer styles — then size the appliance around it. Measure the interior height and width against a full keg before you pay for anything.
Prepare the Refrigerator
Measure the interior and confirm the appliance can actually reach serving temperature before you modify anything. A kitchen fridge holds 38°F easily; a beverage cooler often has a compressor that is too small for a room warmer than 70°F, and a dorm-style mini fridge may not recover well from an open door.
For a used appliance, run the freeze test first: plug it in, set it to its coldest setting, and give it overnight. It should get cold enough to freeze a bottle of water laid on its back inside. If it does not, the compressor is weak and the build will disappoint you later. Unplug the unit before you take anything apart, and remove the door liner or interior panels only as the manual describes.
Clear out the door shelves and any drawer that eats floor space, and protect the interior surfaces with a washable mat or trimmed plastic bin if you want a surface for the keg to sit on. Keep the air path clear: the compressor needs room to move air, and a tight-packed interior runs warmer than it looks.
Mark which post on the keg is gas and which is liquid before the keg goes in. Grey tape on the gas post and black on the liquid post is the common convention, and it saves you from tapping a keg backwards later.
Install the Keg, Faucet, and Lines
Set the keg inside and position it so the coupler and disconnect reach the door or tower without the tubing stretched taut. Seat the keg flat and centered so the gas and liquid posts sit at similar heights and the coupler does not fight you when you swap kegs.
Mount the faucet through the door or the collar. Work from the outside in, remove the door’s plastic liner if the hole passes through it, and make the hole the size your shank actually requires — a 7/8-inch hole saw is common for shank and tailpiece hardware. Keep the drill perfectly square to the panel so the shank sits straight and the handle clears the door when it swings.
Never drill through the cabinet walls, the back, or the bottom of an appliance. That is where refrigerant lines and the compressor loop live, and piercing them ends the appliance. Door-mount and collar-mount designs exist precisely because they let you skip that risk.
Run the beer line from the keg’s liquid post to the shank’s connector. Cut the length for your system rather than guessing, route it in a smooth curve with no sharp bends, and secure it so it cannot rub against a cooling line or the compressor housing. A kink or a pinch in the line shows up later as a pour that stops halfway down the glass.
Seal the shank with the hardware’s own gasket, and add a drip tray under the faucet. If your faucet has a flow-control lever, that lever is a coarse adjustment, not a replacement for balancing the line.
Connect and Test the CO2 System
Stand the cylinder upright where it cannot be knocked over, ideally on a floor or in a rack that keeps it vertical. Follow the cylinder and regulator instructions exactly, and never test a fitting by ear alone or by holding your face near a suspected leak.
Attach the regulator to the cylinder, run the high-pressure gas line to a disconnect near the keg, and continue from the disconnect to the keg’s gas post. A disconnect lets you cut gas to one keg without shutting the whole system down. Tighten fittings by hand and then only as far as the manufacturer specifies — over-tightening a flare or a thread strip is its own leak.
Pressure test before you connect a keg. Mix dish soap and water in a spray bottle, then spray every fitting, the disconnect, and the regulator connection. Bubbles mean a leak; dry surfaces mean a seal. Fix what bubbles, wipe it down, and test again. Do this the same way every time you work on the system.
When you are ready to charge the keg, open the cylinder slowly and bring the regulator up to a conservative starting pressure. Do not exceed the regulator’s rated pressure. A pressure that climbs on its own while the system is closed usually means a leak somewhere, and that is a repair job, not a setting to ignore.
Chill, Tap, and Serve
Chill the keg and the lines before you pour anything. A keg that goes into the fridge warm will need many hours to come down, and cold beer poured through a warm line foams badly. Most homebrewers leave a freshly filled keg in place overnight before tapping.
Tap according to your coupler and your beer type. Attach the coupler with the gas and liquid ports aligned correctly, attach the disconnect, and open the cylinder valve. Then open the faucet and let beer run until it stops sputtering and turns to clear foam.
Set serving pressure conservatively to start — roughly 10 to 12 PSI for most ales near 38°F, a little lower for lighter beers and higher for nitro setups that use their own restrictor hardware. Pour a full test glass and judge three things: the temperature, the carbonation level, and whether the pour speed feels right.
If the glass foams head over heels, the line is too short for the pressure, the beer is too warm, or the faucet spout is aerating the pour. If it pours flat and slow, the line is too long. Trimming a few inches is cheaper than any part you can buy.
Common Mistakes
Most disappointing first builds come down to a handful of predictable errors. These are the ones worth catching before you tap a full keg.
Drilling into a refrigerant line. The fix is not a repair technique — it is prevention. Mount on the door or a collar and never pierce the cabinet. Unplug the appliance before any drilling, and treat the back and underside of the unit as off limits.
Too little cooling. Serving temperature is roughly 34 to 38°F for lagers and 38 to 42°F for most ales. A small compressor fighting a warm room will drift above that, and warm beer plus cold air is the classic foam combination. Add a temperature controller, lower the room temperature, or choose a bigger compressor.
An overloaded or undersized appliance. Two half-barrel kegs in a dorm mini fridge leaves no room for airflow, and the compressor humps in chest freezers steal the vertical space you thought you had. Measure with the compressor hump in mind, and leave clearance on the sides.
Guessing at line length. Line length sets pour speed as surely as pressure does. Cut the line to your system’s measured restriction, keep the run smooth, and re-cut it rather than adding a kink to slow the pour down.
Kinked or pinched tubing. Route lines along a path with no tight bends, and secure them so door hinges and compressor vibration cannot pinch them over time. A restriction shows up as a pour that stalls or runs warm and foamy.
Loose fittings and unchecked connections. Gas connections should be dry and tested with a soapy solution before every first keg of the season, not just at build time.
Wrong faucet height. Set the spout so a tall glass fits under it and the handle does not hit the door when it swings. Check clearance before you tighten the shank hardware.
Excessive CO2 pressure. Turning the regulator up to force a slow pour just produces foam and drives excess carbonation into the beer. Change the line length instead, and stay within the regulator’s rated pressure.
Poor cylinder placement. A cylinder standing loose in a busy garage is a hazard. Keep it upright, secured, and in a ventilated spot, away from heat.
Skipping the purge. Air in the lines makes the first glass undrinkable. Run beer through the faucet until it comes out clear and settled, then wipe the shank.
A few habits keep the system healthy. Buy food-safe components for anything that touches beer, and label gas lines, beer lines, and disconnects so the next person servicing the kegerator knows what they are touching. Leave service access — a removable door panel or a hinged collar beats permanent fasteners. And test the whole system cold and empty a day before anyone is coming over. If the kegerator is part of a bigger gathering plan, our cookout shopping list guide covers the food side of the same day.
For ongoing upkeep, clean the beer lines every few weeks or between kegs with a line-cleaning solution, wash the coupler, and check the regulator and disconnects while the system is under pressure. Swap a cylinder well before it runs empty rather than at the moment you need the keg.
Frequently Asked Questions
Can I turn an old refrigerator into a kegerator?
Yes, and most home kegerators start that way. An upright or mini refrigerator works well for a single keg as long as it reaches serving temperature. Unplug it, mount the faucet through the door, run a beer line to the keg and a gas line from a regulated cylinder, and leave the cabinet walls untouched. Run a freeze test on a used unit first: if it cannot freeze a water bottle overnight, the compressor will not keep up.
What is the best temperature for a home kegerator?
Around 38°F suits most ales, and lagers taste best nearer 34 to 36°F. Keep the whole vessel at one stable temperature rather than swinging between cold and cool, because swings cost you carbonation. A chest freezer with a collar holds temperature well. A small upright refrigerator often needs a temperature controller to stay in range on a warm day.
Do I need a specialized refrigerator to build a kegerator?
No. You need an appliance that holds serving temperature reliably and has room for your keg with airflow around it. That can be a kitchen refrigerator, a beverage cooler, or a chest freezer converted into a keezer. Kitchen fridges are often the most capable because their compressors are sized for real room temperatures. Whatever you use, follow the manufacturer’s instructions for anything you relocate.
How much CO2 pressure should I use on a home kegerator?
For most ales, start near 10 to 12 PSI at about 38°F and adjust from there. Lighter beers usually pour well a bit lower. Nitro stout is the exception, running around 30 to 35 PSI through a restrictor faucet. Never exceed your regulator’s rated pressure. If a pour runs too fast, change the line length rather than turning the pressure down.
How long does it take to build a kegerator?
A single-keg refrigerator conversion with a door-mounted faucet takes a few hours once you have the parts, plus time to chill the keg. A chest freezer keezer with a wood collar is a weekend project. Add a week if you are sourcing parts, and never rush the leak test. Cutting beer line, drilling the door, and purging the lines all happen faster than people expect.
Conclusion
Start by picking the format that matches how you actually drink — one tap and a small fridge, or a chest freezer with a collar and multiple taps. Confirm the appliance holds serving temperature before you modify it, and buy food-safe fittings and pressure-rated tubing you intend to keep.
Then assemble the hardware without drilling into the cabinet, soak-test every gas connection, chill the keg overnight, and pour a test glass before anyone else is in the room. That last habit — testing a day early — has saved more gatherings than any part on this list.