
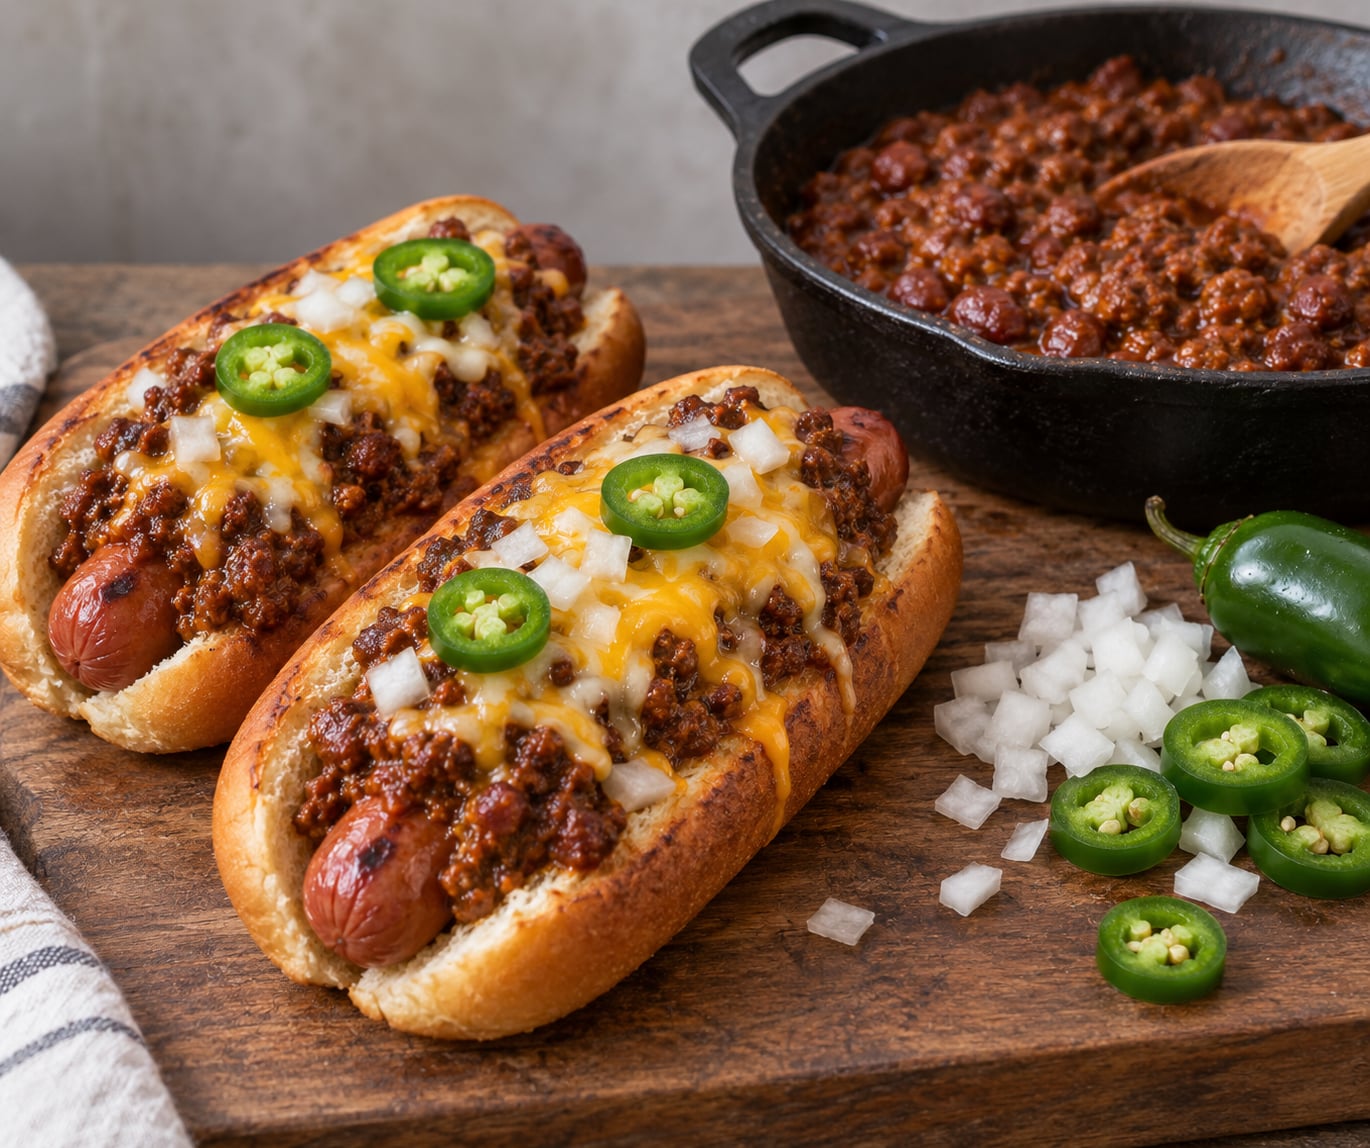
Chili dogs come down to one thing: a thick, well-seasoned beef chili that clings to the hot dog instead of sliding off it. To make chili dogs the way a diner counter does, brown the beef first, simmer the chili until the liquid cooks down, toast the buns, and assemble everything in the last minute. Forty minutes, four servings, no premade can involved.
The most common version I see is a bean-less meat sauce seasoned with chili powder, cumin, and a little vinegar. That is the style used in this recipe, and it is the one that clings best. Add a layer of cheese and the whole thing turns into the chili cheese dog most people are really after.
If you are building a table for a game night, our jalapeno poppers for burger night make a natural first plate before the dogs come out.
What You Need
Knowing how to make chili dogs starts with the list below. Everything is a supermarket item, and the measurements are written for four hungry people.
- 1 pound ground beef (80/20 for flavor, 90/10 for less grease)
- 1 large onion, diced
- 2 garlic cloves, minced
- 2 tablespoons chili powder
- 1 tablespoon ground cumin
- 1 teaspoon dried oregano
- 1/2 teaspoon garlic powder
- Pinch of cayenne pepper
- 1 can (15 ounces) crushed tomatoes
- 1 cup beef broth, or water
- 1 tablespoon tomato paste
- 1 tablespoon Worcestershire sauce
- 1 teaspoon apple cider vinegar
- 1 teaspoon brown sugar
- 1 can (15 ounces) kidney beans, drained and rinsed (optional)
- 8 all-beef hot dogs, natural casing preferred
- 8 top-split hot dog buns
- 2 cups shredded sharp cheddar
- Butter or oil for the buns
Optional toppings: yellow mustard, diced white onion, pickled jalapeño slices, relish, sour cream, chopped scallions, or a spoonful of the tangy fresh guacamole cut with lime and cilantro.
Three easy swaps cover most preferences. For a thicker chili, cut the broth to a half cup and simmer another ten minutes. For a milder version, use mild chili powder, leave out the cayenne, and add the beans. For more heat, stir in a chopped chipotle in adobo or a tablespoon of minced fresh jalapeño. To save time, start with a can of plain beef chili and doctor it with the spices, vinegar, and Worcestershire sauce listed here.
Step-by-Step
Step 1: Brown the Beef and Build the Chili Base
Heat a skillet over medium-high heat and add the ground beef. Spread it out and leave it alone for two minutes so it crusts before you break it up with a wooden spoon.
Once the beef is browned, drain off the grease. Push the meat to the sides, drop in the diced onion, and cook it in the rendered fat until soft and translucent, about four minutes. Stir in the garlic for thirty seconds.
Cook the ground beef to 160°F (71°C), the safe minimum internal temperature recommended for ground meat by the USDA. A food thermometer is the only reliable way to check, since color alone is misleading.
Add the chili powder, cumin, oregano, garlic powder, and cayenne to the pan and stir for about a minute. Toasting the spices in the hot fat wakes up the aromatics and is the single biggest flavor step in the whole recipe.
Step 2: Simmer the Chili Until Thick and Flavorful
Pour in the crushed tomatoes, tomato paste, broth, Worcestershire sauce, vinegar, and brown sugar, then add the beans if you are using them. Bring the pan to a boil, then turn the heat down to low.
Simmer uncovered for 20 to 30 minutes, stirring now and then. Ten minutes is the rushed version, and the difference is obvious in the flavor. Twenty-five minutes is where the chili stops tasting like a tomato mixture and starts tasting like chili.
How to make chili dogs comes down to this test: drag a spoon through the pan and watch the bottom. If the line holds for a second before the sauce closes over it, the chili is ready. If it fills in instantly, give it five more minutes.
Step 3: Toast the Hot Dogs and Warm the Buns
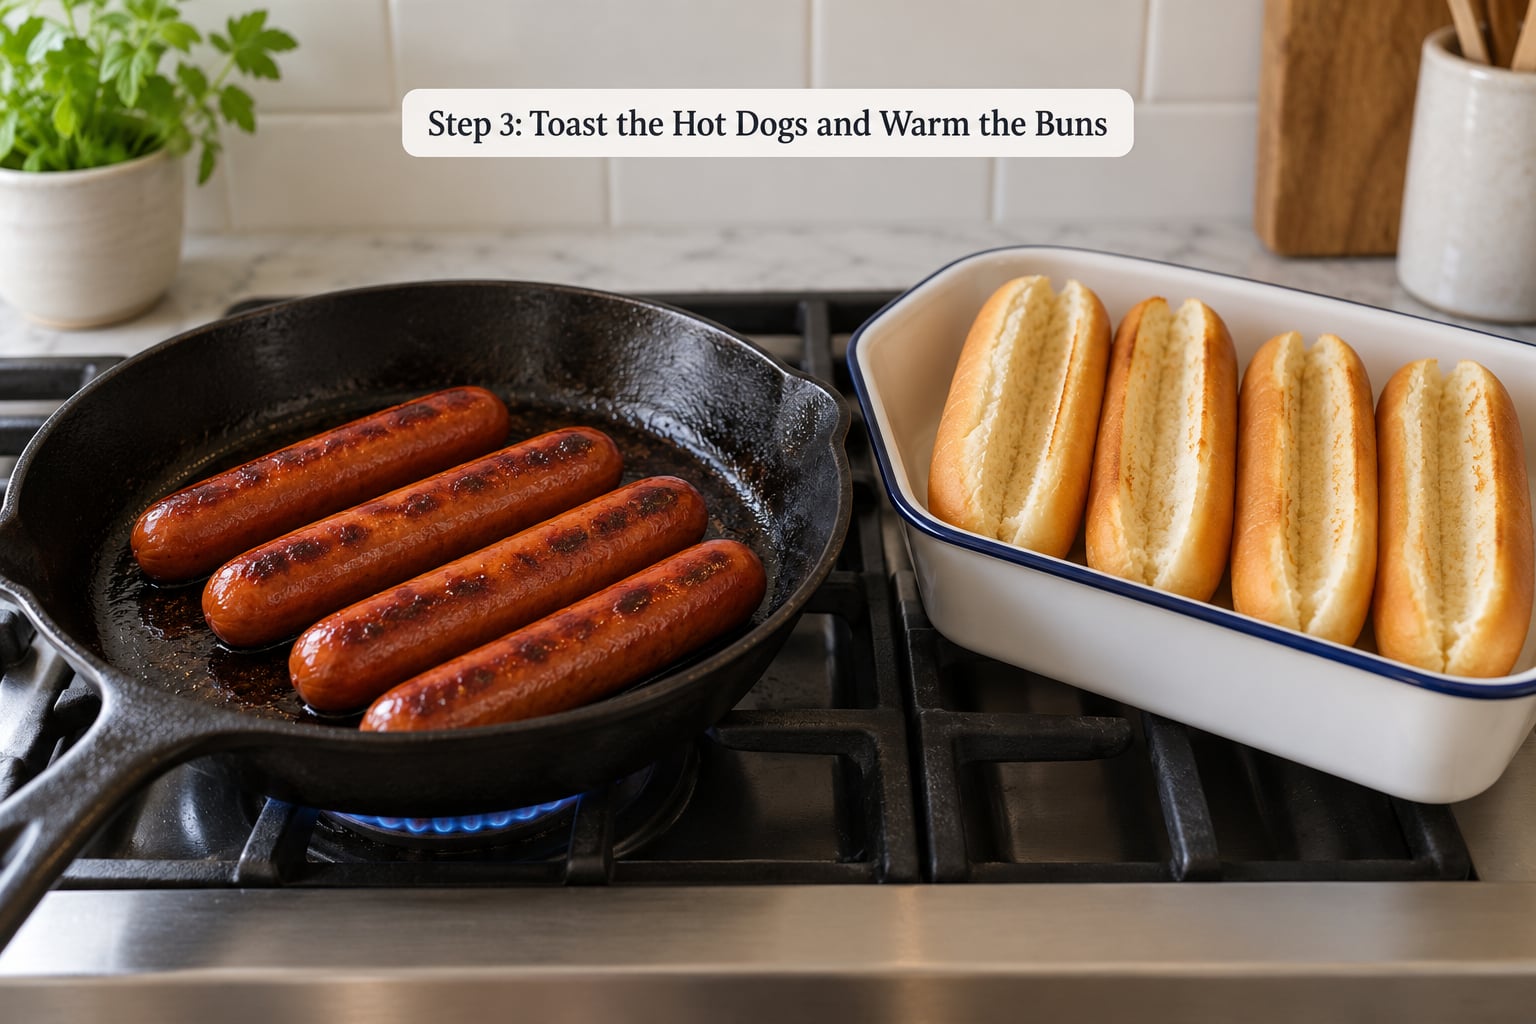
While the chili simmers, heat the dogs. Pan-frying over medium heat gives the best surface browning, and it takes about 6 to 8 minutes with regular turning. Boiling works too, but keep the water at a bare simmer and do not pierce the dogs, or they split and lose their juices.
An air fryer is the fastest method. Set it to 400°F (200°C), place the dogs inside, and cook for 7 to 9 minutes, turning halfway through. They come out evenly hot with no standing water on the surface, which is exactly what you want here.
Toast the buns cut-side up in the same skillet with a thin coat of butter for a minute or two, or put them in the oven at 350°F (175°C) for four minutes. Standing the buns upright in a baking dish while they toast keeps them open, and a spread of mayo on the cut face gives you a better moisture barrier than butter does.
Step 4: Add Cheese and Assemble the Chili Dogs
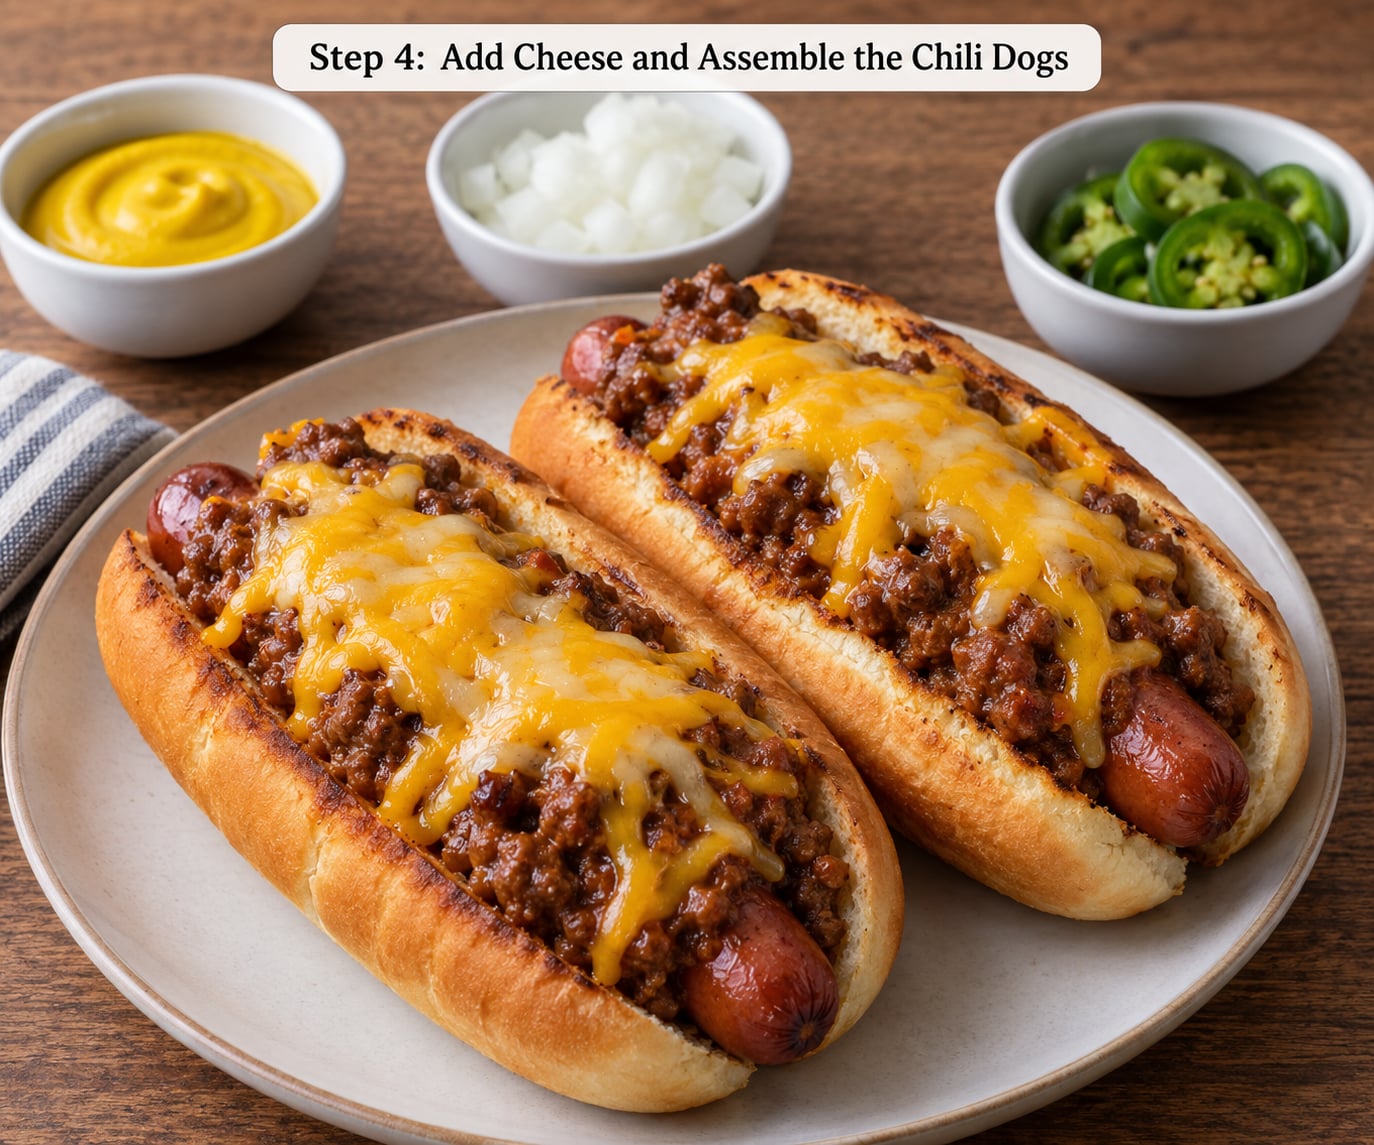
Lay each dog in its toasted bun and spoon about a third of a cup of chili over the top. Work from the outer edge of the bun toward the center so the weight sits in the middle instead of dragging the bread apart.
Shred the cheese from a block if you can. Pre-shredded cheese has anti-caking agents on it that keep it from melting smoothly, and that is why the cheese on a homemade chili dog often looks dry instead of gooey.
For the meltiest result, put a layer of cheese in the empty bun first, add the dog, then add chili and more cheese on top. Cheese under and over the chili gives the whole sandwich structure, and it holds together when you pick it up.
Finish with mustard, diced onion, and jalapeño slices. Add condiments after the chili goes on so the bread does not soak through, and serve them right away.
Step 5: Melt, Serve, and Store Leftovers
Put the assembled dogs under the broiler for 30 to 60 seconds, or in the oven at 400°F (200°C) for about five minutes, to melt the cheese on top. Watch them the whole time, since broiler cheese goes from melted to scorched in seconds.
A finished chili dog should have chili thick enough to sit in a mound, cheese visibly melted and lightly browned at the edges, and a bun that still holds its shape when you lift it. If the chili runs off the sides, it needs more reduction.
Store leftover chili in an airtight container in the refrigerator for three to four days, and keep the buns and dogs separate so nothing goes soggy. To reheat, warm the chili in a saucepan over low heat with a splash of water, and toast the buns again for two minutes. Assemble a fresh dog rather than reheating an assembled one.
To finish the meal, our root beer float is the diner-style dessert that pairs with this.
Common Mistakes
The chili is watery. This is the number one problem. Simmer it uncovered longer and stir more often, and skip the broth entirely if you doubled it by accident. Thick chili holds its shape on the dog; thin chili is just a hot dog with warm sauce on it.
The seasoning tastes flat. You either skipped the spice-toasting step or added the spices too late. Bloom them in the hot beef fat for a full minute before liquid goes in, and add a splash of vinegar at the end if it tastes heavy.
The hot dogs come out dry or split. Boiling water that is at a full rolling boil makes the casings burst, and a long cook dries out lean dogs. Use a bare simmer, turn them a few times, and pull them the moment they are heated through.
The buns turn to mush. Toast the buns rather than warming them, stand them upright while they toast, and put a thin layer of mayo on the cut face before the chili lands. Assemble no more than a minute or two before serving.
The beef gets rubbery. Once you push it out of the pan and start simmering, stop stirring constantly. Let it sit undisturbed for a few minutes so it stops cooking itself dry.
You assemble everything early. Chili dogs are a last-second dish. Keep the chili warm on low, keep the dogs hot in a low oven, and build them at the table.
One more tip worth knowing: all-beef natural casing dogs have a snap that holds up against soft chili, while skinless franks go bland next to it. Score the dogs with shallow diagonal cuts before cooking, and the grooves give the chili somewhere to settle, plus crisp edges that stay crunchy under the sauce.
Frequently Asked Questions
Can you cook hot dogs in an air fryer?
Yes, and it is the fastest way to get evenly heated dogs with no standing water on the surface. Set the air fryer to 400°F (200°C), add the dogs, and cook for 7 to 9 minutes, turning halfway through. Cook in a single layer so the air circulates, and check a minute early if your dogs are thin or frozen. Toast the buns in the same basket for the last two minutes if they fit alongside.
What is the difference between hot dog chili and regular chili?
Hot dog chili is thinner, smoother, and usually bean-less, and it is seasoned a little sharper so it tastes good sitting on top of a hot dog. Regular chili is thicker, often contains beans, and is built to stand on its own as a bowl food. The practical rule is that hot dog chili needs to cling rather than pool, so skip the beans and reduce it until a spoon trail stays open for a second.
How do I keep hot dog buns from getting soggy?
Toast the buns, stand them upright in a dish so the base stays dry, and spread a thin layer of mayo on the cut face as a moisture barrier. Butter works too, but mayo holds up better. Add the chili right before serving rather than letting assembled dogs sit, and put condiments like mustard on top of the chili instead of underneath it so the bread never touches liquid directly.
Can I make the chili ahead of time?
Yes, and the flavor is usually better the next day. Hot dog chili keeps three to four days covered in the refrigerator, and it also freezes well in individual portions for up to three months. Reheat it in a saucepan over low heat with a splash of water or broth, since it thickens as it sits. If it gets too stiff, loosen it with liquid until it drips off the spoon.
How do I control the spice level of the chili?
Build the heat in layers you can adjust. Chili powder and cumin bring warmth without real heat, cayenne adds clean heat, and chipotle in adobo or minced fresh jalapeño add heat with smoke and tang. Start with a moderate amount of cayenne and taste the finished chili before serving, then let people top their own dogs with jalapeños, hot sauce, or mustard at the table instead of spiking the whole pot.
Can I use frozen hot dogs?
You can, with a little extra planning. Thaw them in the refrigerator overnight if you have time, or cook them straight from frozen in an air fryer at 400°F (200°C) for about 10 to 12 minutes. Frozen dogs hold more water, so pat them dry with a paper towel after cooking and toast them in the pan for a minute to drive off surface moisture before they go in the bun.
Conclusion
Cook the chili until it is thick enough to hold a spoon trail, toast the buns, and assemble the dogs only once everything else is ready. That sequence is the whole recipe, and it is what separates a chili dog from a hot dog with sauce on it.