
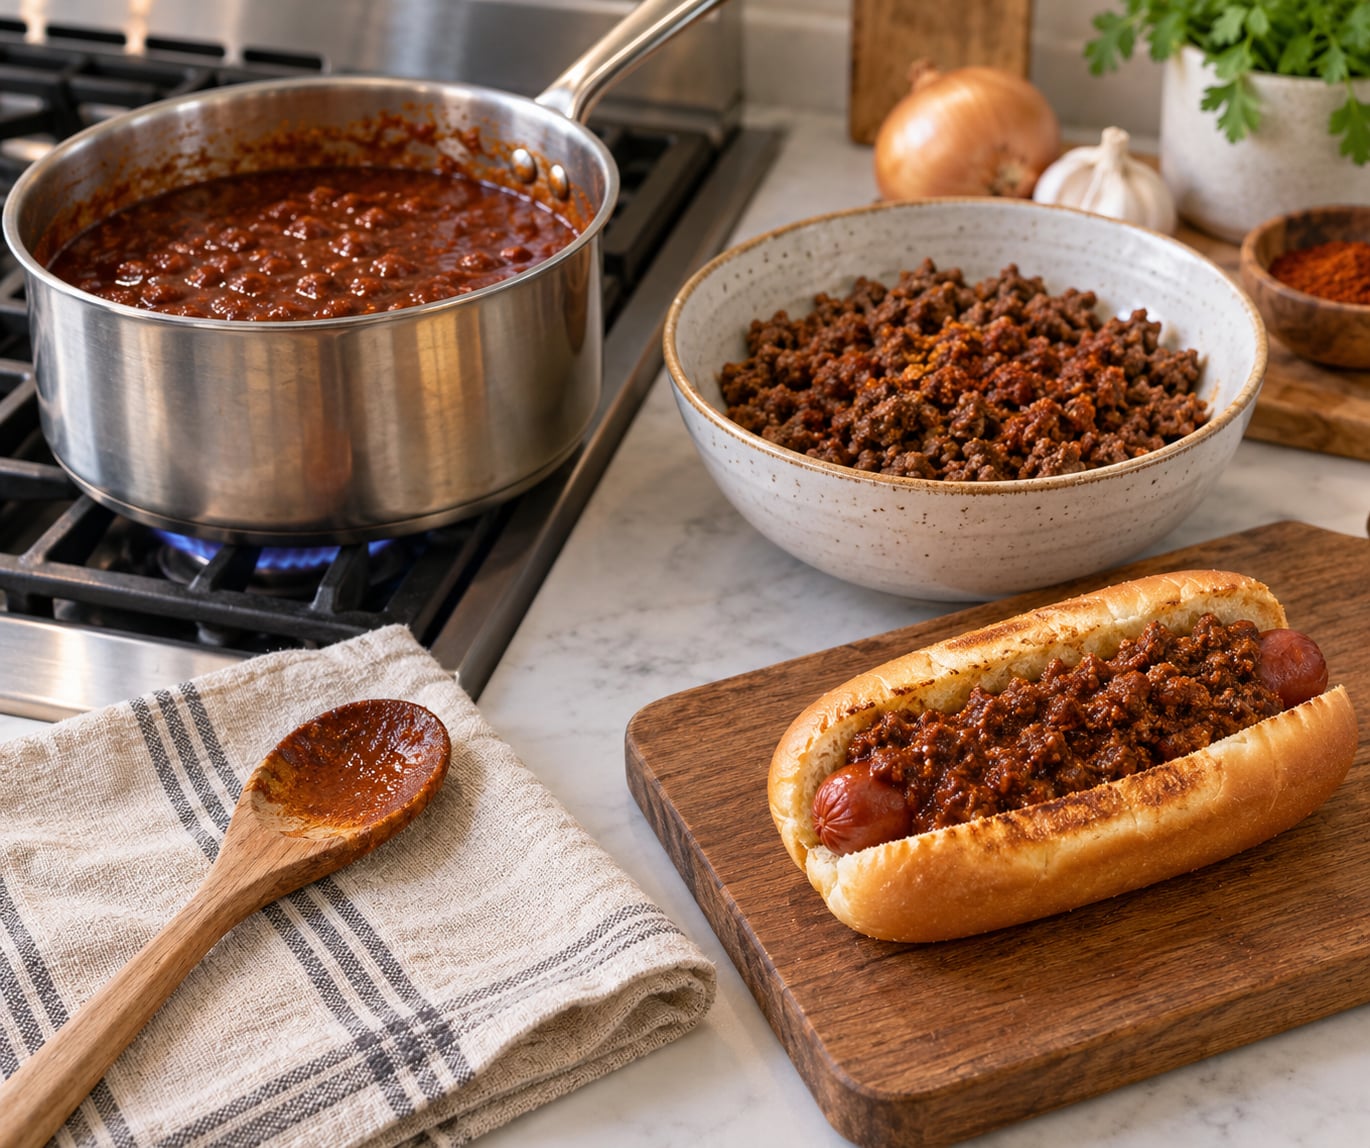
Hot dog chili sauce is a beanless, all-meat chili con carne seasoned with chili powder, cumin, garlic, and paprika, simmered until it is thick enough to cling to a frankfurter. Here is how to make hot dog chili sauce at home in about 45 minutes of stove time, and the difference from a jarred sauce is texture: diner chili is fine and almost spreadable, never chunky.
This is the Coney Island version, which is the one most people mean when they say hot dog chili. Spiced forward, only lightly sweet, and no beans anywhere in it.
Before you start, the quick version:
- Prep: 10 minutes
- Cook: 35 to 45 minutes
- Yield: roughly 3 cups of sauce, enough for 12 to 15 hot dogs
- Difficulty: easy, one pot
- Choose your profile: sweet and mild, or vinegar-forward and spicy? The recipe splits at the final seasoning step, so you can go either direction without starting over.
One more thing before the steps. The most common complaint about homemade hot dog chili is that the meat stays in lumps and the sauce tastes like a sloppy joe. Blending most of the browned beef with water fixes that, and it costs you about 60 seconds.
What You Need
Everything below goes in one skillet or Dutch oven. Measurements are US first, metric after.
The sauce
- 1 lb (450 g) lean ground beef, 80/20 or 90/10
- 2 tbsp (30 ml) olive oil, plus more as needed
- 1/4 cup (about 60 g) yellow onion, minced fine
- 2 tbsp (32 g) tomato paste
- 1 1/2 cups (360 ml) water, plus 1/2 cup (120 ml) more for blending
- 2 tbsp (10 g) chili powder, a blends-only blend, not pure ground chile
- 1 tsp (2 g) smoked paprika
- 1/2 tsp (1 g) ground cumin
- 1/2 tsp (1.5 g) garlic powder
- 1/2 tsp (1.5 g) onion powder
- 1/4 tsp (0.5 g) cayenne pepper, optional
- 1/8 tsp each (0.5 g) allspice and cinnamon
- 1 tbsp (15 ml) Worcestershire sauce
- 1 tsp (5 ml) apple cider vinegar
- 1 tsp (4 g) brown sugar, optional, for a Western-leaning sweet profile
- 1/2 tsp (3 g) kosher salt, plus more to taste
Equipment
- Heavy skillet or Dutch oven with a lid
- Wooden spoon or spatula
- Blender or immersion blender, optional but recommended for fine texture
- Fine-mesh strainer, only if you blend the meat
Swaps that work
Ground turkey or chicken works fine, and browning it well matters more than which animal it is. Turkey releases less fat, so add a little olive oil and salt it earlier. Some brands carry added moisture, which means you may need less water in the pot.
Tomato paste instead of tomato sauce is the right call. Sauce arrives already diluted with water, so the pot will stay thin and the flavor never concentrates. Paste cooks down to a dark, almost brick-colored sauce in about a minute, and that caramelization is most of what makes the batch taste like a diner.
Beans are optional, but know where you stand. Traditional hot dog chili has none, and Coney dogs are built around an all-meat sauce. If you want beans anyway, stir them in during the last 15 minutes so they stay intact, and cut the water by a third so the pot does not go loose.
Chili powder type changes everything. A blends-only chili powder carries chile, cumin, oregano, and garlic already mixed, which is what this recipe assumes. Pure ground chile, like chipotle or ancho powder, is a different ingredient and will turn the batch smoky and sharp. Use blends-only here, then adjust with cayenne if you want more heat.
Apple cider vinegar is the acid that makes it taste authentic. Red wine vinegar or distilled white vinegar both work. For a gluten-free batch, check the Worcestershire label, since many versions contain wheat, and swap in tamari or coconut aminos plus a splash of extra vinegar.
Low-carb is easier than you would expect. Skip the brown sugar and the ketchup-style shortcuts other recipes reach for, keep the tomato paste to 2 tbsp, and lean on vinegar and Worcestershire for the depth. If you are building a burger alongside it, my note on how to make burgers with breadcrumbs vs without at home covers the patty side of the plate.
Step-by-Step: How to Make Hot Dog Chili Sauce
Brown the Beef and Build the Flavor Base
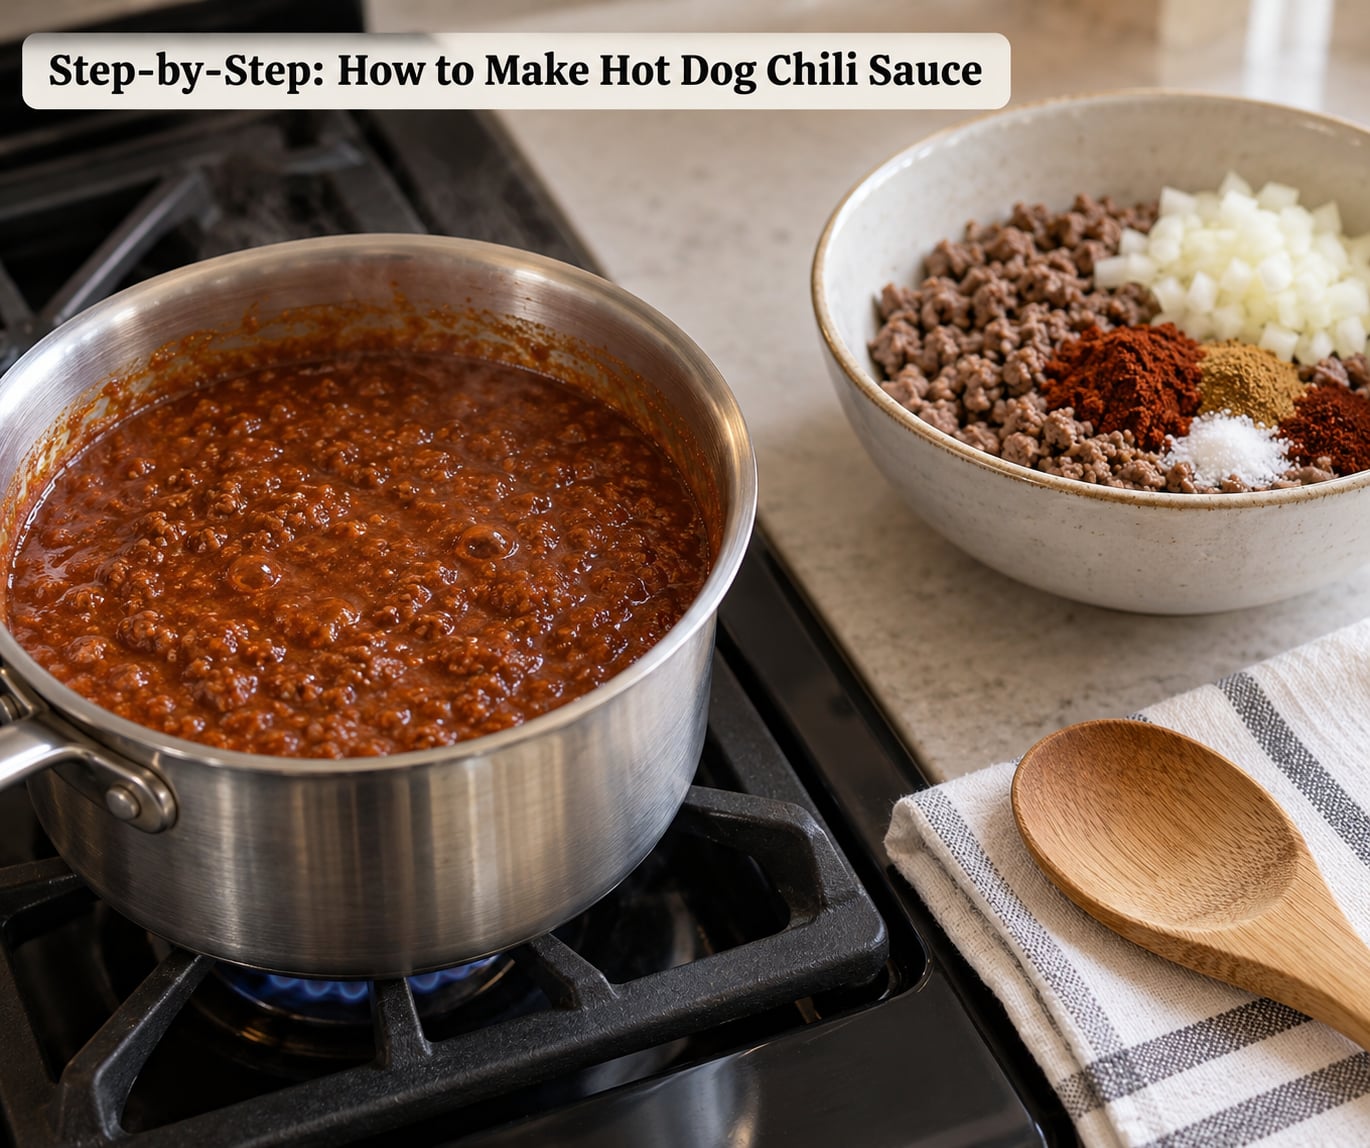
Heat the oil in a heavy skillet over medium-high heat until it shimmers, then add the beef in a single layer. Leave it alone for about 3 minutes so a crust forms, then break it up and cook another 4 to 5 minutes until the pink is gone and the crumbles are browned.
Ground meat is done at 160 F (71 C) according to USDA guidance. Drain the rendered fat into a jar and reserve it, because that fat is what you bloom the spices in and it carries flavor further than plain olive oil.
Drop the heat to medium and go back in about 1 tbsp of the reserved fat. Add the onion and cook 4 to 5 minutes until soft and translucent with just a hint of color at the edges. Mincing fine matters here, since the onion never fully breaks down in a short simmer.
Now add the chili powder, paprika, cumin, garlic powder, onion powder, allspice, and cinnamon. Stir constantly for 45 to 60 seconds until the pan smells toasted and the spices darken by a shade. This step is the whole ballgame for a sauce that tastes like chili rather than like beef with chili powder sprinkled on it. Skipping it is the single most common reason a homemade batch tastes flat.
Add the Tomato, Broth, and Seasonings
Stir in the tomato paste and cook it for a full minute, scraping the bottom of the pan. It will go from bright red to a dark rust color and the smell will shift from tinny to sweet. That is the point of this step, not a formality.
Pour in 1 1/2 cups (360 ml) of water, scrape again to loosen the fond, and add the Worcestershire, vinegar, brown sugar if using, and salt. Bring to a simmer, then turn the heat down so you see a bubble every second or two. Too hard a boil scatters the meat and burns the sauce against the pan.
Each ingredient has a job here. Water carries the spices and sets the body you are aiming for. Worcestershire brings salt, molasses, and tamarind, which is the savory depth most home versions are missing. Vinegar supplies the tang that makes diner chili taste bright rather than heavy. The brown sugar is the only sweetness, and it belongs to the Western profile more than the Coney one.
Simmer Until Thick and Season to Taste
Let it simmer uncovered for 30 to 40 minutes, stirring every 5 or so minutes so nothing catches. Partially covering it speeds things up and thickens it faster, but it also traps steam and keeps the sauce thinner, so go uncovered if you want control.
Here is where the fine texture happens. Scoop out about 80 to 90 percent of the browned meat, leave a little behind so the pot does not scorch, and blend that meat with the reserved 1/2 cup (120 ml) of water until it is a smooth paste with no lumps. Stir it back into the pot. What you have now is a sauce with real body that will stay put on a hot dog instead of running into the bun.
For a deeper diner-style version, keep going to two hours. The extra time is not about heat, it is reduction: the liquid evaporates, the tomato darkens further, and the flavors settle into something closer to what comes out of a real coney dog stand.
Know when it is done by looking, not by the clock. Dip a spoon in and hold it up sideways. The sauce should coat the back of the spoon with no free liquid pooling underneath. If it runs off clean, give it another 5 minutes. If it is so thick it plops off, splash in a quarter cup of hot water.
Taste and adjust before you serve. Needs more salt, add salt. Feels flat but not hot, add another splash of vinegar, which sharpens without adding heat. Too fiery for the people at the table, add brown sugar or a little more tomato paste, both of which round out the chile. Too sweet for a Coney-style batch, another teaspoon of vinegar fixes it in one shot.
Keep it warm on low, or cool it and refrigerate. Either way, taste it again after an hour, because the flavor keeps tightening as it sits.
Common Mistakes
The sauce is too watery. Most of the time the pot needed longer uncovered, or more water went in than the recipe called for. Finish it over medium heat without a lid and stir until it coats a spoon. If it never thickens, remember that flour and cornstarch both turn the texture grainy, so skip them.
It tastes bland. Either the spices never bloomed or the acid is missing. Toast the dry spices in the fat for a full minute before adding liquid, and finish with Worcestershire and cider vinegar rather than more salt. A bland chili is almost never a salt problem.
There is a greasy film on top. You did not drain the fat after browning, or you skipped the blend step that emulsifies the rest back in. Drain next time and reserve about a quarter cup for blooming the spices.
It is too hot. Heat built from a lot of chile cannot be removed once it is in, so the fix happens in the pot. Add brown sugar, more tomato paste, or both, then a splash of vinegar. To keep it milder next time, leave out the cayenne and start with 1 tbsp of chili powder instead of 2.
The meat is still lumpy. You stopped short of blending, or you blended only half of it. Pull 80 to 90 percent of the meat, blend it smooth with a little water, and stir it back in.
The hot dogs went soggy. This is a serving problem, not a sauce problem. Toast the bun, add a thin stripe of mayo or mustard, spoon the chili on the dog, and serve it in the wrapper or on a tray instead of pre-assembling. Holding a dressed hot dog for ten minutes is what turns the bottom of the bun to paste.
For the sauce that goes beside it rather than on it, my home burger sauce recipe takes five minutes and handles the same job with mayo, pickle brine, and mustard. The tangier option is this comeback sauce copycat, which is closer to a hot dog topping in spirit.
Storage and reheating. Cool the sauce to room temperature, then refrigerate it airtight for up to 3 to 4 days. Reheat on the stove over medium-low with a splash of water, stirring, and never in the microwave if you can help it, since the microwave dulls the flavor. It freezes well for 2 to 3 months in a freezer-safe container; leave a finger of headspace, thaw overnight in the fridge, and add water while it warms up. Thawed sauce is a little flatter than fresh, so a pinch of salt and a drop of vinegar bring it right back.
It also does more than hot dogs. Spoon it over chili cheese fries, loaded nachos, a baked potato with cheese, or a burger with the lid on. It works as a dip for fries with a little shredded cheese and sour cream stirred through after it comes off the heat.
Frequently Asked Questions
What makes hot dog chili sauce different from regular chili?
Hot dog chili sauce is beanless, uses more seasoning per pound, and cooks down thicker so it stays on the hot dog instead of sliding off. Eating chili is loose enough to ladle and usually carries beans. Hot dog chili is spoonable, heavily spiced, and cut with vinegar so it tastes bright rather than heavy.
Do I need to use ground beef for hot dog chili sauce?
Ground beef gives the richest traditional flavor, but the recipe works with ground turkey, chicken, or a plant-based meat alternative. Browning the meat properly matters more than which kind you pick, since the fond and rendered fat build the base of the sauce. With turkey, add a little olive oil and season it earlier because it releases less fat on its own.
How can I make hot dog chili sauce thicker?
Simmer it uncovered after the tomato paste and water go in. The liquid needs to evaporate for the sauce to concentrate, so keep stirring and check every 5 minutes. It is ready when the back of a coated spoon holds a thin layer with no free liquid underneath. Flour and cornstarch will get it there faster but leave a grainy texture.
Can I make hot dog chili sauce ahead of time?
Yes, and it usually tastes better the next day. Cool it to room temperature first, refrigerate it airtight, and use it within 3 to 4 days. For longer storage, freeze it in a freezer-safe container for up to 2 to 3 months and thaw it overnight in the fridge. Reheat on the stove with a splash of water and taste for salt before serving.
How do I make hot dog chili sauce less spicy?
Leave out the cayenne and start with 1 tbsp of chili powder instead of 2. If a batch is already too hot, add brown sugar, an extra tbsp of tomato paste, or both, plus a splash of apple cider vinegar. Sugar and acid round out chile heat that is already dissolved in the sauce, and neither one dulls the flavor the way simply using less chili powder does next time.
Conclusion
The step that decides whether your batch tastes like a diner is the first one: brown the beef properly, then drain the fat and bloom the spices in what you kept. Everything after that is adjustment.
Simmer it uncovered until it coats a spoon, taste it before anyone else does, and fix the salt, the vinegar, or the heat in small moves. Served on toasted buns with mustard and a sharp pickle alongside, it is the whole meal.