
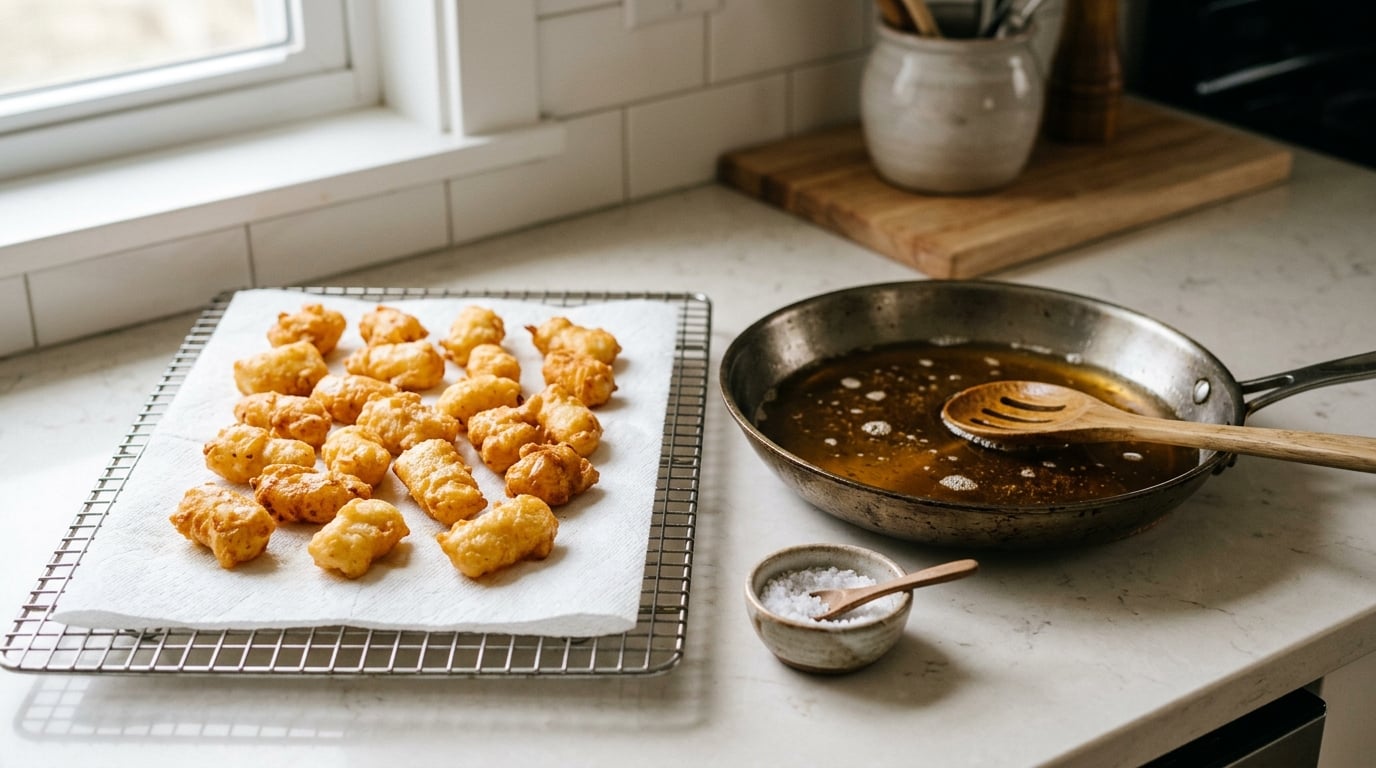
Cheese curds squeak when their surface is bone dry, the middle is still warm and springy, and a quick blast of heat forms a thin crust on the outside. Learning how to make cheese curds squeak is really about controlling moisture at three points: dry the curds properly, fry them in small batches, and press off the oil before they sit. The whole job takes about 30 minutes, one skillet, and a paper towel.
The sound is not a gimmick and it is not added. It comes from strands of calcium-bound casein protein on the curd surface rubbing against tooth enamel when you bite, and those bonds relax as curds age, chill, or get scorched by oil that was too hot.
Below is the whole method, then a diagnostic list for the batch that came out silent.
What You Need
Start with the curds themselves, because that decision drives everything downstream. Fresh curds from a creamery or a market are the easiest option: they are already cut, drained, and lightly salted, and they squeak loudest in the first day. Store-bought curds work fine as long as they are young and were never frozen, so check the packed-on date and how the bag feels.
Good curds are pale, glossy, and rubbery to the touch. They bend without cracking and snap back when you let go. If the bag feels heavy with liquid, or the curds are chalky and crumbly, put them back.
Ingredients
- Fresh or store-bought cheese curds, about 1 pound for two or three people
- Neutral, high smoke point oil such as canola, peanut, or vegetable oil, 2 to 3 inches deep in the pan
- Non-iodized salt, plus whatever seasoning you like
- Optional: garlic powder, onion powder, black pepper, smoked paprika, chives, or a small diced jalapeno
If you would rather make the curds from scratch, the ingredient list is short: one gallon of whole milk, half a packet of mesophilic culture, about a quarter teaspoon of liquid rennet, a quarter teaspoon of calcium chloride, and a tablespoon of non-iodized salt. That route takes three to four hours including the ripen, and it is the only way to get raw-milk curds, which squeak louder and hold that squeak longer than pasteurized ones.
Two details matter more than the recipe itself. Use milk that is not ultra-pasteurized, because heat-treated milk gives you a crumbly paneer-style cheese that never squeaks, and homogenized milk loses the fat globules that keep the curd glossy. And ripen to a pH of 5.1 to 5.5 before adding rennet, which is where the springy calcium-casein structure forms.
Equipment
- Wide heavy skillet or a medium saucepan, ideally 10 inch or larger
- Slotted spoon or spider for lifting curds out
- Fine-mesh strainer lined with butter muslin, or a clean towel
- Paper towels and a wire cooling rack or a plate lined with foil
- Instant-read thermometer for the oil
A wire rack matters more than it sounds like it should. Curds stacked on a flat pile of paper towel steam themselves, and a soft exterior is the opposite of what you are after.
Everything on this list is optional except a way to dry the curds and a way to heat oil. Skipping moisture control is the single reason people end up with greasy, silent curds, so treat the strainer and the towels as required equipment rather than extras.
Step-by-Step: How to Make Cheese Curds Squeak
Start with Fresh, Dry Cheese Curds
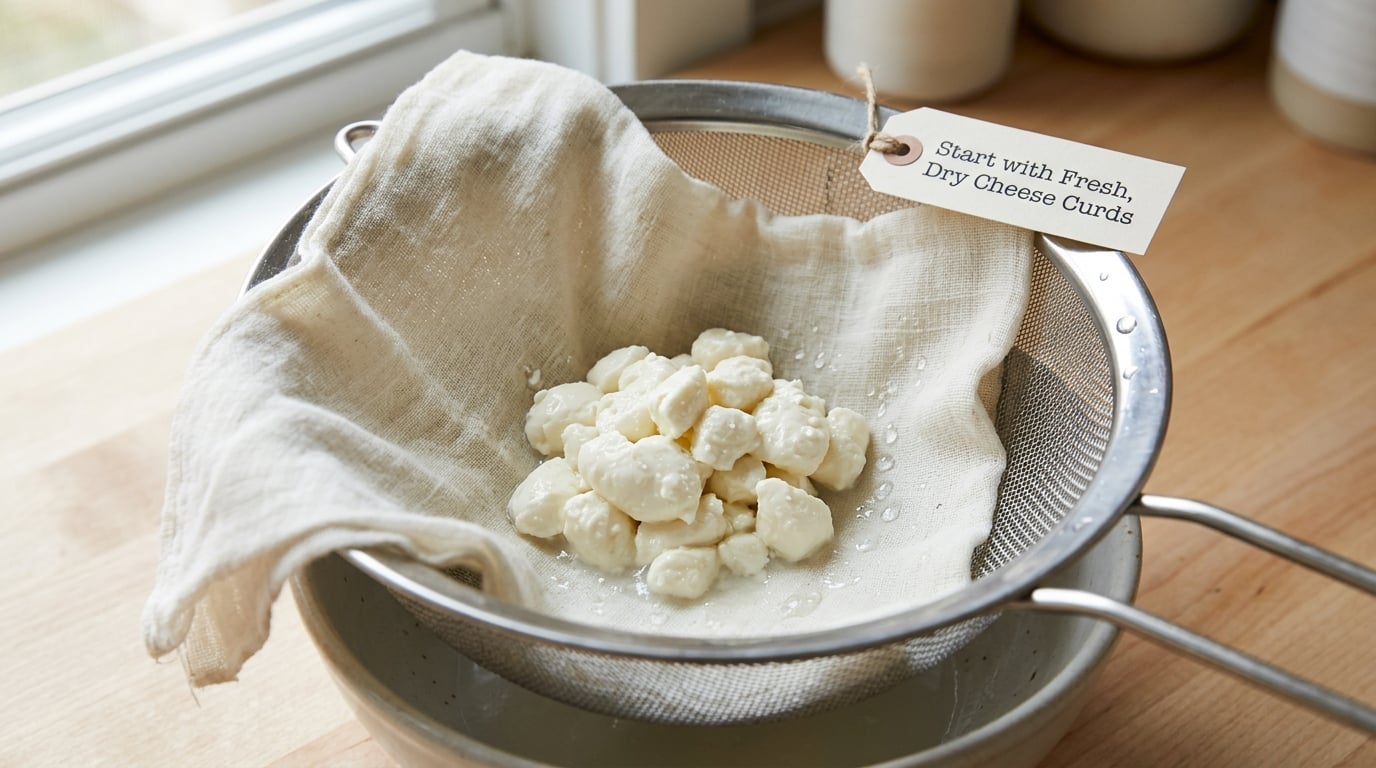
Drain the curds in a fine-mesh strainer lined with muslin for 20 to 30 minutes, then rinse them briefly under cold running water to wash away the loose brine and any milky residue. Give the bundle one firm squeeze, turn it out, squeeze again, and repeat until water stops coming out in any meaningful amount.
Now dry them. Spread the curds across a clean towel or a sheet of paper towel and roll them gently through it, then spread them out in a single layer and leave them for 20 to 30 minutes. Turn them once or twice while they sit. Cheesecloth alone is not enough drying; a terry cloth or paper towel pulls far more water from the surface in a short time.
You know they are ready when a curd feels firm, slightly tacky, and dry at the edges rather than slick. It should feel noticeably lighter than a wet one. Squeeze a single curd hard in your fist and listen: a very dry curd makes a faint high-pitched squeak against your teeth, which is a good sign before it ever hits the pan.
If you are working from fresh homemade curds, this is also the moment to press them. A light press under a weight for an hour firms them without pushing out the fat that carries flavor, and skipping the press gives you a softer curd that fries up chewy rather than crisp.
Heat the Oil Carefully
Pour 2 to 3 inches of oil into the skillet and set it over medium-high heat. Aim for 350 to 365F. A thermometer is the reliable way to get there, but the visual cue is close enough for most people: the oil shimmers across the whole surface, moves in slow waves when you nudge the pan, and a test curd dropped in sizzles immediately and steadily rather than sitting still or popping violently.
Too cool is the more common failure. Below roughly 325F the curd soaks oil before the crust sets, and you get a greasy, limp result with almost no crunch. Too hot and the outside browns and goes bitter before the center warms through, which kills the squeak because the protein structure is damaged before you ever bite it.
Do not leave the oil unattended once it is shimmering. It goes from ready to smoking in under a minute on a gas burner, and there is no fixing scorched oil in the middle of dinner.
Fry the Curds in Small Batches
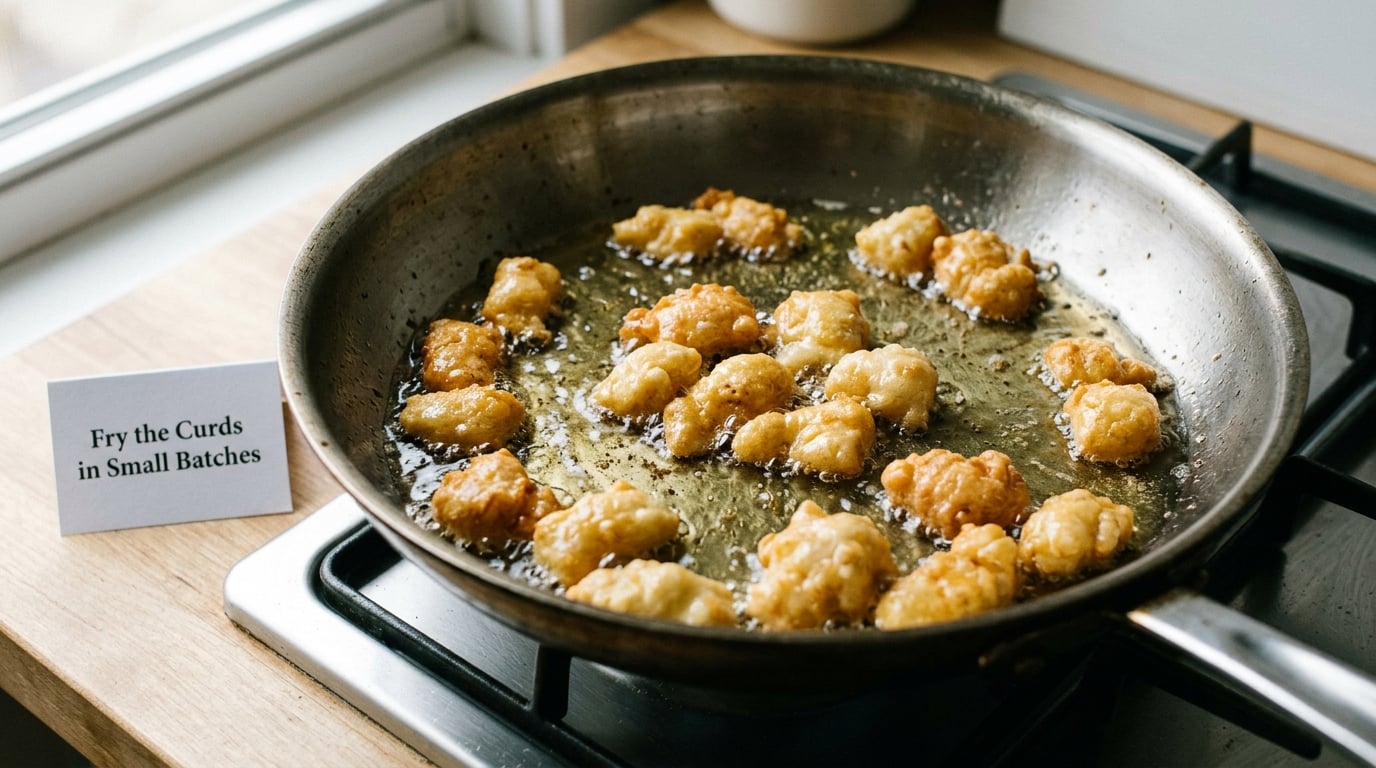
Lower the dried curds into the oil with a slotted spoon, about a dozen at a time. The pan should look crowded but should not be packed; if the curds touch each other constantly, the oil temperature drops and they steam instead of frying. Keep the oil between 350 and 365F as you go, turning the heat down if it climbs.
Move them gently with the spoon so the sides get color evenly, and fry for one to two minutes. They are done when the exterior is golden and crisp, the surface no longer looks wet, and the center feels hot when you lift one out and hold it a second before tasting. Pull them at golden, not deep brown.
You should hear it as you work. Steady crackling from the pan is the crust forming correctly, and a lively, popping sound when you bite into a warm curd is exactly what the whole process is aiming at.
Timing per batch runs about 90 seconds, and letting the oil recover between batches matters as much as the first temperature reading. Give it 60 to 90 seconds before adding the next round. If the curds go in and the sizzle drops to almost nothing, the oil was not hot enough, and that batch will be greasy rather than crisp.
Press or Rest the Fried Curds
Lift the curds out and spread them on the paper towel on your wire rack in a single layer, not in a heap. Let them rest for 30 to 60 seconds, then press each one very lightly with the back of the spoon or a spatula for a second or two, just enough to leave a dent.
That brief press firms the outside and pushes out the oil that would otherwise pool on the surface, and it leaves the interior dense and springy. What you are not doing is squashing them flat. A hard press with a weight, or stacking the curds under something heavy, compresses the structure into a cracker, and a compressed curd does not rebound against your teeth, so it goes quiet.
Move them straight to the rack if you are frying a second batch, and keep the finished ones moving rather than sitting under a warm pan.
Season and Serve Immediately
Salt the curds while they are still hot. Warm salt dissolves into the crust, cool salt just sits on top of it. One good pinch of non-iodized salt per serving is plenty, and this is the right moment for garlic powder, onion powder, black pepper, smoked paprika, or a small dice of fresh jalapeno, all of which stick better to a hot, slightly oily surface than to a cool one.
Eat them within minutes if you can. Every minute that passes after frying pulls a little more moisture out of the crust, and a crust that has lost its crispness does not produce the sharp crackle you hear with a fresh curd. An airtight container or a sheet of plastic wrap traps steam and finishes the job.
For serving, put them out with a dipping bowl, or top poutine and chili cheese fries with them while everything is still hot. They also melt well over a salad or a burger, though melted curds lose the squeak, and the sound is the entire reason for the work.
Common Mistakes
Almost every silent batch traces back to one of four things: moisture on the curds, milk that was too heat-treated, curd that got overcooked, or oil that was not hot enough. If you want how to make cheese curds squeak to be reliable rather than lucky, run through these in order before you change anything about the recipe.
Why your cheese curds squeak weakly or not at all
Check the curds themselves first. A curd that is soft, glossy, and heavy with water will never squeak, because there is no dry surface for your teeth to catch on, and that surface is the entire mechanism. Squeeze one hard: if water beads out or your hand comes away damp, the drying step was cut short.
Next, ask where the curds came from. Curds made from ultra-pasteurized milk come out crumbly and matte, more like paneer or feta, and they stay quiet no matter how well you fry them. Pasteurized curds from a grocery store squeak, just more quietly and for less time than raw-milk curds. Curds that have been sitting in a bag for a week, or frozen and thawed, have lost the squeak and cannot get it back.
Then look at the cooking. Curds cooked past about 115F, or held at high heat long enough to scorch, lose the springy calcium-casein structure that creates friction. And if you pressed them hard under a weight, or wrapped them tightly overnight, the same thing happens: the structure compresses instead of bouncing.
Lastly, run the oil checklist. Underheated oil, a crowded pan, and curds that sat after frying instead of going straight onto a rack will all produce a soft, oily exterior. That exterior is not only less crisp, it damps the squeak, because your teeth never get a dry surface to strike.
How to fix greasy or limp fried curds
Greasy curds mean the oil was below frying temperature when they went in, or that the pan was too full for the oil to hold its heat. Next time, heat to 350 to 365F and confirm with a test curd, then fry no more than a dozen at a time.
For the curds you already have, press them harder than feels right. Put them between paper towels, set a heavy flat pan on top for ten minutes, and most of the surface oil will move out. They will not regain their crunch, but they stop feeling slick.
To keep the next batch from happening, drain on a rack rather than a paper towel pile, salt only after draining, and serve from the rack rather than a bowl. A bowl traps the steam that softens the crust.
How to revive curds that have gone quiet
Quiet curds are not ruined, they are just cold and relaxed. Bring them to room temperature for 20 to 30 minutes and the sound usually comes back, because warming the curd tightens the calcium-protein bonds again.
For a faster fix, spread the curds in a single layer in a hot dry skillet over medium heat for 10 to 15 seconds, moving them constantly, or microwave them in a single layer for 3 to 5 seconds. Both work. The skillet gives you better control, since microwaved curds can go soft in the middle if you leave them a second too long.
Neither trick brings back a crisp fried crust. Warming revives the natural squeak of the curd, which is the sound most people are chasing, and it is why room-temperature cheese curds often squeak better than straight-from-the-fridge curds.
For keeping them that way, drain the brine, seal loosely rather than airtight, refrigerate at or below 40F, and use them within a few days of opening. Raw-milk curds vacuum-sealed and refrigerated can hold their squeak for weeks, which is the one storage habit worth copying if you make your own.
Frequently Asked Questions
Do store-bought cheese curds squeak when fried?
Yes, if they are young and never frozen. Grocery-store curds squeak when you bite them cold, and frying turns that same curd into a crisp, hot version that still squeaks inside the crust. Buy bags packed within the last few days, reject any that feel chalky or watery, and dry them for at least 20 minutes before they hit the oil.
Why aren’t my cheese curds squeaking?
In order of likelihood: the curds were still wet when you fried them, the milk was ultra-pasteurized, the curds were cooked past about 115F, or they were pressed hard enough to flatten the structure. Ultra-pasteurized milk is the usual culprit and gives you a crumbly paneer-style cheese that stays quiet no matter what you do. Squeeze a curd, check your cook temperature, and keep the press light.
Is it necessary to fry cheese curds to make them squeak?
No. Frying is what makes them crisp for poutine and fried curds, but the squeak is a property of the curd itself, not the crust. Fresh curds straight from the strainer squeak when they are warm, which is why room-temperature curds are often louder than refrigerated ones. Fry for texture, not for the sound.
How dry should cheese curds be before frying?
Dry on the outside, springy on the inside. After draining and squeezing, roll the curds in a towel and leave them in a single layer for 20 to 30 minutes. A finished curd feels firm and slightly tacky with dry edges, noticeably lighter than before, and makes a faint squeak against your teeth when squeezed. Any visible water means give them another ten minutes.
Can I make cheese curds squeak without cheesecloth?
Yes. Cheesecloth is helpful for draining whey, not for drying. A clean terry towel, a salad spinner, or a layer of paper towel followed by 20 to 30 minutes of air drying will do the same job. The important part is removing surface water before the curds meet hot oil, and any absorbent cloth handles that well.
How do I keep fried cheese curds crisp after cooking?
Drain on a wire rack in a single layer, never in a pile, and do not cover them while warm. For the first 15 minutes the crust is still setting, so leave it alone and salt only after the oil has wicked out. Serve within a few minutes, and if you must hold them, put them back in a hot dry skillet for 10 to 15 seconds rather than storing them in a sealed container.
Conclusion
Start by fixing moisture, because that is where nearly every silent batch begins. Drain and squeeze the curds, dry them for 20 to 30 minutes, fry a dozen at a time in oil at 350 to 365F, press each one lightly between paper towels, and salt while hot.
Then eat them right away, off the rack, with nothing piled on top. Knowing how to make cheese curds squeak comes down to that sequence rather than a secret ingredient, and it is the whole difference between a plate of warm cheese nuggets and curds loud enough to hear across the table.