
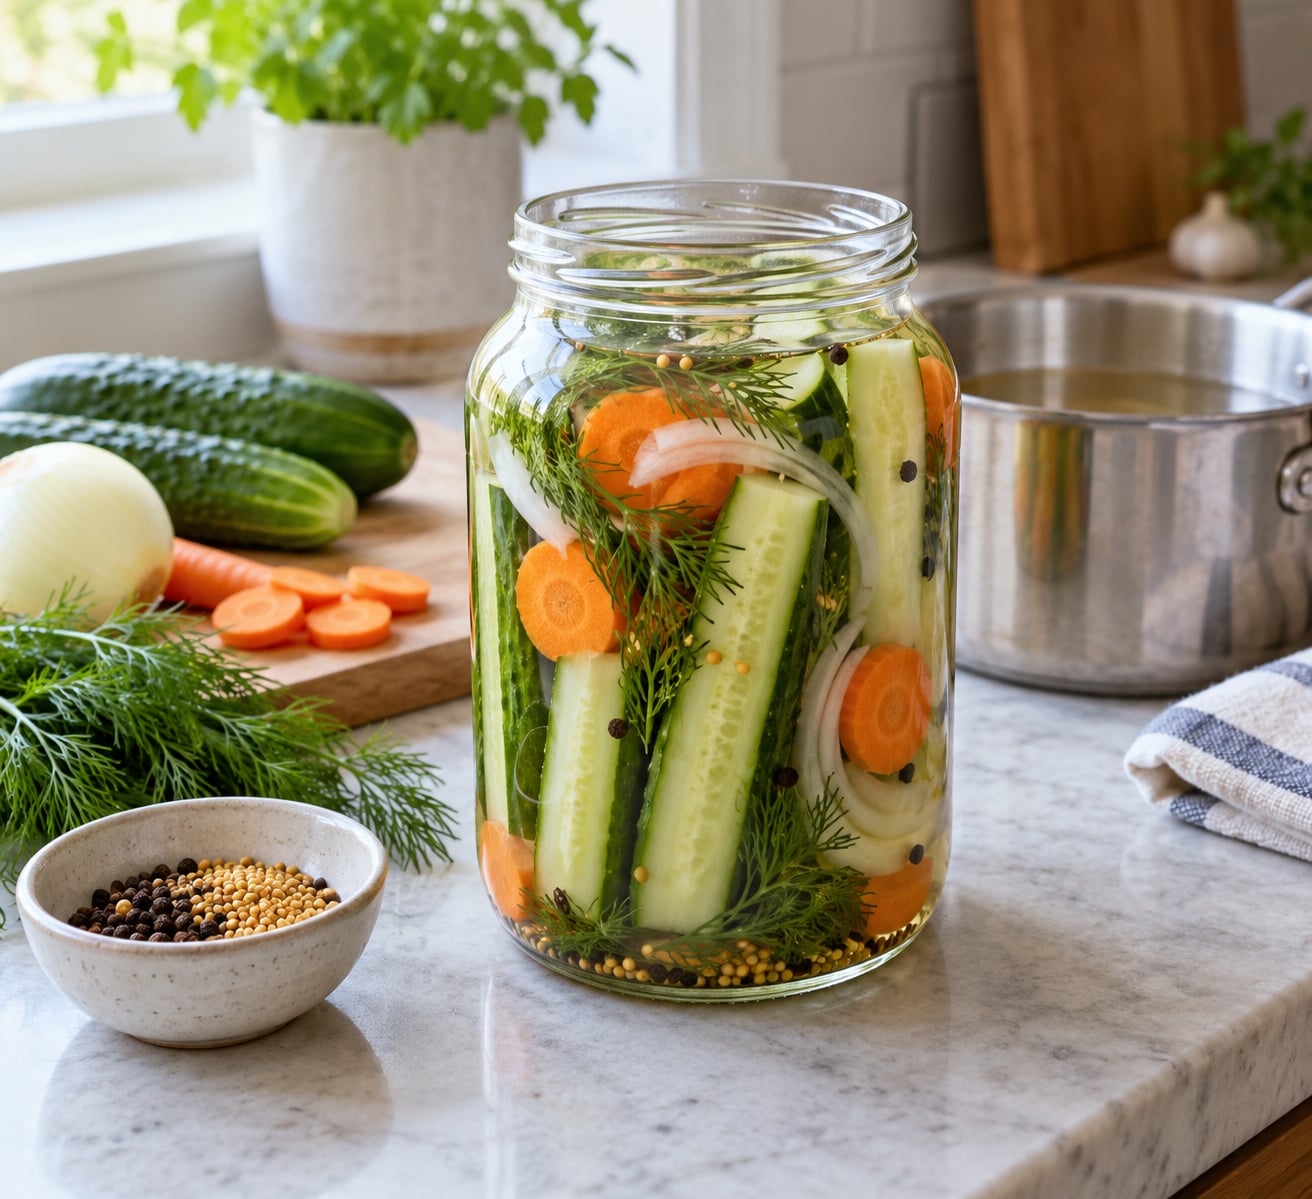
Refrigerator pickles need no canning equipment and about 15 minutes of active time: you slice cucumbers, pour over a hot vinegar brine, pack them into jars and chill overnight. Unlike shelf-stable canned pickles, fridge pickles are not heat processed, so they stay crisp and must stay refrigerated their whole life. Once you learn the method, you can put up a jar tonight and eat them tomorrow.
The method below makes roughly two quart jars. I keep the brine at a simple 1:1 vinegar-to-water ratio with pickling salt and a little sugar, then load each jar with dill, garlic and whole spices. Active time runs 15 minutes, chilling takes at least 4 hours, and the flavor keeps building for about a week.
Pickles fit naturally into burger cookouts too. How to make jalapeno poppers for burger night uses the same vinegar-and-spice logic, and a drained pickle on a patty is the fastest topping upgrade there is.
What You Need
The whole setup is one saucepan, a measuring cup and clean glass jars. If you own a funnel, use it, but a wide-mouth jar and a slow pour work nearly as well.
For the vegetables, you need about 2 pounds of small cucumbers or 4 to 5 medium slicing cucumbers, 1 large carrot, 1 small onion and 4 to 6 garlic cloves. Cucumbers bring the crunch, and the carrot and onion add color and take on the brine faster than the cucumbers do, which gives the jar visual variety.
For the brine, measure out:
- 1 cup white distilled vinegar with 5 percent acidity
- 1 cup water
- 1 tablespoon pickling or canning salt
- 1 teaspoon sugar
- 1 to 2 teaspoons whole peppercorns
- 1 teaspoon mustard seed
- 4 to 6 sprigs fresh dill or about 2 tablespoons dill weed
- 1 teaspoon red pepper flakes, optional
Three caveats about the ingredients matter more than anything else in the list. First, use vinegar labeled 5 percent acidity; anything milder or homemade will not hold the pickles safely, and rice vinegar at grocery-store strength is usually too mild. Second, use pickling or canning salt, because table salt’s iodine and anti-caking agents can leave a bitter edge. Third, choose cucumbers that are firm and free of soft spots.
A vinegar brine is not a canning solution. A tested canning recipe has a specific vinegar-to-vegetable ratio, a measured salt concentration and a processing step validated for shelf storage. This brine is deliberately milder and relies on refrigeration. Boiling water canning these jars would not make them shelf-stable.
Two clean quart jars hold the batch comfortably. Wide-mouth jars are easier to fill and easier to fish a spear out of. A single half-pint jar also works, and the brine math scales straight down: roughly 1/2 cup vinegar, 1/2 cup water and 1/2 tablespoon salt per jar.
Step-by-Step: How to Make Refrigerator Pickles
Prepare the Vegetables and Containers
Scrub the cucumbers under cold running water and trim the blossom end, the small flower remnant at one tip. That end carries enzymes that break down pectin, which is part of what holds a cucumber’s structure, and cutting it off is the cheapest way to keep the finished pickle from going limp. Slice into spears, coins or thick half-moons, aiming for pieces of roughly the same size.
You know the cuts worked when everything would fit through the jar mouth in about the same bite. Uniform pieces pickle at the same rate, so you never end up with a jar that is half mush and half firm.
Peel the carrots if you want a softer texture, slice them into coins or thin batons, and cut the onion into half-moons. Crush the garlic cloves with the flat of a knife to open them up; a crushed clove releases far more flavor than an intact one.
Boil the empty jars for 10 minutes and let them cool before you touch them. Handling warm glass with cool vegetables can crack a jar, and hot glass also makes air pockets harder to spot. Boiling also sterilizes the container so nothing comes along for the ride.
How to Make Refrigerator Pickles: Salt the Cucumbers
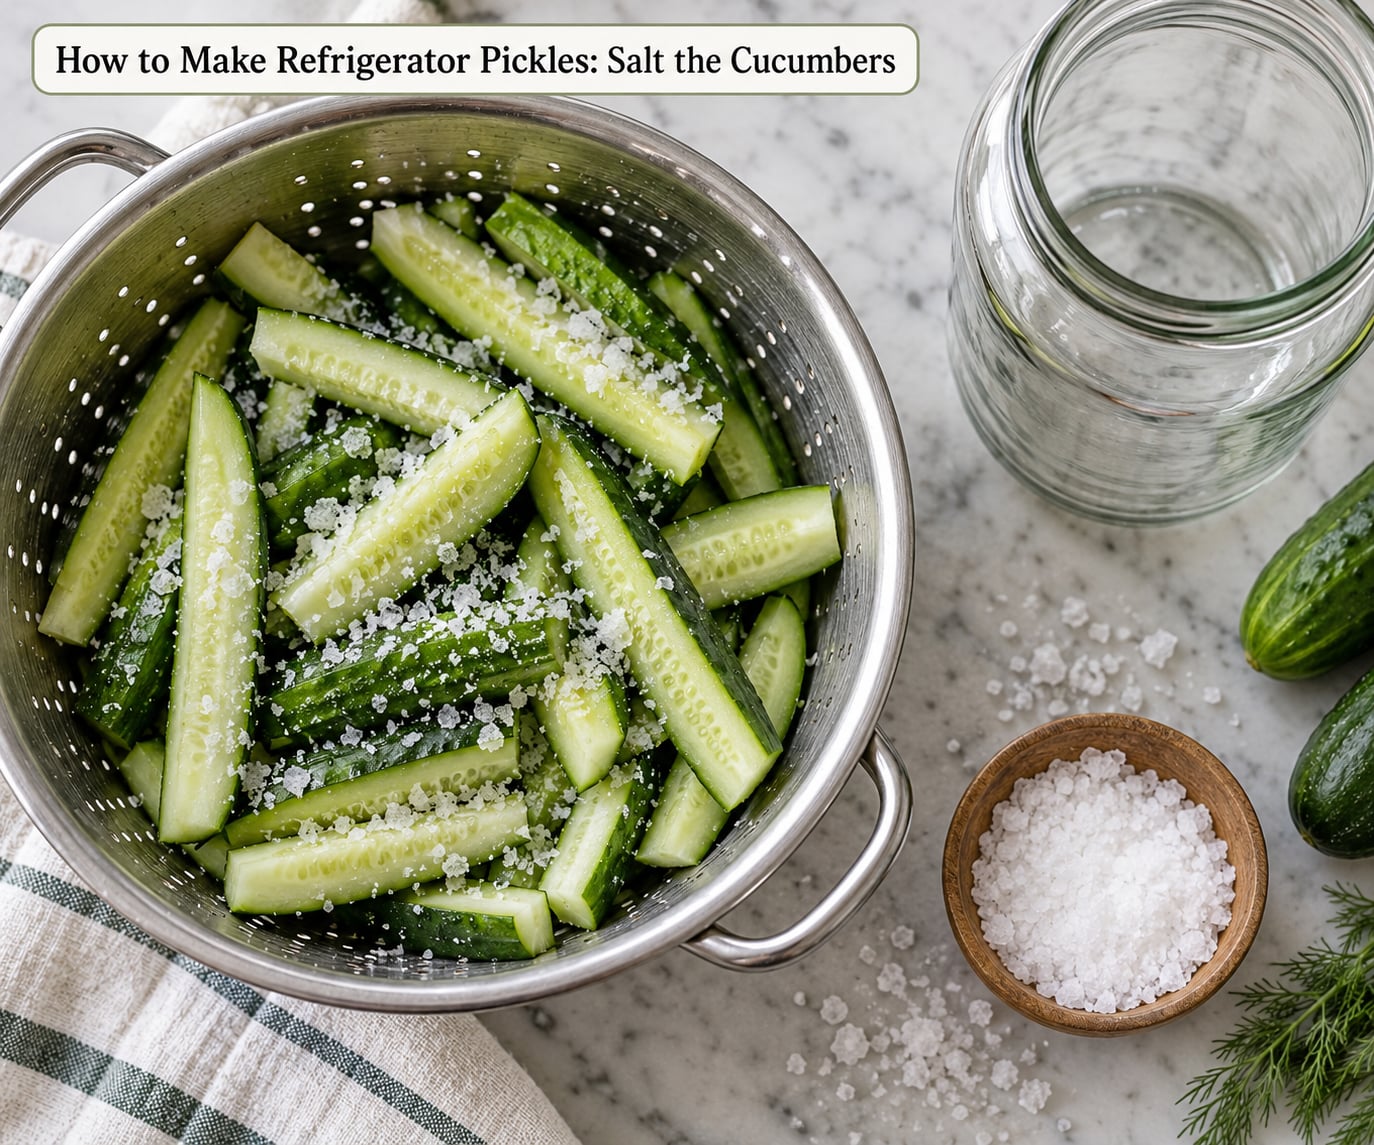
Put the cucumber pieces in a colander set over a bowl, toss them with 1 tablespoon pickling salt, and let them sit 20 to 30 minutes. While they rest, salt draws water out of the cucumber cells, which is what firms them up rather than softening them. Pour off the liquid that collects.
You know the salting worked when the cucumber pieces look slightly dull and feel firmer than they did going in, with a puddle of cloudy liquid in the bowl underneath. Draining that liquid matters, because it carries most of the excess water that would otherwise dilute your brine.
Salt a firm vegetable longer and you trade crunch for bitterness, so cucumber is the one to keep an eye on. Carrots, onion and cauliflower can take the same treatment for the full 30 minutes without turning bitter, and radishes and thin green beans are better added raw and pickled straight in the brine.
Blend the Vinegar Brine
Combine the vinegar, water, salt and sugar in a saucepan and bring it just to a boil, stirring until the sugar dissolves. Some recipes add the whole spices to the pot and simmer five minutes longer; that is worth it for a more rounded, cooked spice flavor.
You know the brine is ready when it reaches a rolling boil and the sugar has fully disappeared. Skim any foam off the top, then let it cool for 5 to 10 minutes before it touches the vegetables.
Pouring boiling brine straight onto cucumbers cooks them and gives you the soft texture you were trying to avoid. Warm brine and cold vegetables is the combination that keeps a fridge pickle crunchy.
The 3-2-1 rule for pickles is a popular shortcut: 3 cups vinegar, 2 tablespoons salt and 1 tablespoon sugar, plus spices and enough water to cover. It works well, but the ratio above is the one I come back to because the salt and sugar stay in balance with a full cup of vinegar. Adjust either one only after you have tasted a finished jar.
Pack the Jars with Spices and Vegetables
Divide the dill, peppercorns, mustard seed, red pepper flakes and 3 to 4 garlic cloves between the jars. Layer in the cucumber spears, then the carrot and onion on top or packed in between.
Fill the jars no more than three-quarters full with vegetables. Over-packing leaves no room for the brine to circulate, and the result is weakly seasoned pickles with flavor sitting only on the top layer. Give the brine a job to do by keeping some space free.
Pour the warm brine in until every piece is covered and there is about three-quarters of an inch of headspace at the top. Tap the jar firmly on the counter a few times so trapped air bubbles rise, then top up with more brine if the cucumbers float. A loose lid lets gas escape; an airtight screw-top ring is what you want here.
You know the packing worked when no cucumber pokes above the brine line. Anything exposed to air oxidizes, dulls and eventually gets colonized by whatever is in the jar.
Refrigerate Until the Pickles Look Ready
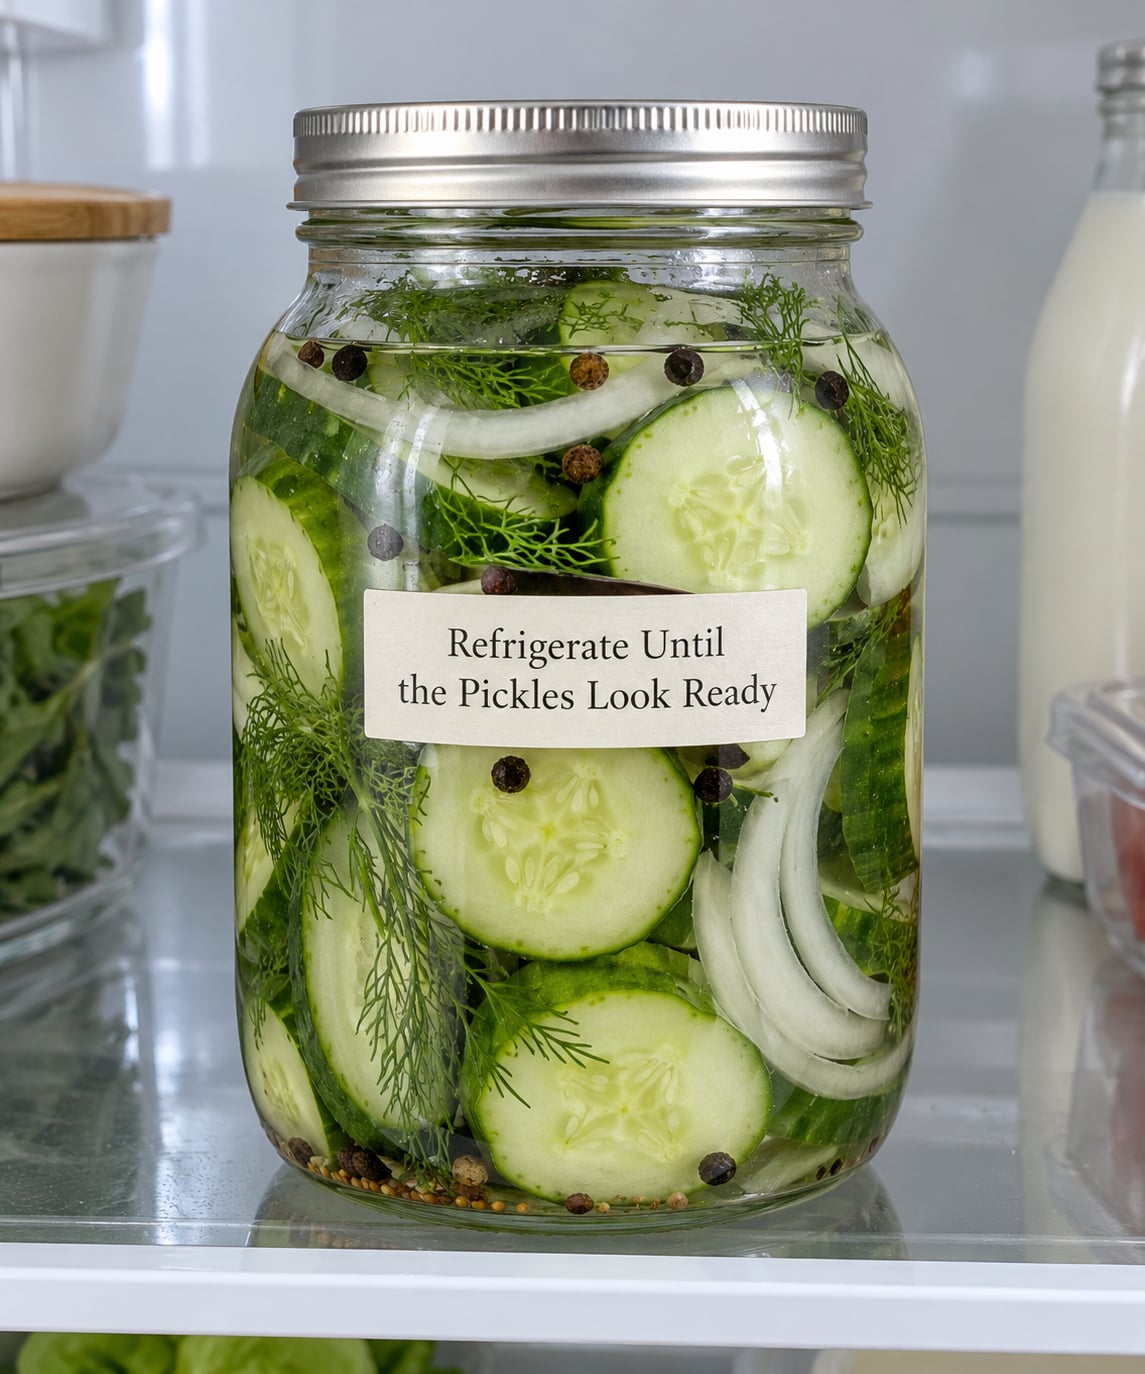
Screw the lids on, refrigerate the jars and wait. Taste one spear after 4 hours and again the next day.
At 4 hours the outside has a tangy edge while the center still tastes mostly like cucumber. By the next day the flavor has moved all the way through and the color has shifted from bright green to olive. Around day 3 the pickle tastes noticeably seasoned, and at a week the dill and garlic settle into a background note that leaves the vinegar in front.
Pickles keep their best crunch in roughly the first two weeks and stay perfectly good for four to six weeks, provided the jar stays sealed and cold. Airtight lids and utensils with no food residue on them are the difference between a jar that keeps and a jar that grows mold. Do not dip a wet spoon in and leave it sitting on the counter.
These are refrigerator pickles, not canned pickles. They are not shelf-stable and they will not survive a pantry, a road trip without a cooler, or a power outage.
Serve the Pickles
Drain a few spears and taste one on its own before you build anything. A good finished pickle is tangy first, noticeably seasoned next and still snapping when you bite it.
For burgers, slice the spears thin and layer them under the cheese, or serve them whole on the side next to the patty. They pair well with a smoky charcuterie board, chopped into a potato salad, or layered into a club sandwich alongside turkey and bacon. If you want a second topping for the same cookout, how to make guacamole for burgers covers the fresh side of the plate, and how to make veggie burgers from scratch handles the patty when you want a meatless night.
If the jar tastes flat, add a splash of the brine that is sitting in the bottom of a second jar rather than pouring on raw vinegar, which is easy to overshoot. If it is sharp, eat them within a couple of days instead of trying to soften them; vinegar does not retreat once it has soaked in.
Common Mistakes
Most disappointing pickle jars fail on one of a handful of things. The fixes are short, so it is worth running the list once before your next batch.
- Uneven cuts: thin coins and thick spears in the same jar pickle at different speeds. Pick one size per jar.
- Not enough headspace: the brine has to cover the vegetables, and a packed jar has no room for aromatics to spread.
- Using salad vinegar: bottling vinegar sold only for salad dressing carries too little acid. Use vinegar labeled for pickling at 5 percent acidity.
- Loose lids: an unsealed jar loses liquid and invites mold. Screw the ring down until it stops.
- Skipping refrigeration: these pickles rely on cold storage. A pantry jar is unsafe to eat.
- Leaving produce out during prep: put cut vegetables back in the fridge or finish the batch in one sitting so nothing sits warm for hours.
- Treating this as a canning recipe: do not water-bath can these jars. A tested canning recipe is a different, more acidic formula written for shelf storage.
Using Too Much Salt or Vinegar
If a finished batch is too intense, dilute it. Spoon out the cucumbers, discard a portion of the brine, and add cold brine made at the same ratio until the flavor sits where you want it. Adding more fresh vegetables to a salty jar works too, since they absorb brine as they sit.
For a weak batch, a small splash of properly measured vinegar or a pinch of salt before it goes back in the fridge is usually enough. Do not rebuild a batch from scratch after packing with a different salt or vinegar concentration, because that changes the acidity the vegetables have already soaked up and leaves you guessing about safety.
Be careful with salt swaps generally. Pickling and canning salt are fine. Kosher salt works if you measure by weight instead of volume, since a tablespoon of Diamond Crystal is roughly half the volume of a tablespoon of table salt. Table salt also works, but skip the non-iodized or specialty salts with anti-caking agents, and reduce nothing without tasting first.
Making Pickles Mushy or Bitter
Sliminess shows up for a handful of reasons. Thin slices turn soft fastest, so if you want a pickle within hours rather than days, slice thin and accept the shorter window. Excess salting breaks down cell structure, so keep the salt rest to 20 or 30 minutes for cucumbers and no longer. Poor drainage leaves liquid in the jar that keeps the pieces sitting in their own water, which is why the salting step ends over a colander. And every extra week in the fridge softens the texture a little more.
Bitterness comes from a different place: the blossom-end enzymes, over-salting and old or damaged cucumbers. Trim the blossom end, buy firm produce, and skip any cucumber that feels soft or shows dull skin.
Already-soft pickles are not dangerous, they are just disappointing. A slimy surface or a bad smell is a different story and belongs in the trash. Once a pickle loses its snap, it will not get it back, so serve it in a chopped relish or a salad dressing where texture is not the point.
Frequently Asked Questions
What vegetables are best for refrigerator pickles?
Cucumbers are the obvious choice, and small pickling or Persian cucumbers give the best crunch because their skin is thinner and seeds are smaller. Carrots, onion, radishes, cauliflower florets, green beans, asparagus and beets all take the same brine well. Cut denser vegetables like carrots and beets thinner than cucumbers so everything finishes pickling at about the same time.
How long should refrigerator pickles sit before eating?
Wait at least 4 hours for the vinegar to reach the center of a spear, then taste. After a night in the fridge the flavor has moved all the way through and the color has turned from bright green to olive, which is the point most people call done. Flavor keeps developing for about a week, so if you are not in a hurry, day two is where the balance settles best.
How long do homemade refrigerator pickles stay in the fridge?
Sealed jars kept continuously refrigerated below 40F stay good for four to six weeks, and many home cooks eat them well past that. Crunch declines gradually after the first two weeks, so eat the jars in order. Any jar with mold, slime, unexpected fizz when opened or an off smell should be discarded whole, without tasting.
Can I use leftover refrigerator pickle brine for another batch?
Not as a straight pour. The cucumbers release water as they pickle, so leftover brine is weaker in both acid and salt than the original recipe, and a second batch packed with it under-pickles and invites spoilage. Strain it and use it as a marinade or dressing base instead, or make a fresh batch at the full 1:1 vinegar-to-water ratio.
Do refrigerator pickles need to be processed like canned pickles?
No. Refrigerator pickles are not shelf-stable and must stay cold from packing to serving. The brine in this method has less vinegar than a tested canning recipe, so a boiling water bath would not make these jars safe for the pantry. If you want shelf-stable pickles, use a tested recipe from a source such as the National Center for Home Food Preservation and follow its processing times exactly.
Conclusion
Start with one small jar. Cut your cucumbers to a single even size, mix the 1:1 vinegar brine with measured salt and sugar, pack the dill and garlic loosely, and refrigerate overnight. Check them after four hours, again the next day, and keep the sealed jars cold for the full four to six weeks. Once the batch is gone, you will already know whether to add more vinegar, less sugar or a hotter pepper on the next round.