
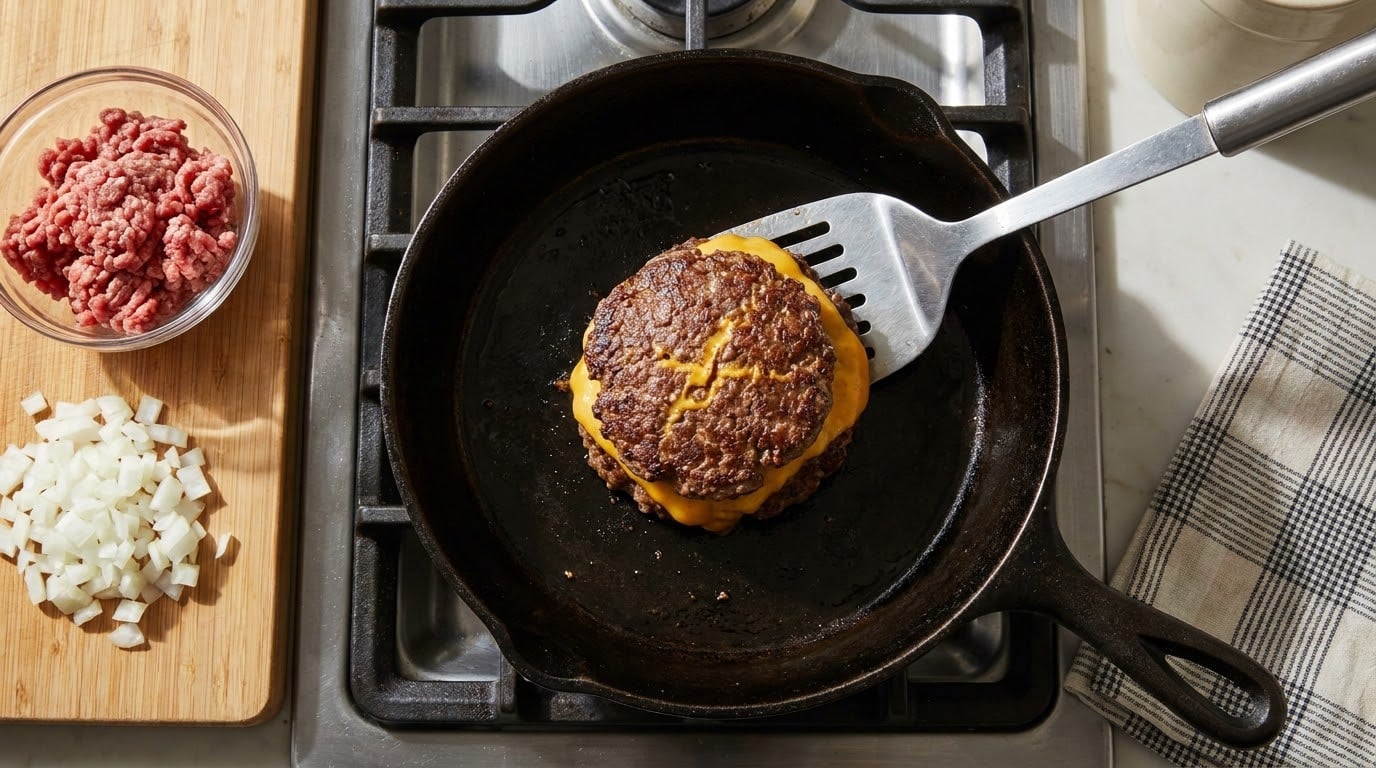
To make a juicy lucy burger at home, mix 80/20 ground beef with finely chopped onion, a splash of milk, salt and pepper, chill it briefly, then cook rough, loosely shaped portions in a hot cast iron skillet until the outside browns and the inside hits 160°F / 71°C. The beef stays loose rather than being packed into a firm patty, which is what keeps it tender and messy in the best way. From mixing bowl to bun, plan about 40 minutes for four burgers.
The whole idea is moisture control. A preformed burger patty loses juice fast because there is nothing holding water inside it. Loose beef cooked in small batches browns on the outside while the middle stays soft, and the milk in the mix keeps the crumbles from drying out.
What You Need
For four servings you need about 1.5 pounds of ground beef, one small onion, a tablespoon or two of milk, kosher salt, black pepper, and neutral oil for the pan. That is a short list, and it is intentional.
- 1.5 lb (680 g) 80/20 ground beef — the fat is what makes it work.
- 1 small yellow onion, finely chopped — pulse it in a food processor if you can; pieces smaller than a lentil distribute evenly.
- 1 to 2 tbsp milk — not dairy for flavor, moisture for texture.
- 1 tsp kosher salt plus more to taste, and 1/2 tsp black pepper.
- 1 tbsp neutral oil (canola, avocado, grapeseed) for a light film in the skillet.
- One cast iron or heavy skillet — 12 inch is ideal so you can cook four portions without crowding.
- Two spatulas — a wide one to flip and a thin one to break and check.
- Optional: Worcestershire sauce, garlic powder, dehydrated minced onion, sliced American or cheddar cheese.
- To serve: sturdy hamburger buns, butter or oil for toasting, lettuce, tomato, pickles, and a restrained amount of sauce.
Two tools do more work than the rest. A heavy skillet holds heat instead of spiking and dropping every time a cold portion lands on it, and a second spatula lets you support the burger from underneath when you turn it rather than trying to lever it over with one tool.
On the beef ratio, the standard advice is 80/20. Some readers on r/cheeseburgers go a little leaner, around 85/15, on the theory that the beef fat already carries plenty of richness. Both work. 90/10 gets dry fast under this method, and lean beef has no juice left to give.
Step-by-Step: How to Make a Juicy Lucy Burger
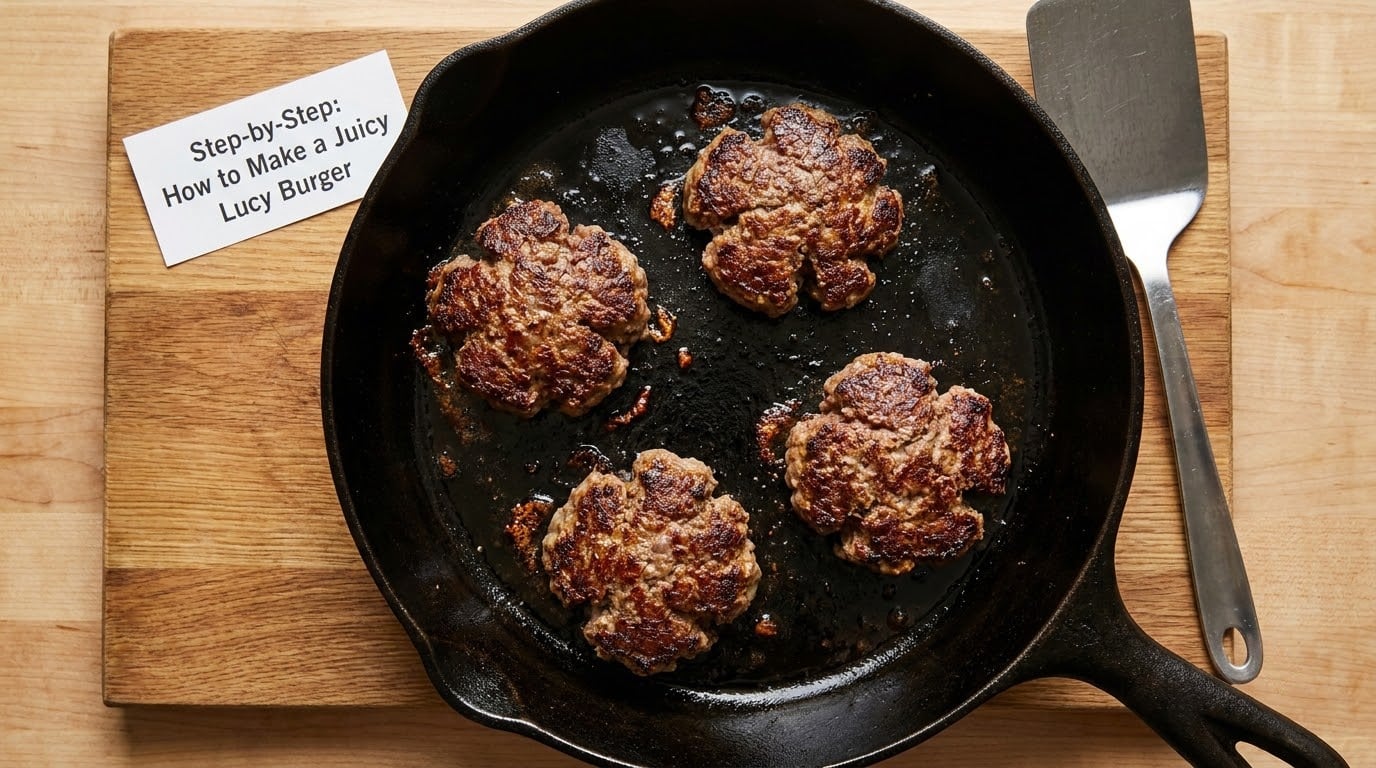
This method is for home cooks who want a tender, seasoned burger with a browned exterior and a lot of moisture. The technique comes down to three things: mix lightly, chill briefly, cook small batches over controlled heat.
Mix the Beef Without Overworking It
Combine the ground beef, chopped onion, milk, salt and pepper in a large bowl and work it with your hands just until everything looks evenly speckled. Stop there. What you want is a cohesive but still loose mixture, more like thick chili than a smooth ball.
Kneading longer than that tightens the meat. The proteins squeeze together, the meat expels water, and you end up with something closer to a dense sausage puck than a tender burger. Uneven mixing is the opposite problem: bare patches come out bland and salty patches come out inedible. A minute of light hand mixing fixes both.
If you want more flavor, add a tablespoon of Worcestershire sauce and a teaspoon of garlic powder, or a tablespoon of rehydrated dehydrated minced onion. That last one is the signature of the Minnesota version of this burger, and it works well with the rest of the mix.
Let the Mixture Chill
Cover the bowl and refrigerate it for 20 to 30 minutes. The rest lets the seasoning spread through the fat and gives the milk time to soak in rather than sitting in one spot.
What you are looking for is slightly firmer and slightly darker in color, nothing more. The mixture should still slump off the spoon. If it holds a shape or looks smooth and pasty, it has gone too far and you should add a couple of tablespoons of cold beef or a splash more milk.
Chilled beef also releases less water into the pan when it hits heat, so the surface sears instead of slowly stewing.
Heat the Skillet and Add a Light Film of Oil
Set a heavy skillet over medium-high heat for three or four minutes, then add a tablespoon of oil and let it run until it shimmers and flows easily, roughly 175 to 200°F (79 to 93°C).
A lightly oiled surface is the goal. You do not want smoke rising off the pan, which means it is too hot, and you do not want a visible puddle of oil, which means you will fry the outside before the inside catches up. If you can see the film clearly on bare iron, wipe some of it off.
For an outdoor grill, medium-high over direct heat is the equivalent, and a closed lid helps a thick portion cook through on a cool day. Open lid for the crust at the end.
Brown the Beef in Manageable Batches
Drop four roughly equal scoops of the chilled mixture into the hot pan, spaced apart, and let them sit. After about 20 seconds, gently press each one with the spatula into a rough patty shape about 4 inches wide, then stop pressing.
The shaping is deliberately light. You are setting a diameter, not compacting the meat. A firm, compressed disc gives you a hockey puck; a loosely packed one gives you browned edges and a moist middle.
Cook without moving them for 4 to 5 minutes. Batching matters more than anything else here: four portions crowding a 12 inch skillet drop the pan temperature fast, the beef releases water instead of browning, and you get a gray, greasy result. Two batches of two is better than one crowded batch of four.
Turn, Season, and Check the Temperature
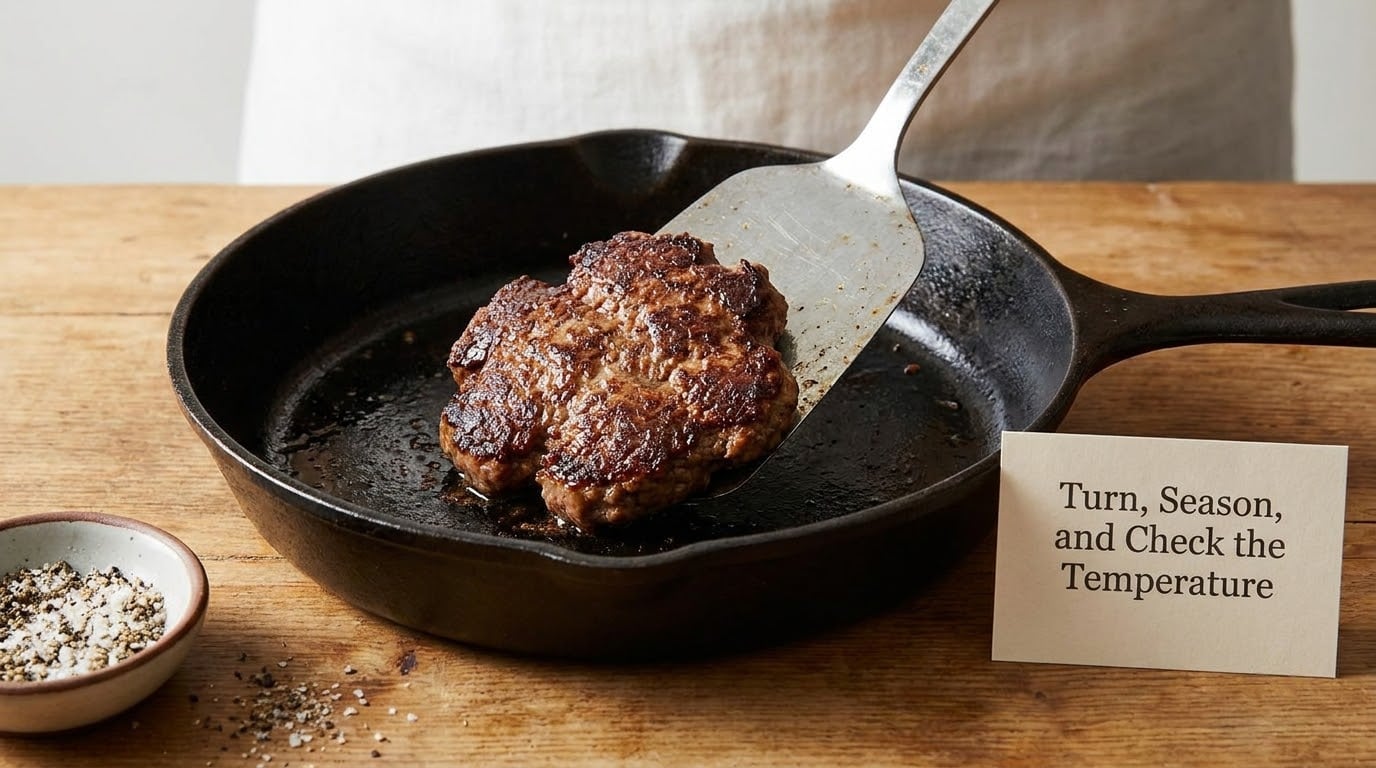
Turn when the underside is deeply browned and you see rendered fat running off, not when the top looks gray. Slide the wide spatula far under the portion and use the thin spatula to support the far side so it folds over instead of tearing in half.
Cook the second side for another 3 to 4 minutes. A second seasoning here is optional and worth it: a light pinch of salt and pepper on the raw side right after the flip seasons the crust, and kosher salt flakes give a better crunch than fine salt.
Then check the temperature. The USDA recommends a minimum internal temperature of 160°F / 71°C for ground beef, and a stuffed or thick portion cooks through more slowly than a thin patty, so time alone is a bad guide. Stick an instant-read thermometer into the thickest part, reading through the side rather than straight down, and take it from the center.
If you have no thermometer, cut the thickest portion in half with a sharp knife and look for the absence of pink. That costs you juices, so save it for one burger out of the batch rather than cutting all four.
Do not press, poke, or repeatedly flip. Every touch squeezes moisture out, and the crust that forms on the first side is what keeps the rest of it from steaming itself dry.
Rest and Serve in the Bun
Move the burgers to a plate and let them rest for 3 to 5 minutes. The juices that were pushed to the surface settle back into the meat, and the inside stays tender longer on the way to the table.
Use the rest to toast the buns. Butter the cut faces or brush with oil and put them cut-side down in the same pan for about a minute, then build the burgers.
Sauce the bottom bun lightly rather than the top. A heavy layer under a double portion of beef turns the bun to mush before anyone bites it, and you already have plenty of moisture in the burger. Add lettuce, tomato, pickles, or caramelized onion if you like; keep wet toppings on the bottom bun so the top stays crisp.
Assemble in this order: sauce on the bottom bun, burger, cheese if you skipped cheese inside, pickles and onions, then the toasted top bun. Serve immediately, while the fat is still hot enough to run.
Common Mistakes
The five failures below cover nearly every bad Lucy burger, and each has one cause and one fix.
- Dry and crumbly center. Usually overworking the beef in the bowl, or pressing the portions flat once they hit the pan. Mix only until the seasoning is evenly speckled and stop shaping the moment the diameter looks right.
- Greasy, gray outside. The pan was crowded or the oil was too heavy. Cook two at a time in a 12 inch skillet and wipe off any oil that pools under the meat.
- Uneven cooking. The portions were different sizes, so the small ones overcooked before the large ones caught up. Weigh the beef and divide it into four equal scoops; if you want identical patties, our guide on how to make burger patties all the same size has the portioning method.
- Sticking and tearing on the flip. The pan was not hot enough when the beef landed, or you moved it too early. Wait for visible browning before touching it, and support it with two spatulas.
- Tough middle. Excessive heat plus too many flips. Medium-high, one flip, and a thermometer at 160°F / 71°C is the whole technique.
- Soggy bun. Sauce went on top and the burger sat. Put sauce on the bottom bun, keep the wet toppings low, and build to order rather than in advance.
Pro Tips and Serving Ideas
A few refinements after the base method. Cook 80/20 beef for the best moisture and flavor, or 85/15 if you want the burger to read less rich, and pick the blend using our piece on what cuts make the best burger blend.
Drain visible excess fat from the raw beef if the tray looks greasy, but do not squeeze the meat in a strainer or squeeze each portion. You want the fat rendered in the pan, not all of it on the counter beforehand.
Chop the onion as finely as you can manage. Anything bigger than a corn kernel stays a distinct bite and gives you a raw-onion edge that fights the browned crust.
Season cautiously and taste. The Worcestershire sauce, the Worcestershire-adjacent tang of the onion, and the beef fat all carry salt, so add the bulk of it at mixing and finish after cooking.
Three topping combinations that work well: pickles plus a thin layer of yellow mustard and caramelized onion, which is close to the Minnesota bar version; grilled onion and a smoky barbecue sauce with coleslaw for a cookout; or tomato, lettuce, and a thin layer of ranch for kids. If you would rather skip the bun entirely, our how to make a burger without a bun guide works the same beef into a lettuce cup or a plate.
One note for the skeptics: the stuffed, cheese-centered version of this burger does divide opinion, and plenty of home cooks find the concept a gimmick rather than an upgrade. If you are on that side, this method still works, because the technique that keeps it tender, the light mixing, the chill, the small batches, is the same technique that keeps any ground beef dish from drying out.
Frequently Asked Questions
What is a Lucy burger?
A Lucy burger is a cheeseburger made by sealing cheese between two seasoned ground beef patties so it melts inside and stays trapped there. The origin is Minneapolis, where the 5-8 Club and Matt’s Bar both claim it. Some versions use American cheese slices and others use cubed cheddar, but the defining feature is always the sealed, molten center.
Should I form Lucy burger beef into a patty?
For the loose version described here, no. You scoop equal portions into the hot pan and press them only enough to set a 4 inch diameter. For the classic sealed stuffed version, you do form two thin patties, but you pinch the edges firmly and keep the cheese at least half an inch away from the rim so it cannot squeeze out during the flip.
What ground beef is best for a juicy Lucy burger?
An 80/20 lean-to-fat ratio is the standard for this method because the fat renders into the burger as it cooks. Go 85/15 if you want less richness on the plate, which some readers prefer. Avoid 90/10 and any lean blend: with the skillet cooking time here, lean beef has no juice left to give by the time it browns.
How do I know my Lucy burger is cooked through?
Check with an instant-read thermometer in the thickest part, aiming for at least 160 F / 71 C, the USDA minimum internal temperature for ground beef. Read from the side so the probe reaches the center without touching bone or pan. Without a thermometer, cut the thickest portion in half and look for the absence of any pink, understanding that you will lose some juices.
How do I keep a Lucy burger from becoming dry?
Mix the beef lightly instead of kneading it, chill the mixture for 20 to 30 minutes, and cook two portions at a time so the pan stays hot. Flip only once, once the underside is browned, and stop pressing the meat after shaping. A 3 to 5 minute rest before serving lets the juices settle back in.
Conclusion
Start with 80/20 ground beef, chopped onion, a splash of milk, salt and pepper, and mix it with a light hand for about a minute. Chill it 20 minutes, heat a heavy skillet with a thin film of oil, and cook two portions at a time over medium-high without touching them until the underside browns. Turn once, confirm 160°F / 71°C, rest for a few minutes, and put it in a toasted bun.
That is how to make a juicy lucy burger that stays tender: moisture added at the mixing stage, moisture protected by restraint at every stage after that, and browning on the outside to build the crust that holds the rest of the juice inside.