
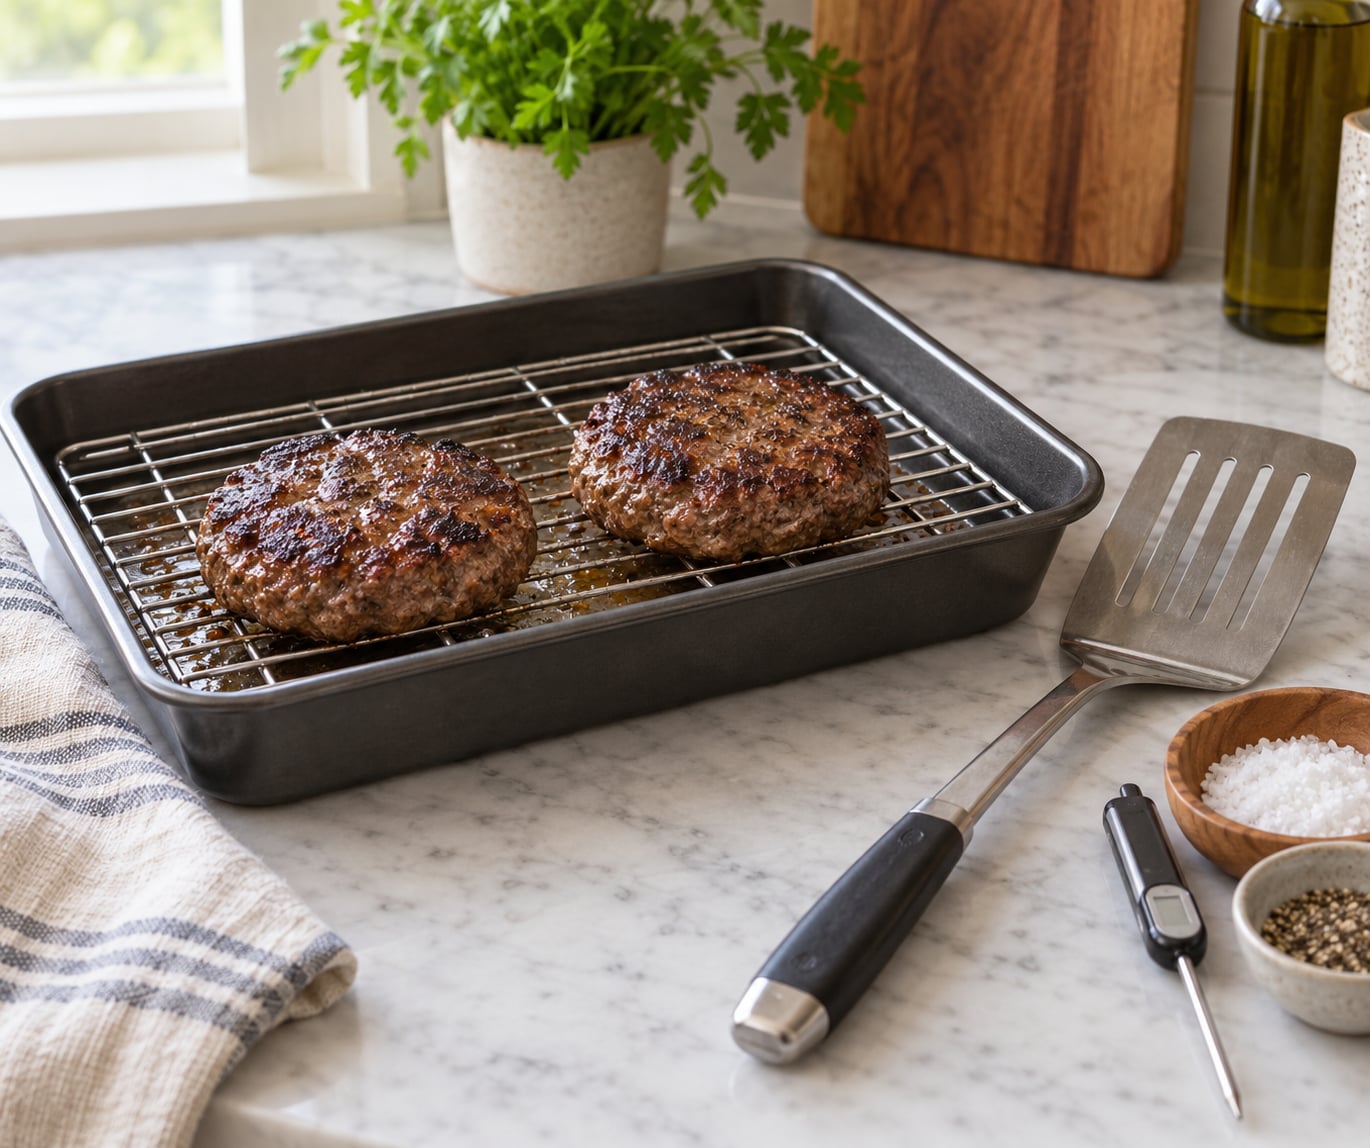
To broil burgers, set the oven to broil on high, slide the rack 3 to 4 inches under the heating element, and cook them 4 to 6 minutes per side. Flip once, then check the center with an instant-read thermometer until it hits 160°F (71°C). The whole thing takes about 15 minutes start to finish, and it is the fastest route to a browned crust and a juicy middle when you have no grill outside.
I cook burgers this way most weeks. It is the method I use when it is raining, when the grill is still cold at 6pm, or when I want a cheeseburger on the table in the time a frozen pizza takes to cook.
Broiling is not magic, and it is not the same as frying a burger in a skillet. You are working with radiant heat from above, which browns the top face fast and leaves the bottom to cook by conduction. That single fact explains almost every broiling problem: the top burns before the middle is done, the patty dries out if you babysit it, and the second side needs as much attention as the first.
Get three things right and everything else gets easier — an even patty, the right rack position, and one flip. Here is how I do it.
What You Need
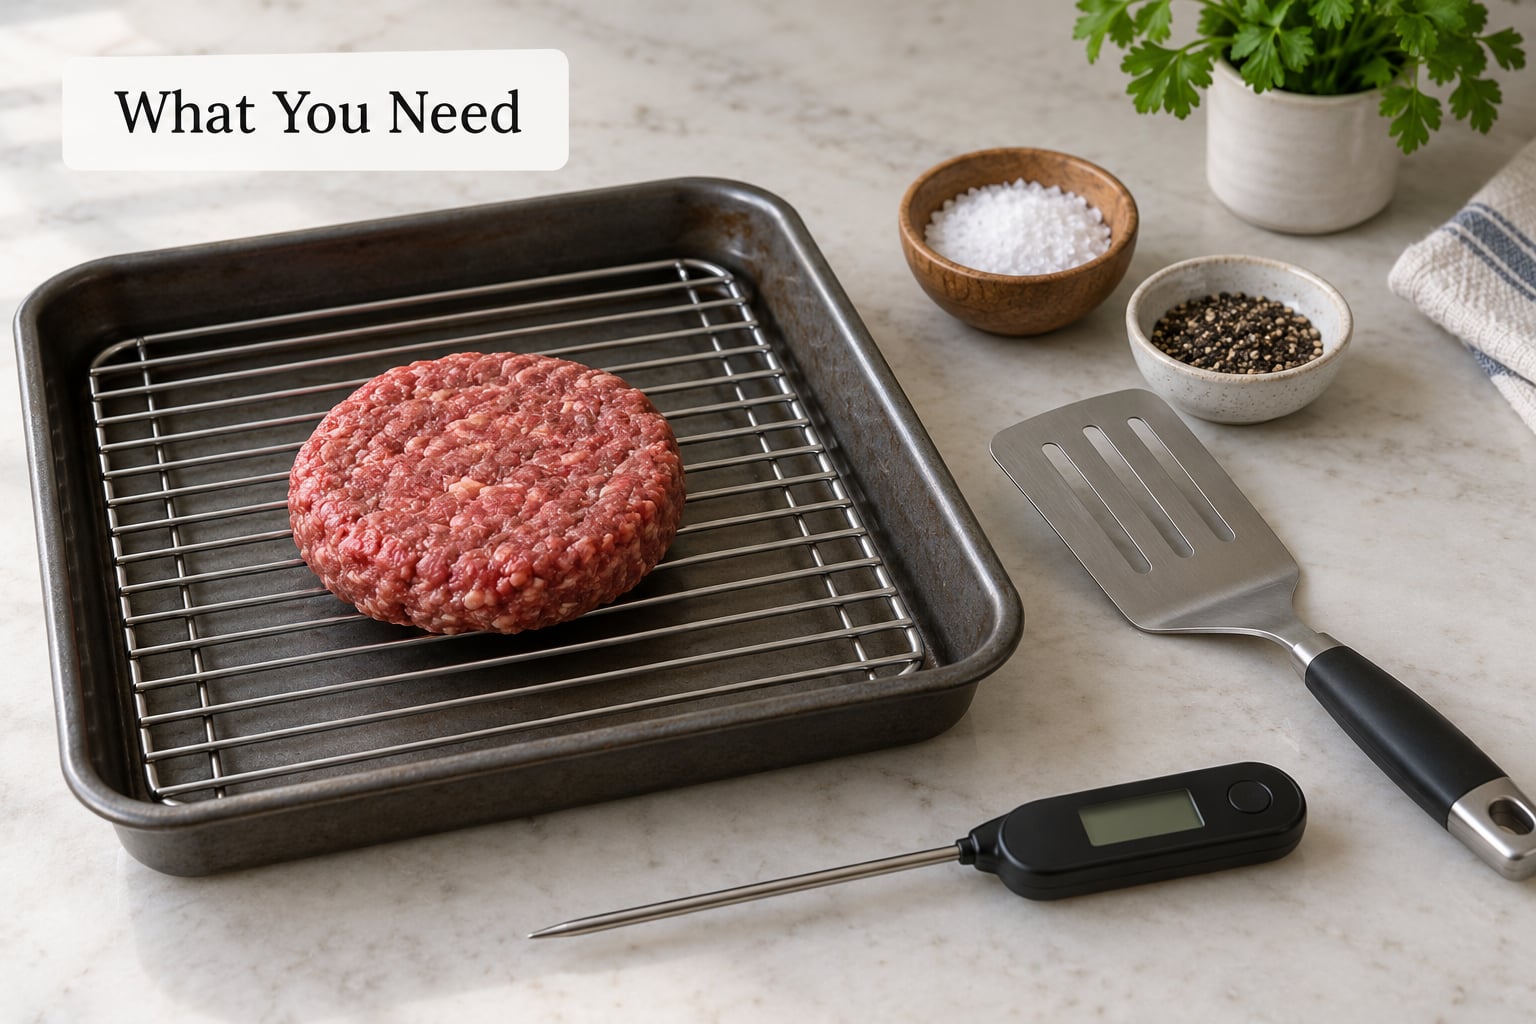
An oven-safe pan with a wire rack
A slotted broiling pan is the best tool because the fat drips away from the meat instead of sitting under it and steaming the bottom. If you do not own one, a rimmed baking sheet with a cooling rack set inside works nearly as well. Line the sheet with foil for cleanup, but leave the rack bare so juices fall through.
Do not use parchment under the patties at broiler heat. It browns, curls, and sometimes scorches before your burger is halfway done.
Ground beef with enough fat to stay juicy
An 80/20 blend is the classic answer and an 85/15 blend is what I buy most often because the patty holds together better on the rack. Leaner than 80/20 and you need a light coat of oil on the surface to keep the crust from turning leathery. This is also where the difference between a good burger and a great one shows up, and I wrote more about how restaurants keep burgers consistent when I noticed how much of it comes down to the blend.
Salt, pepper, and whatever else you like
Keep it simple on the surface. Kosher salt and coarse ground pepper are enough for most people. If you want more, add garlic powder, smoked paprika, or a pinch of Worcestershire to the meat itself rather than layering sauce on top. If you plan to add breadcrumbs for texture, there is a comparison of breadcrumb versus no-breadcrumb patties worth reading first, because breadcrumbs absorb moisture and broiled patties already run lean.
An instant-read thermometer
This is the one tool I will not compromise on. Color lies — a burger can look done and still be 145°F in the middle, or look pink and be perfectly safe. Push the probe into the side of the patty, not the top, so you get a reading from the middle of the meat instead of the browned surface.
How to Broil Burgers Step by Step
1. Preheat the broiler and position the rack 3-4 inches from the element
Start the broiler with the oven door closed and give it a full 5 minutes to come up to temperature. Broilers are gas elements or electric coils that glow red, and they recover slowly, so a broiler that has not fully heated gives you a pale first minute and then a sudden rush of heat.
Set the rack 3 to 4 inches below the element. Closer than 3 inches and the top face chars before the center moves much. Lower than 6 inches and you are really baking the burger with a light sear. If your oven allows it, switch the broiler to low for very thin patties or when you are cooking four burgers at once on a crowded rack.
Everything on that pan has to be oven-safe, including the wire rack and any foil you line the sheet with. A non-oven-safe rack warps and ruins the pan, and warped pans do not sit flat on the oven floor.
2. Shape burgers evenly and season them
Divide the beef into equal portions by weight if you have a kitchen scale. A third-pound patty is about 4 to 4.25 inches wide and three-quarters of an inch thick, and matching sizes across the batch is what makes broiling predictable. Even patties cook at the same rate; uneven ones leave you with one done burger and one that still needs a minute.
Handle the meat gently and press it together just enough that it holds together. If you compact it hard, it squeezes out fat during cooking and ends up dry and dense. Wetting your hands first stops the beef sticking to your fingers.
Press a shallow dimple into the center of each patty with your thumb. It keeps the burger from doming up in the broiler so the top and bottom cook at the same rate. Some cooks skip this for oven broiling, but I find it helps more than it hurts.
Season both sides with salt right before the patties go in. Do not mix salt into the meat ahead of time unless you are doing it hours in advance — it draws moisture out of the surface, and you want that moisture staying in.
Skip anything wet on the raw patty. Onions, pickles, and sauces laid on before broiling release water and sugar, and both burn before the meat finishes.
3. Place the burgers on the prepared pan with space between them
Set the patties on the rack with a finger’s width between them. Air circulation is part of what browns the edges, and patties touching each other steam each other instead. A standard half-sheet pan holds four burgers comfortably; five is pushing it.
If you are using lean beef, brush the tops lightly with oil. For 80/20 and fattier blends, skip it — you already have enough fat to handle the heat, and more means more smoke.
Put a sheet of foil on the oven floor or the rack below if you are worried about drips. Fat hitting the element or the oven floor is the single biggest cause of a smoking kitchen and a triggered alarm, and it is the complaint I hear most from people broiling in apartments.
4. Broil until the edges brown without burning them
Slide the pan into the oven on the top rack and close the door. Set a timer. Do not stand and watch — the door glass blocks most of the element’s heat, so opening it repeatedly drops the temperature and slows the cook.
- 1/4-pound patties, thin: 2 to 3 minutes per side
- 1/3-pound patties, standard: 4 to 6 minutes per side
- 3/4-pound patties, thick: 7 to 9 minutes per side
What you are watching for on the first side is color on the edges and top surface, not crust on the flat faces. The edges pull in and round off, the top turns a deep brown in patches, and rendered fat darkens. If the top is black in the center while the edges are still pale, move the rack down or drop to broiler low next time.
Watch smoke here. A fine mist of steam early on is normal. Visible heavy smoke means fat is hitting the element or the patties are too close, and it will taste bitter long before it sets off an alarm.
5. Flip carefully and check the temperature
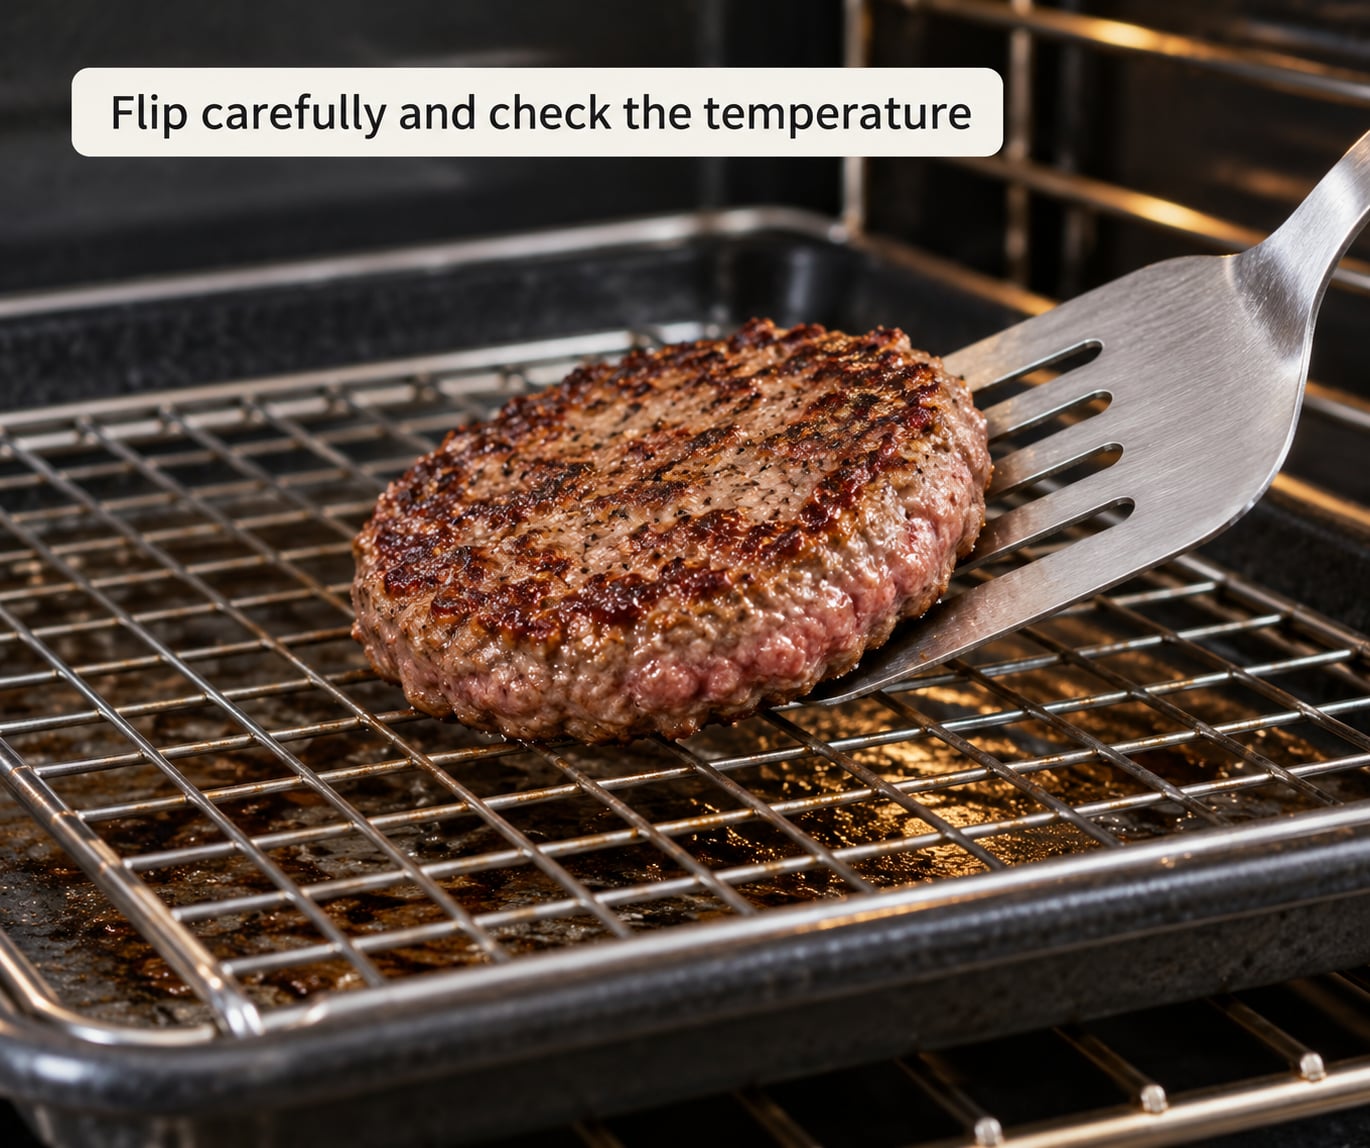
Use a thin, wide metal spatula and slide it fully under the patty before you lift. Burgers stick when the meat has bonded to the hot metal, so if one does not release, do not yank — slide the spatula sideways and scrape gently along the rack to break the bond. A little cooking spray on the rack before cooking helps more than anything else.
Flip once. Cook the second side for roughly the same time, usually one minute less since the patty is already partly cooked through.
Here is what the thermometer readings mean once you cut into the patty:
- 125°F to 130°F (52°C to 54°C): rare, red center and very loose.
- 130°F to 135°F (54°C to 57°C): medium rare, red to pink center.
- 140°F to 150°C (60°C to 65°C): medium, pink center and firmer.
- 160°F (71°C) or higher: well done, brown throughout with no pink.
The USDA minimum for ground beef is 160°F (71°C). Pull the patty about 5°F below your target and take it off the heat, because carryover cooking will carry it the rest of the way while it rests. That is also why an overcooked burger stays overcooked — there is no coming back from the well-done zone.
If you want melted cheese, lay it on during the last 30 to 60 seconds with the door open, or add it after the patties come out and let residual heat do the work. American and cheddar melt fast. Provolone and Gruyère take closer to a minute, and a thick slice of Swiss laid on cold will sit there looking unchanged.
6. Rest briefly before serving
Move the patties to a plate or a rack and wait 3 to 5 minutes. Resting lets the muscle fibers relax and stop pushing juice out, which is exactly the juice you want in the burger instead of on the cutting board. If you are in a hurry, a tent of loose foil speeds it slightly.
While the burgers rest, split your buns and put them cut-side down on a lower rack under the broiler for 30 to 60 seconds. Watch them closely — they go from toasted to charcoal in about ten seconds. Doing both jobs at once means everything is hot at the same time.
Common Mistakes
Broiling too close to the heating element
This is the most common failure: a black crust over a raw pink center. Rack position is your throttle. Drop the rack one inch and reduce the time per side, or switch from high to low. A patty that is blackened on top at four minutes is telling you the top is getting three times the heat the bottom is.
Using patties that are too thin or uneven
A patty pressed flatter than three-quarters of an inch dries out and falls apart when you flip it. Build up any squat patties with the extra meat, and weigh them against each other so the batch cooks evenly. If your patties vary a lot in thickness, pull the thin ones off first rather than cooking to the thickest one and serving everyone a burnt burger.
Flipping too often or pressing the patties
Three or four flips dry the surface and tear the crust. Flip once. And skip the urge to press down with the spatula — every press squeezes juice out onto the rack where it burns. Let the weight of the spatula do the work.
Adding sauces or wet toppings too early
Ketchup, barbecue sauce, and anything with sugar or vinegar will blacken within a minute or two under broiler heat. Same for raw onion, pickles, and tomato. Sear the bare patty, then top it after it comes off the heat. The sauce still melts into the hot meat, it just does not burn.
Skipping the temperature check
Color and firmness are guesses. A burger can run to 175°F and still look pink in the middle, and one can hit 160°F while the surface is still pale. Ten seconds with a thermometer removes the guess entirely, and it is the reason I stopped serving burgers that were tough in the center.
Tips for Juicy Broiled Burgers
Chill the patties briefly. Thirty minutes in the refrigerator firms up cold fat so the burger keeps its shape on the rack instead of slumping into a puddle.
Coat lean beef lightly with oil. Under broiler heat, fat in the meat renders away fast. A 90/10 blend without a little oil tends to taste like leather no matter how well you time it.
Add cheese off the heat. Residual heat melts thin slices in about a minute, and you get zero burn risk.
Toast buns on a second rack while the patties rest. It costs nothing and it is the step most people skip, which is why their burgers go soggy by the second bite.
Broil from frozen if you must, and give it more time. Frozen patties need about 50 percent longer, and they should go on the rack from frozen, never thawed and re-frozen. Thaw in the refrigerator overnight if you have the time — I wrote about the freezer side of this in the meal prep burger guide.
Watch the smoke, not just the clock. If the kitchen fills with haze, drop the rack or lower the broiler before the alarm gives you the message.
Frequently Asked Questions
How long should I broil hamburgers on each side?
Broil a third-pound patty 4 to 6 minutes per side on broiler high, with the rack 3 to 4 inches from the heating element. Thin quarter-pound patties need 2 to 3 minutes per side, and thick three-quarter-pound patties need 7 to 9. Check the center with an instant-read thermometer and pull at 160u0026deg;F (71u0026deg;C).
Do you flip burgers when broiling?
Flip once, at the halfway point. Broilers cook from above, so the top face browns in a couple of minutes while the center lags behind. One flip gives you an evenly browned second side. Repeated flipping tears the crust, dries the surface, and lets juice escape onto the rack where it burns.
Should I broil burgers on high or low?
High for patties thicker than three-quarters of an inch, low for thin or frozen patties and for large batches. Broiler low spreads the heat over a longer window, which gives the center time to catch up and reduces the chance of a black crust. If your top face burns before the middle cooks, switch to low before anything else.
Can I broil frozen hamburger patties?
Yes, straight from the freezer. Place frozen patties on the hot rack and add roughly 50 percent to the usual time, checking temperature early. Broiling is actually one of the better methods for frozen patties because the top-down heat cooks the surface before the inside has a chance to turn mushy. Thawing in the refrigerator overnight gives a better result when you have the time.
Is it better to bake or broil burgers in the oven?
Broiling wins on speed and crust. A broiler hits 500u0026deg;F or more from above, so you get browning in minutes and a total cook time under 15 minutes. Baking at 400u0026deg;F is gentler and better for large batches or lean meat, but it produces a paler surface and takes roughly twice as long. Broil first, then check the center with a thermometer.
What is the 5 6 7 rule for burgers?
It is a doneness shortcut that uses the color of cooked ground beef instead of a thermometer: press the patty and the surface stays pink for medium rare, turns light pink for medium, tan for medium well, and brown for well done. Handy in a pinch, but it takes practice, and a thermometer reading of 160u0026deg;F is faster and more reliable than any rule of thumb.
Conclusion
Start with the five things that decide whether a broiled burger works: broiler on high, rack 3 to 4 inches from the element, evenly sized patties, one flip at the halfway mark, and a thermometer reading of 160°F (71°C). Get those right and you are 15 minutes from a burger with a browned crust, a juicy middle, and no smoke alarm going off in the kitchen.