
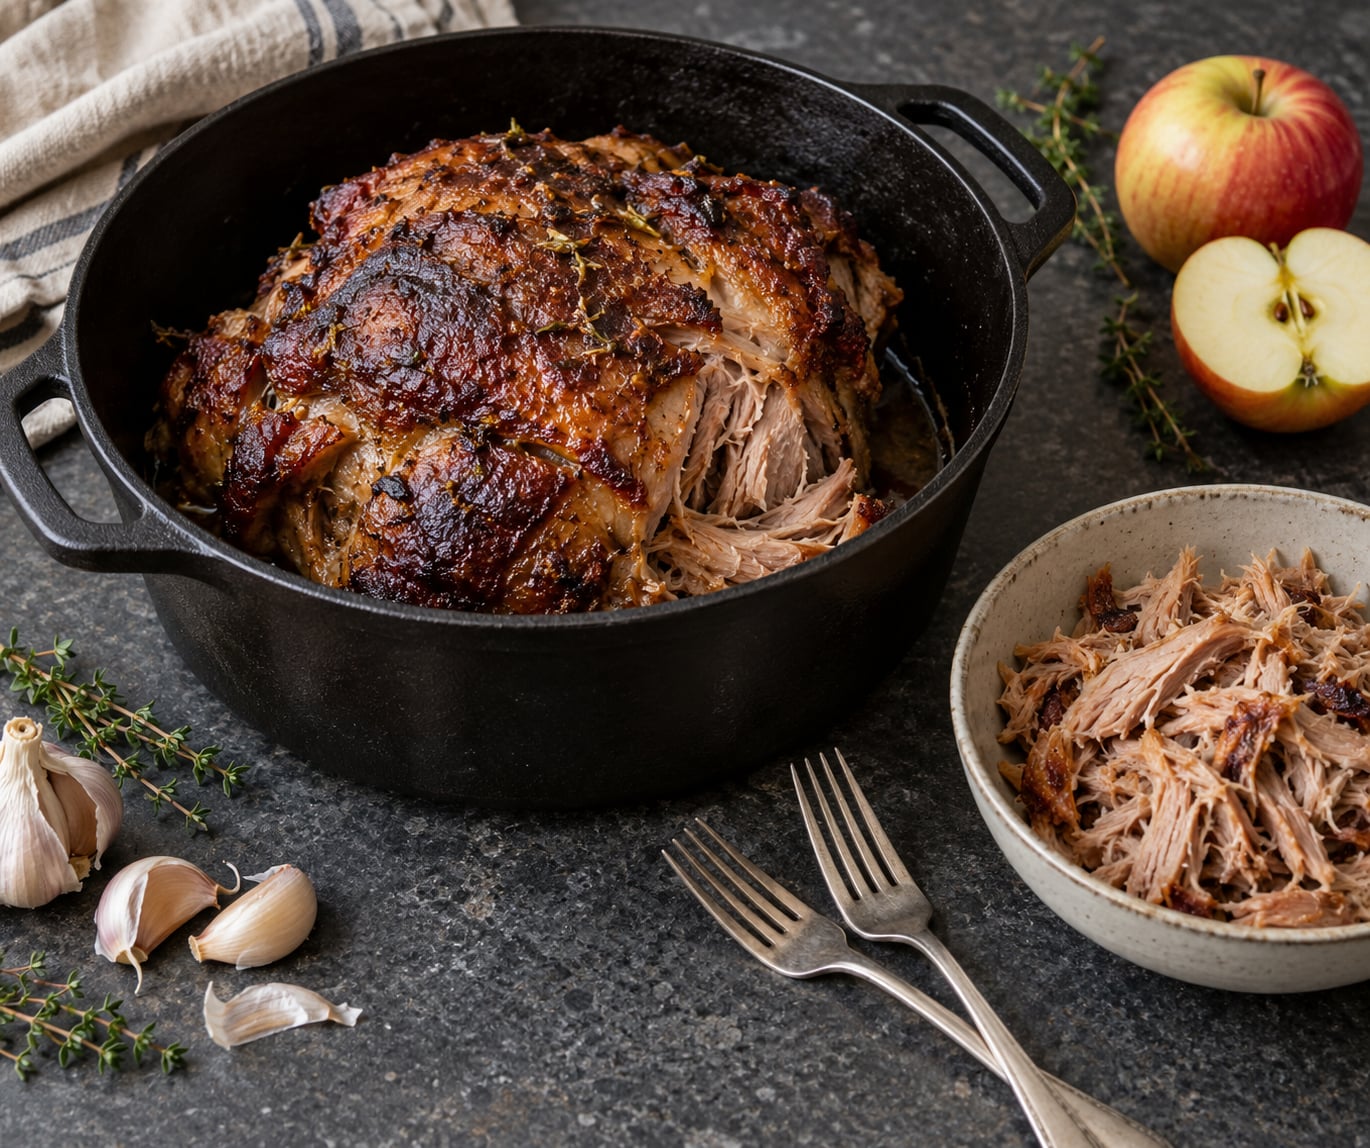
Knowing how to make pulled pork in the oven comes down to a pork shoulder or Boston butt, dry-rubbed and slow-roasted at 300°F (150°C) for three to six hours until it hits 195-205°F internally and shreds easily with two forks. It is the smoker-free route to the same bark and tender strands, and the whole thing runs on one pan, one oven, and a thermometer.
The whole method rests on a single idea most recipes get wrong: cooked by the clock, pulled pork fails. Time is a guess. Temperature and tenderness are the answer, and the gap between them is where tough, dry, un-shreddable meat comes from.
Budget about three hours for a four-pound roast, closer to five for something larger, plus resting time you can spend on sides. It is low-effort cooking, but the hands-on part is short — 15 minutes of trimming and seasoning, then the oven does the work.
These are the timings and temperatures I still cook to in 2026, and they have not changed since I started making this without a smoker.
What You Need
Pulled pork needs very little equipment, which is why the oven method is the one most people try first.
- The cut: a 3- to 5-pound boneless or bone-in pork shoulder. Boston butt is the top of the shoulder; picnic shoulder is the lower portion, and it is usually sold bone-in.
- Dry rub: kosher salt, black pepper, paprika, garlic powder, and a choice of chili powder, cumin, or brown sugar.
- Cooking vessel: an oven-safe Dutch oven, a roasting pan with a rack, or a foil-covered baking dish. All three work.
- Instant-read thermometer: the one tool that decides when dinner is ready. A cheap one is fine.
- Aluminum foil: for the wrapped phase and for resting.
- Liquid: about a cup of apple juice, chicken broth, or water. Optional in a sealed Dutch oven, useful in an open pan.
- Two forks: for shredding. That is the whole tool list.
Which cut should you buy? A Boston butt is compact, round, and stacks neatly in a Dutch oven, which makes it the easiest to cook evenly and the easiest to shred. A picnic shoulder is flatter with a long bone, and that bone gives you a little extra flavor while holding more moisture near the center — but the shape is awkward in a round pot, so give it a roasting pan.
Bone-in or boneless? Both work. Bone-in shoulders hold moisture and pick up a bit more flavor, and they need roughly 30 to 45 extra minutes. Boneless is easier to cube, sear, and fit in a smaller oven, which matters in a galley kitchen or an RV.
One warning: a pork loin is not a substitute. It is lean, quick-cooking, and low in the connective tissue that turns into gelatin. Loin will slice, but it will not pull.
Step-by-Step: How to Make Pulled Pork in the Oven
1. Choose and Trim the Pork
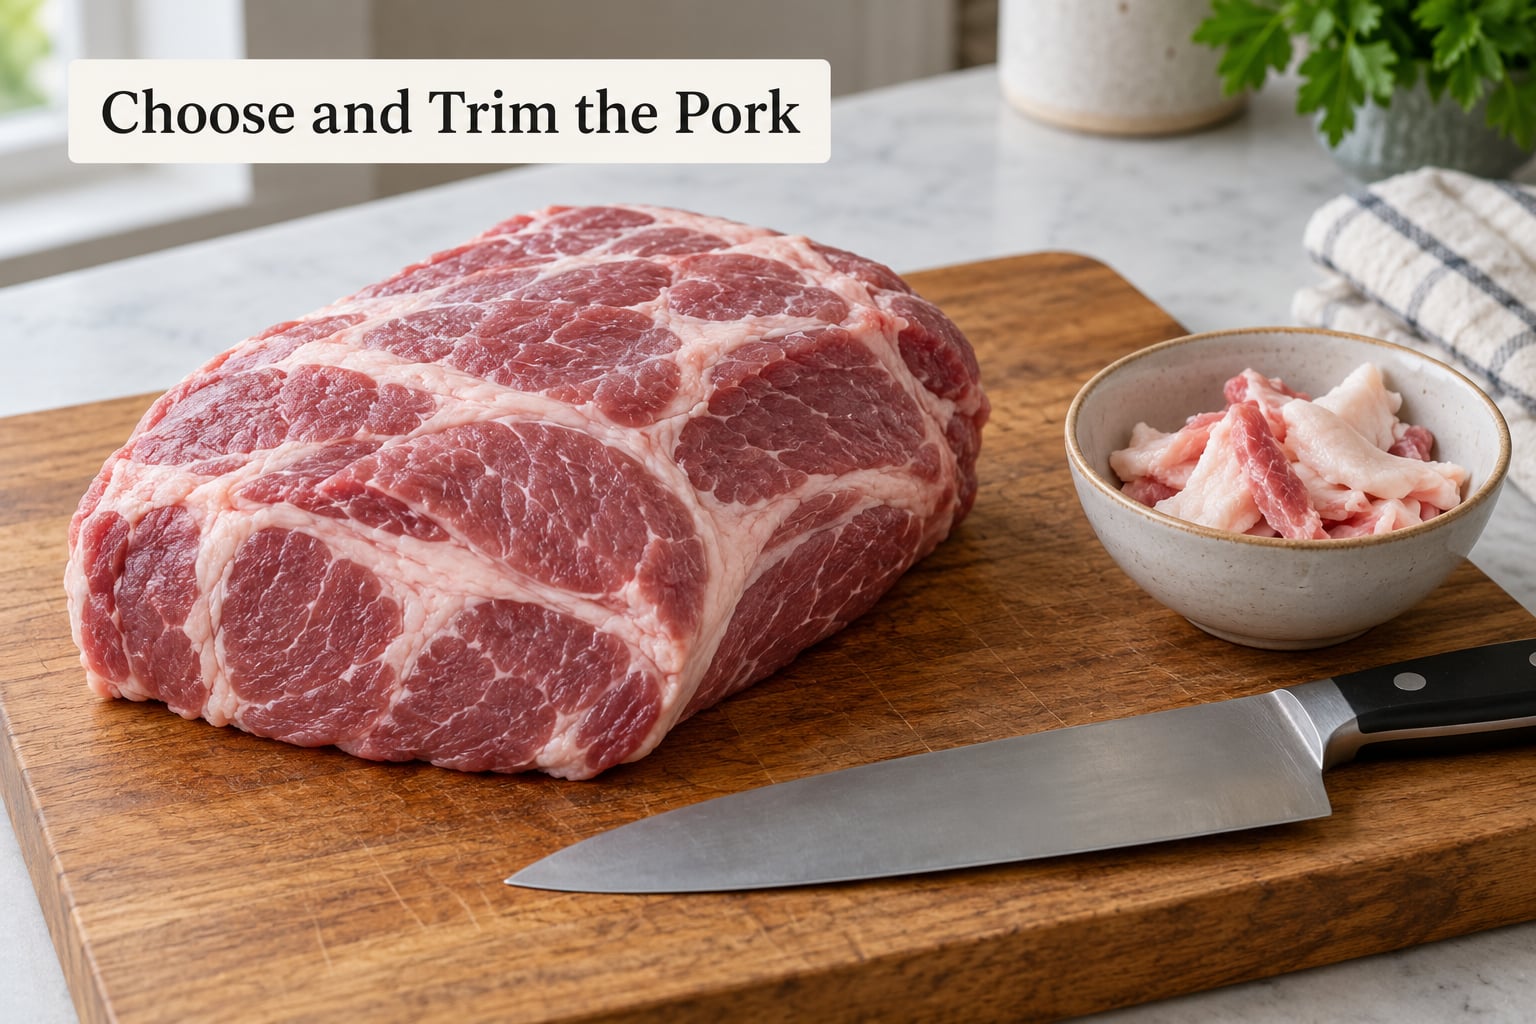
Set the roast fat-side up. Slice off the thick outer slab of fat but leave a thin layer, maybe a quarter inch, behind — that cap is what bastes the meat as it renders. Take the fat cap off too aggressively and you strip away the insulation that keeps the shoulder moist through a four-hour cook.
Pat the surface dry with paper towels. Moisture on the outside steams instead of browning, and you lose the crust that gives oven pulled pork its flavor.
You can skip trimming entirely, but the roast will cook noticeably faster and the extra fat will collect in the pan as grease rather than flavoring the meat.
2. Season the Pork
Mix the rub in a bowl: 2 tablespoons kosher salt, 2 tablespoons black pepper, 2 tablespoons paprika, 1 tablespoon garlic powder, 1 tablespoon chili powder, and 1 tablespoon brown sugar. Brown sugar caramelizes into the crust; leave it out for a sharper, more peppery bark. Cumin or dried oregano work in place of the sugar if you want a deeper, earthier profile.
Pat the seasoning over the whole surface — fat cap, sides, and ends. A thin, even layer is what you want. Rubbed in thick, the sugar and salt burn before the collagen has converted, and you get a bitter crust over chewy meat.
Season right before cooking, or let the rubbed roast sit covered in the refrigerator for several hours or overnight. An overnight rest lets the salt dissolve into the surface and gives you a better crust. It is the same step barbecue cooks call a put-up, and it costs nothing but patience.
If you like, cut a small slit in the top and tuck in a few garlic cloves. It adds aroma without the juices running out the way forum cooks sometimes fear, though the flavor stays close to the surface either way.
3. Begin the Low-and-Slow Oven Cook
Heat the oven to 300°F (150°C). If your oven will not go that low, run it at its lowest setting and put an oven thermometer inside. RV and propane ovens often sit 30 to 50 degrees above the dial, and knowing the real temperature is worth a few dollars.
Answering the covered-or-uncovered question directly: do both, in sequence. A short uncovered phase builds the crust, then a covered phase holds moisture while the collagen converts. That two-stage approach is the single biggest difference between good oven pulled pork and great oven pulled pork.
Here is the schedule. Sear at 450°F for 15 minutes if you want a faster bark — that blast is optional, not required.
- 450°F, 15 minutes, uncovered (optional): builds crust fast on a boneless roast.
- 300°F, uncovered, first phase: cook until the surface looks dry and the bark has darkened, roughly 2 hours for a 4-pound piece.
- Add liquid: pour a cup of apple juice, broth, or water into the pan, not over the meat. The steam does the work.
- 300°F, covered or foil-wrapped, second phase: cook until probe tender, usually another 1.5 to 3 hours.
Which liquid works best? Each adds something different. Apple juice gives a light sweetness and cuts the salt, which is the most popular choice. Chicken broth adds body and savory depth. Water keeps things neutral and costs nothing. Cola or a tomato paste slurry adds caramel sweetness and body for a sweeter, sauced result. In a sealed Dutch oven, the meat renders enough juice to braise itself, so liquid is optional; in an open roasting pan, add it or the bottom can scorch.
Scale the timing by weight rather than guessing. These are starting points, not finish times — temperature decides.
| Roast weight | At 300°F (150°C) | At 325°F (165°C) |
|---|---|---|
| 3-4 lb | 3-4 hours | 2.5-3.5 hours |
| 5-6 lb | 4-5 hours | 3.5-4.5 hours |
| 7-8 lb | 5-6 hours | 4.5-5.5 hours |
Ignore the “30 minutes per pound” line on the package. That guidance is written for a roast you intend to slice, and it will hand you a tough piece of meat that shreds into nothing but strings.
4. Check Temperature and Tenderness
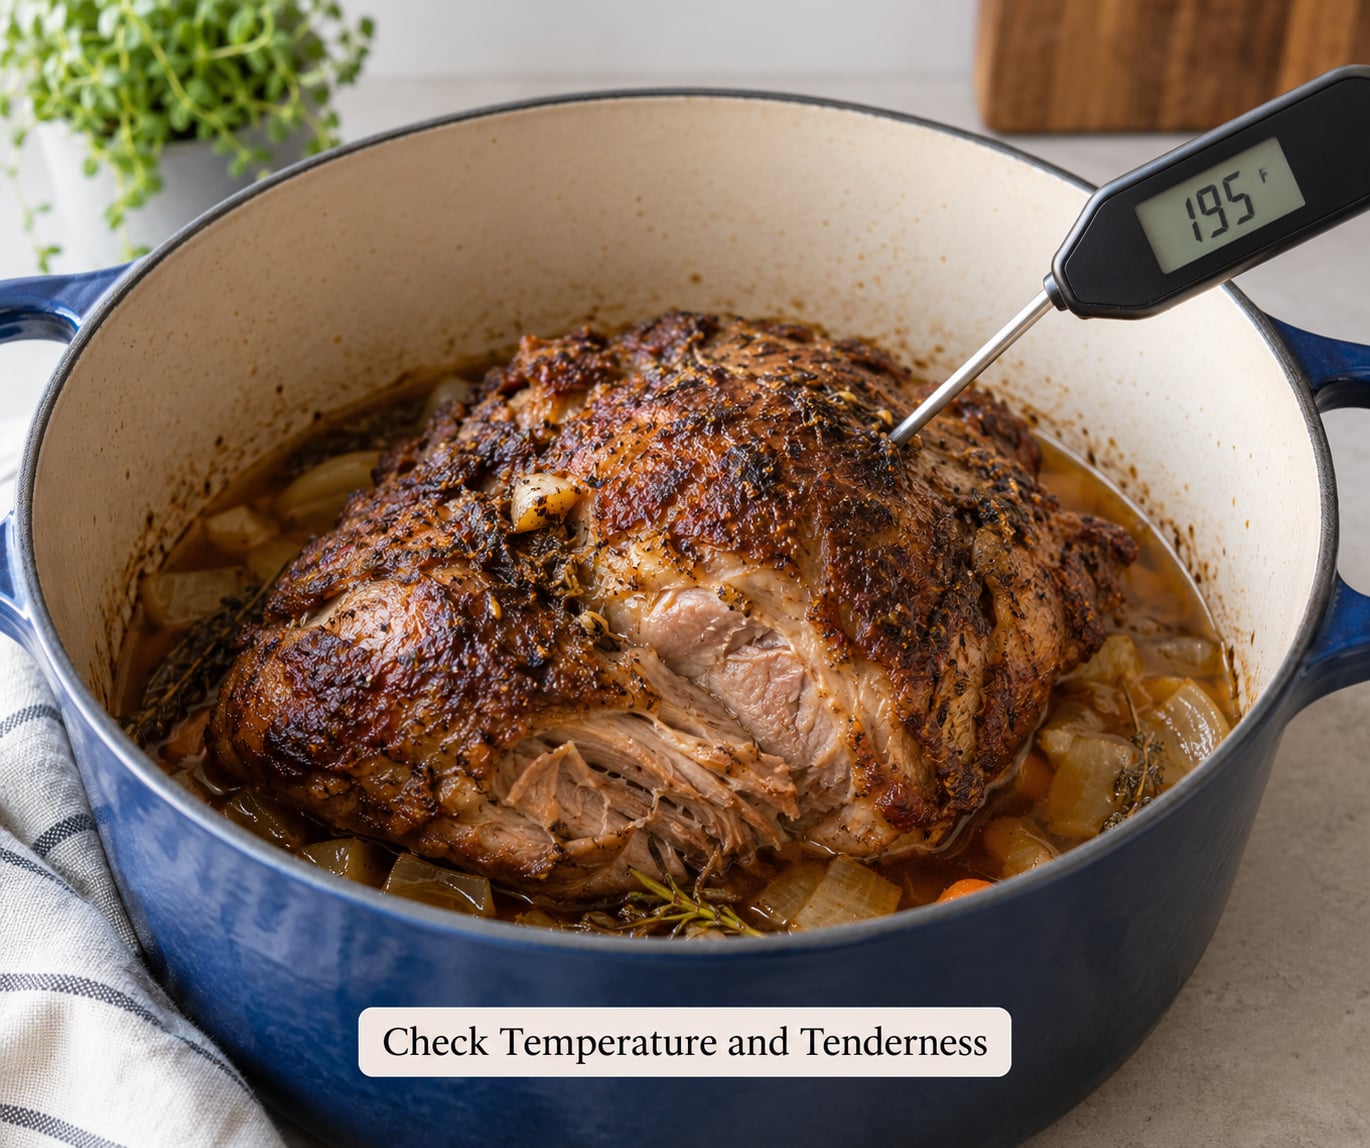
Start probing when the roast has had two hours. Push the instant-read into the thickest part, away from the bone, and read it. Then probe a second spot. A single reading tells you little; two agreeing readings tell you the whole roast.
Here is where most home cooks go wrong. The USDA safe minimum internal temperature for whole cuts of pork is 145°F (63°C). That is the doneness number for a roast you are going to slice. Pulled pork is a different dish with a different target, because shreddable texture comes from collagen breaking down into gelatin, and that happens far past safe doneness.
For pull-apart texture, aim for 195-205°F (90-96°C) and call it done when the probe slides into the meat with almost no resistance. That is probe tender, and it matters more than the number. A roast at 190°F that gives easily beats one at 203°F that still fights the fork.
Using a spoon instead of a thermometer: press the thickest part with the back of a spoon. If it dimples and the meat fibers separate under light pressure, the collagen has converted. If it springs back like a rubber ball, give it another 30 minutes.
Probing in and out repeatedly is the go-to insurance among experienced cooks. Opening the oven more than you need to costs you time and heat, but two or three checks over a long cook cost you nothing.
Can you overcook pulled pork? Past roughly 210°F the shoulder has no collagen left to give, and the meat turns dry and stringy rather than merely firm. The window is wide, but it exists.
5. Rest, Shred, and Serve Pulled Pork
Pull the roast when the probe reads 195-205°F. Wrap it tightly in foil, set it in a dry cooler or the empty pan, and let it rest 30 to 60 minutes — two hours is fine, and many cooks say the extra hold makes shredding noticeably easier.
The rest is not about carryover cooking here, the way it is with a steak. It is about letting the muscle fibers relax and the gelatin finish setting. A pork that shreds like wet cardboard in the pan turns into clean strands once it has sat wrapped for an hour. The juices do not squeeze out, because they are held in the foil.
Shred with two forks, working along the grain. Pull the roast into two or three large chunks first, then pull each chunk apart. Keep the meat in the pan juices as you go. For a big batch, a stand mixer paddle on low does the same job in about a minute, though the texture is slightly rougher.
Taste before you sauce. A well-seasoned shoulder is good with just its own rendered fat and a splash of the cooking liquid. Add barbecue sauce by the tablespoon, not the cup — heavy sauce hides the crust flavor and pushes the sugar past the point where it caramelizes on reheats.
For serving: sandwiches with slaw and pickles, tacos with onion and cilantro, nachos under cheese and pickled jalapenos, or bowls over rice with white beans and corn. The sides are where a long cook pays off, which is a good argument for turning a few of these crispy oven sweet potato fries or a homemade burger without a bun alongside. If you want something that holds up to a freezer, this freezer-friendly burger prep guide covers the same batch-cook-and-freeze logic for ground beef.
Plan on 3 to 4 cooked ounces per person, and expect to lose roughly a quarter of the raw weight to rendering and shrinkage. A 5-pound roast yields about 3 pounds of finished meat, which serves six generously or eight at a sandwich table.
Refrigerate extra meat within two hours and use it within three to four days. For longer storage, freeze it in sauce or broth, pressed flat in a bag, for up to two to three months. Reheat gently in a covered pan with a splash of liquid so it re-steams instead of drying out further.
Common Mistakes
Cooking by the clock. This is the big one, and it is why so many roasts come out tough. Package timing assumes slicing. Watch the thermometer and the probe instead.
Pulling at 145°F. That is safe, but it is not shreddable. The collagen has barely started to move, and you will be sawing at it with a fork.
Shredding too early. If the meat fights you, stop and put it back. Twenty more minutes at 300°F does more than twenty minutes of arguing with the fibers.
Letting the surface burn. Dark bark is good, black is not. Once the sugar in the rub turns black, the flavor turns bitter and no amount of sauce hides it. If you are basting with sauce during the cook, wait until the last 45 minutes.
Using too little liquid in an open pan. The bottom of the roast sits in rendered fat and juices, and once that burns the whole pan smells acrid. A cup of liquid prevents it and keeps the steam coming.
Trimming off all the fat. Leave a thin cap. The lean edge of a shoulder dries out faster than the fatty center, which is why well-trimmed roasts need the wrapped phase more than most recipes admit.
Serving without tasting. Adjust salt and acid before serving. A squeeze of cider vinegar or a splash of apple juice wakes up a roast that tastes flat after a long cook.
Two more habits that fix most problems. Use a wire rack inside the pan so the roast sits above its own liquid rather than simmering in it. And keep the foil tight — a loose wrap releases steam and dries the surface.
Short on time? A Dutch oven gives you pulled pork in about three hours. Brown the seasoned shoulder on all sides in a heavy pot on the stove, pour in a cup of broth, lid it, and braise at 300°F until probe tender, usually 2 to 2.5 hours. The sear gives you bark without oven time, and the sealed pot replaces the foil phase entirely.
For consistent results, the routine matters more than the recipe. Weigh the roast, probe two spots, write down what worked, and adjust next time. After two cooks you will know your oven better than any recipe does.
Frequently Asked Questions
What is the best temperature for pulled pork in the oven?
Three hundred degrees Fahrenheit (150°C) is the sweet spot: hot enough to render fat steadily, cool enough that the surface does not scorch before the interior catches up. A range of 275-325°F works, and the finish is decided by temperature rather than time. Aim for 195-205°F internally and stop when the probe slides in with no resistance.
Do you cook pulled pork in the oven covered or uncovered?
Both, in sequence. Cook uncovered first so the dry rub browns and dries into a bark, then add a cup of liquid and cover with foil or a lid to steam through the long finish. A 450°F blast for 15 minutes at the start speeds up the crust on a boneless roast, but the covered phase is what keeps the meat moist.
How long does pulled pork take in the oven?
Plan on three to four hours for a 3- to 4-pound roast at 300°F, four to five hours for 5 to 6 pounds, and five to six hours for 7 to 8 pounds. Treat those as start times only. The roast is done at 195-205°F internally when the probe gives with no resistance, and that can run earlier or later than the clock suggests.
Can I make pulled pork in the oven in under three hours?
Yes, with a Dutch oven. Brown the seasoned shoulder on all sides in a heavy pot, add about a cup of broth, cover, and braise at 300°F until probe tender, usually two to two and a half hours. Rest it wrapped for 30 minutes before shredding. Boneless cuts finish faster than bone-in, and a small roast beats a large one for speed.
Can you overcook pulled pork?
You can, past roughly 210°F. Once the collagen has fully converted, there is nothing left to give, and the meat dries out and turns fibrous. The practical safeguard is temperature plus the probe test rather than a clock, because a roast that shreds easily at 195°F is done no matter what the recipe says about minutes per pound.
What can I add to pulled pork to keep it moist?
A cup of apple juice, chicken broth, or water in the pan before the covered phase keeps steam coming and stops the bottom from scorching. Beyond that, leave a thin fat cap on the roast, wrap it tightly for the second phase, and rest it wrapped in foil for 30 to 60 minutes before shredding. Adding barbecue sauce mid-cook is what dries meat out, so save it for the end.
Conclusion
Start with the cut: a well-trimmed pork shoulder, roughly four pounds, with a thin fat cap left on. Rub it, roast it uncovered at 300°F, then wrap it with a cup of liquid in the pan and let it finish covered.
From there, ignore the clock and watch the thermometer. Probe at 195-205°F, rest the wrapped roast for at least 30 minutes, and shred only when the meat pulls apart without a fight. That is the whole method, and it is the one I still use.