
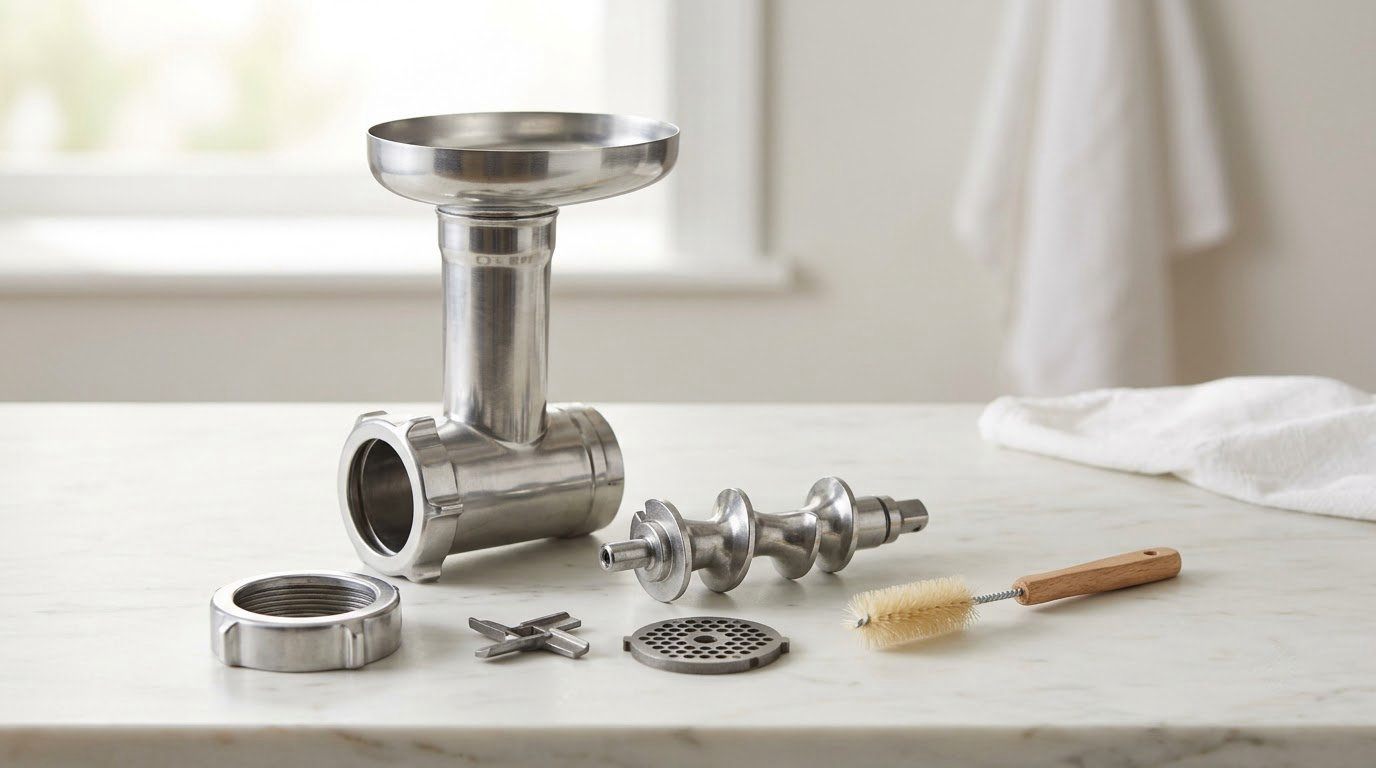
To clean a meat grinder, unplug the unit, run a slice of bread through it to push out leftover bits, take apart every removable part, and hand-wash them in hot, soapy water. The whole routine takes about 15 minutes, and it is the same for a hand-crank model and an electric one.
Raw meat, fat and sinew left on grinder parts breed bacteria and turn rancid fast, and that off-flavour shows up in your next batch of ground meat no matter how carefully the meat itself was handled. Dried grease also dulls the cutting blade and can stall the auger, so cleaning is maintenance, not housekeeping. For context on the raw side of it: ground meat needs to hit 160°F / 71°C internally before it goes anywhere near a plate.
Most of the confusion comes from the teardown. People assume you have to force the whole machine apart, then they soak the motor body and get a permanent smell they can’t shift. Both are avoidable. Below is the full procedure in the order the parts actually come off, plus the dishwasher answer that contradicts half the advice online.
Table of Contents
- What You Need
- Step-by-Step
- 1. Unplug the grinder and let it cool
- 2. Disassemble the grinder in the correct order
- 3. Scrape away stuck meat and fat
- 4. Wash every removable part thoroughly
- 5. Clean the housing and outlet without flooding it
- 6. Sanitize the food-contact parts
- 7. Air-dry completely before reassembling
- 8. Reassemble and test the grinder
- Common Mistakes
- Frequently Asked Questions
- Start with the Right Cleaning Method for Your Grinder
What You Need
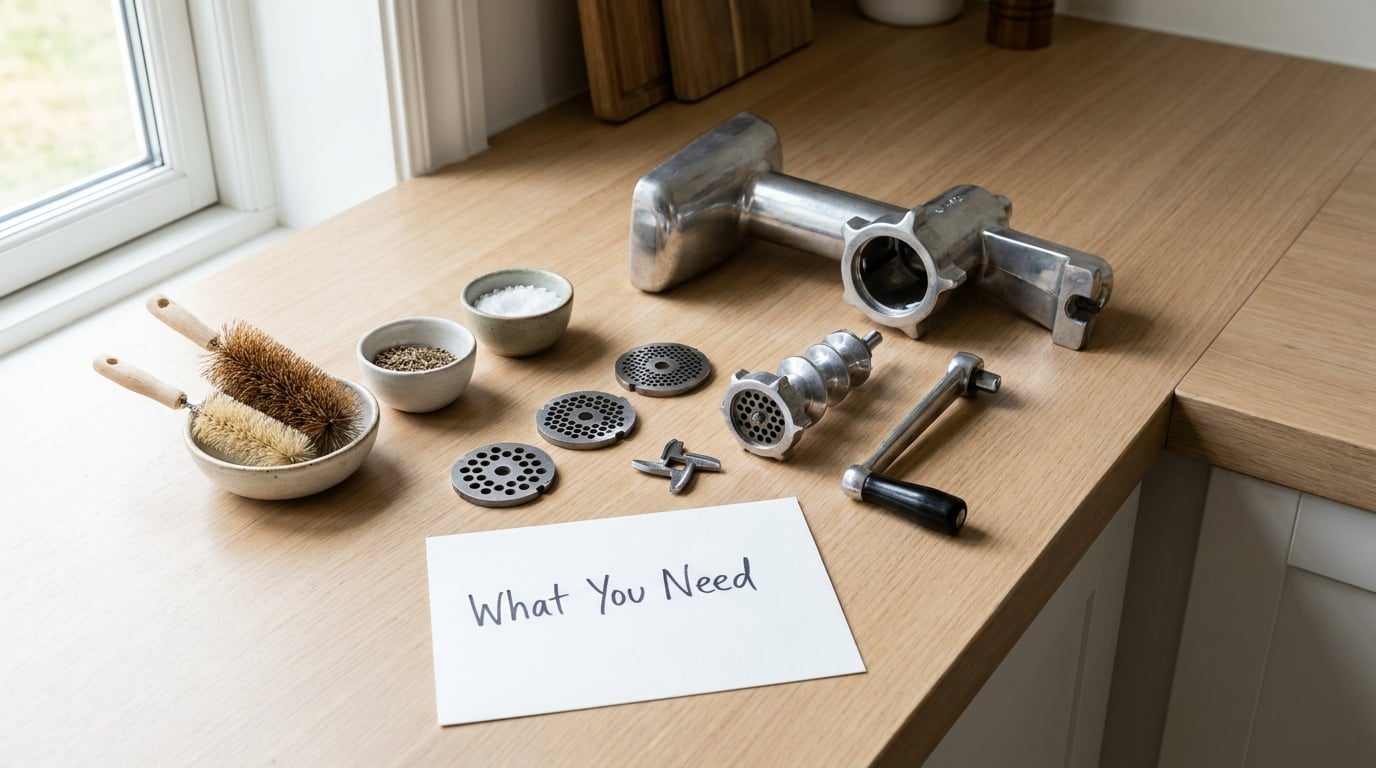
The supply list is short. Have these ready before you touch the machine, because the part you need will always be the one you didn’t set out.
- A basin or sink filled with hot, soapy water
- A mild dishwashing liquid, not a degreaser or abrasive powder
- A stiff nylon-bristle brush, an old toothbrush, and a bottle brush for narrow bores
- A plastic scraper or the back of a spoon for scraping residue
- Paper towels and a clean dish towel for drying
- A food-contact-surface sanitizer, if you have one, with its label directions in view
Timing matters more than people expect. Unplug an electric grinder before you remove anything, and give the housing a few minutes to cool if you just ran a warm batch through it. Manual hand-crank models need the same sequence minus the plug, and the crank handle usually comes off with a single bolt.
Read the owner’s manual for your specific model before the first pass. Manufacturers disagree on two points that matter: which plastic parts are dishwasher safe, and whether the body can be rinsed at all. Where the manual says something specific, it beats anything in this guide.
Step-by-Step
1. Unplug the grinder and let it cool
Pull the plug out of the wall, not just off the switch. A grinder left on a counter after use with the cord still seated is how people get shocks they blame on static. Wait a few minutes if the housing is warm, then move on.
2. Disassemble the grinder in the correct order
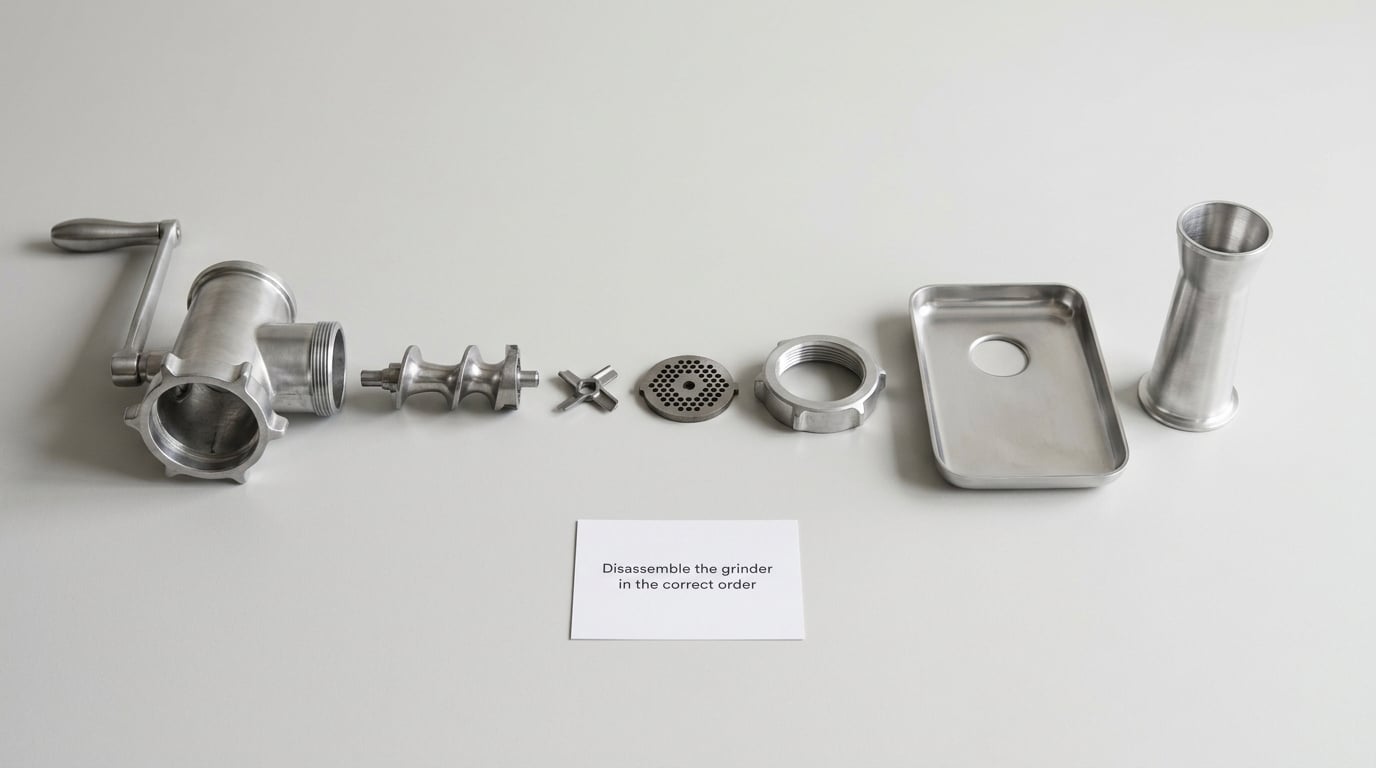
Parts come off from the outside in, and the order is not obvious the first time. Take the hopper and food tray off the top, then the ring cap, then the grinding plate and cutting blade, and only then the auger from the housing. On most models the auger pulls straight out once the plate is free.
Work the ring cap loose by hand, with the blade handle turned a quarter-turn. Never force it with a screwdriver; the tab is thin and it snaps. Put the cutting blade last of the loose parts and keep your fingers on the handle, because it is the one part that will draw blood.
The small hardware is the other problem. Put the plate screws, the retaining ring and the handle bolt in a small bowl or a folded paper towel and carry the bowl with you to the sink. Losing a plate screw inside a sink drain is a bad afternoon.
3. Scrape away stuck meat and fat
Before anything gets wet, scrape the big residue off. Use a plastic scraper, the back of a spoon, or a dull butter knife on the plate face, the auger flights and the inside of the housing. Dried meat comes off far easier dry than wet.
For sinew and shreds caught in the plate holes, work a stiff brush across the face against the grain of the holes, with the plate resting on a flat surface so it doesn’t flex. If meat has welded itself on, a short soak in hot water loosens it better than scraping at it dry.
4. Wash every removable part thoroughly
Soak the food-contact parts in the basin of hot, soapy water for 10 to 15 minutes, then wash each one by hand with the brush. That means the hopper, food tray, ring cap, grinding plate, cutting blade, auger, the grinding tube, and the sausage stuffer and stuffing tubes if your model has them.
Manual-washing every part is the safe default because it works on every grinder. Push a bottle brush or a folded paper towel through the grinding tube, and run the toothbrush around the auger’s helical thread, which hides grease in the valleys. The stuffer barrel and tubes need the same treatment, pushed through with a brush from each end.
Keep water away from the motor body and the suction base. That is the one hard no in the whole process, and it applies whether the base is metal or plastic.
5. Clean the housing and outlet without flooding it
The housing interior gets a damp cloth, a soft brush, and a cloth wrung out so it is barely wet. Wipe down the throat and the grinding outlet where fat collects and hardens. Tip the machine slightly to drain, then run it for a few seconds with nothing loaded to push out the last of the water.
Never put the housing under a tap, never submerge it, and never run it with the plug in while water is still inside it. A damp cloth gets you clean parts; a submerged body gets you a motor that smells like a swamp.
6. Sanitize the food-contact parts
After washing, sanitize the parts that touched raw meat. Use a food-contact-surface sanitizer and follow the label for dilution and contact time, which is where most home kitchens go wrong. A quick wipe under the tap is washing, not sanitizing.
Bleach diluted per its label on food-contact surfaces is permitted, but the manufacturer’s instructions for a meat grinder almost always say to skip it, because it dulls plating and can pit stainless steel. If you use it anyway, rinse thoroughly and air-dry. Vinegar and a baking soda paste handle odors; they do not replace a proper sanitize step.
7. Air-dry completely before reassembling
Dry every part on a towel or a rack, not stacked in a closed drawer. Water trapped in the housing or inside a tube is the root of both the musty smell and the rust spots you find six months later. The outlet and the recessed areas around the auger take the longest, so give them a few extra minutes.
Grinders that stay damp breed mold inside the throat. If you grind a lot of fatty meat, check the outlet and the ring cap every couple of weeks, because hardened grease hides where you would never think to look.
8. Reassemble and test the grinder
Put it back together in reverse order: auger first, then the cutting blade, the grinding plate, and the ring cap last. Hand-tighten the plate screws in a simple crisscross so the plate sits flat and the blade runs parallel to it. A plate that rocks means the blade is cutting unevenly, which dulls it faster than anything else.
Before storing or grinding, turn the auger by hand. It should rotate with no scraping and no resistance. Then run the grinder empty for a few seconds to confirm it spins and drains properly, and wipe the outlet one last time.
Common Mistakes
Cleaning a meat grinder goes wrong in a handful of predictable ways. Each of these has a simple fix.
- Submerging the motor body or suction base. Water gets past the seals, sits inside the housing, and the first thing you notice is a smell that survives any amount of washing. Fix: wipe the housing with a damp cloth only, and treat the body as a non-washable part.
- Putting every part in the dishwasher. Some grinders are entirely top-rack safe except the suction base, per the manufacturer’s own documentation, while other models have plastic hoppers and trays that warp or melt. Fix: check the manual, and hand-wash anything you are unsure about.
- Using bleach or abrasive powder on food-contact parts. Both are hard on plating and stainless finishes, and powder leaves grit in the holes of a grinding plate. Fix: mild dish liquid, and sanitize with a labeled product only when the manual allows it.
- Washing parts while the blade is still attached. The blade is the sharpest item in the box and the one most likely to cause a cut during cleanup. Fix: remove it, hold it by the handle, and keep it face-down on the towel.
- Leaving a grinder unwashed overnight. Rendered fat hardens around the ring cap and the throat overnight, and then it has to come off as a solid. Fix: clean it right after the last batch, even if the full wash waits until later.
- Forgetting the sausage stuffer. The barrel and stuffing tubes are food-contact parts and hold grease inside a bore most people never look at. Fix: run a bottle brush or a rolled paper towel through each one from both ends.
Between batches, the honest shortcut is a 60-second flush: stop every ten pounds or so, let the grinder run empty, and wipe the plate and the front of the housing. Forum advice on bulk game processing keeps landing on that number, and it works, because you catch the residue before it sets. A full teardown and wash still happens at the end of the session, every time.
For storage, keep the grinder assembled but loose, in a dry cupboard away from the stove, with the hopper off. If a grinder has been sitting unused or came from storage with a stale smell, run a slice of bread through it, then a slice of lemon, then clean it as above, and the odor goes with the grease.
Frequently Asked Questions
Can I put a meat grinder in the dishwasher?
Only if the manufacturer’s documentation says the parts are dishwasher safe, and that almost never covers the whole machine. Some models list all removable parts as top-rack safe except the suction base, while others have plastic hoppers, trays and pushers that can warp near hot water. The motor body, suction base and power cord never go in. When in doubt, hand-wash everything in hot soapy water, which works on every grinder.
How often should I clean a meat grinder?
Clean it right after every session, and flush it between batches if you are grinding more than about ten pounds. Raw meat, fat and sinew left inside the housing or grinding tube grow bacteria, go rancid and taint the next batch. The per-batch flush is a quick empty run plus a wipe on the plate; the session clean is the full disassemble, wash, sanitize, dry and reassemble described above.
What is the best way to remove stuck meat from a meat grinder?
Scrape it off before washing, using a plastic scraper or the back of a spoon, then soak the part in hot, soapy water for 10 to 15 minutes. Dried food comes away far easier dry than wet. For shreds lodged in the holes of a grinding plate, work a stiff nylon brush across the face. Avoid metal knives on the plate, because they scratch the surface and catch more meat next time.
Can I use baking soda to clean a meat grinder?
A paste of baking soda and water can help lift light grease and neutralize odors, and white vinegar works on smells too. Neither replaces proper washing and sanitizing of food-contact parts, since they are mild compared to what raw meat leaves behind. Rinse any baking soda residue away thoroughly so nothing tastes soapy in your next batch, and air-dry the parts completely.
What is the best thing to clean a meat grinder with?
Hot water plus a mild dishwashing liquid is the right answer for almost every part, worked in with a nylon-bristle brush for the plate holes and a bottle brush for the grinding tube and stuffing tubes. Skip bleach and abrasive powders, which dull plating and pit stainless steel. For the sanitizing step after washing, use a food-contact-surface sanitizer at the concentration and contact time printed on its label.
Start with the Right Cleaning Method for Your Grinder
Start by pulling the manual and finding two lines: which parts are washable, and whether the housing can ever get wet. That answer decides everything else. Then know which machine you own, a manual hand-crank or an electric model, since the teardown order and the unplugging step are the only real differences between them.
From there, keep it simple. Run a slice of bread through the machine to push out the last of the meat, take the hopper, tray, ring cap, grinding plate, cutting blade and auger apart in that order, hand-wash every food-contact part in hot, soapy water, sanitize to the label directions, air-dry fully, and put it back together. Fifteen minutes at the end of the session is far less work than a grinder that smells like an old warehouse.